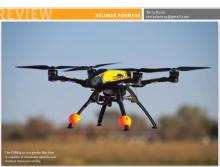
HELIMAX FORM500
Terry Dunn
A low-cost, multipurpose quadcopter

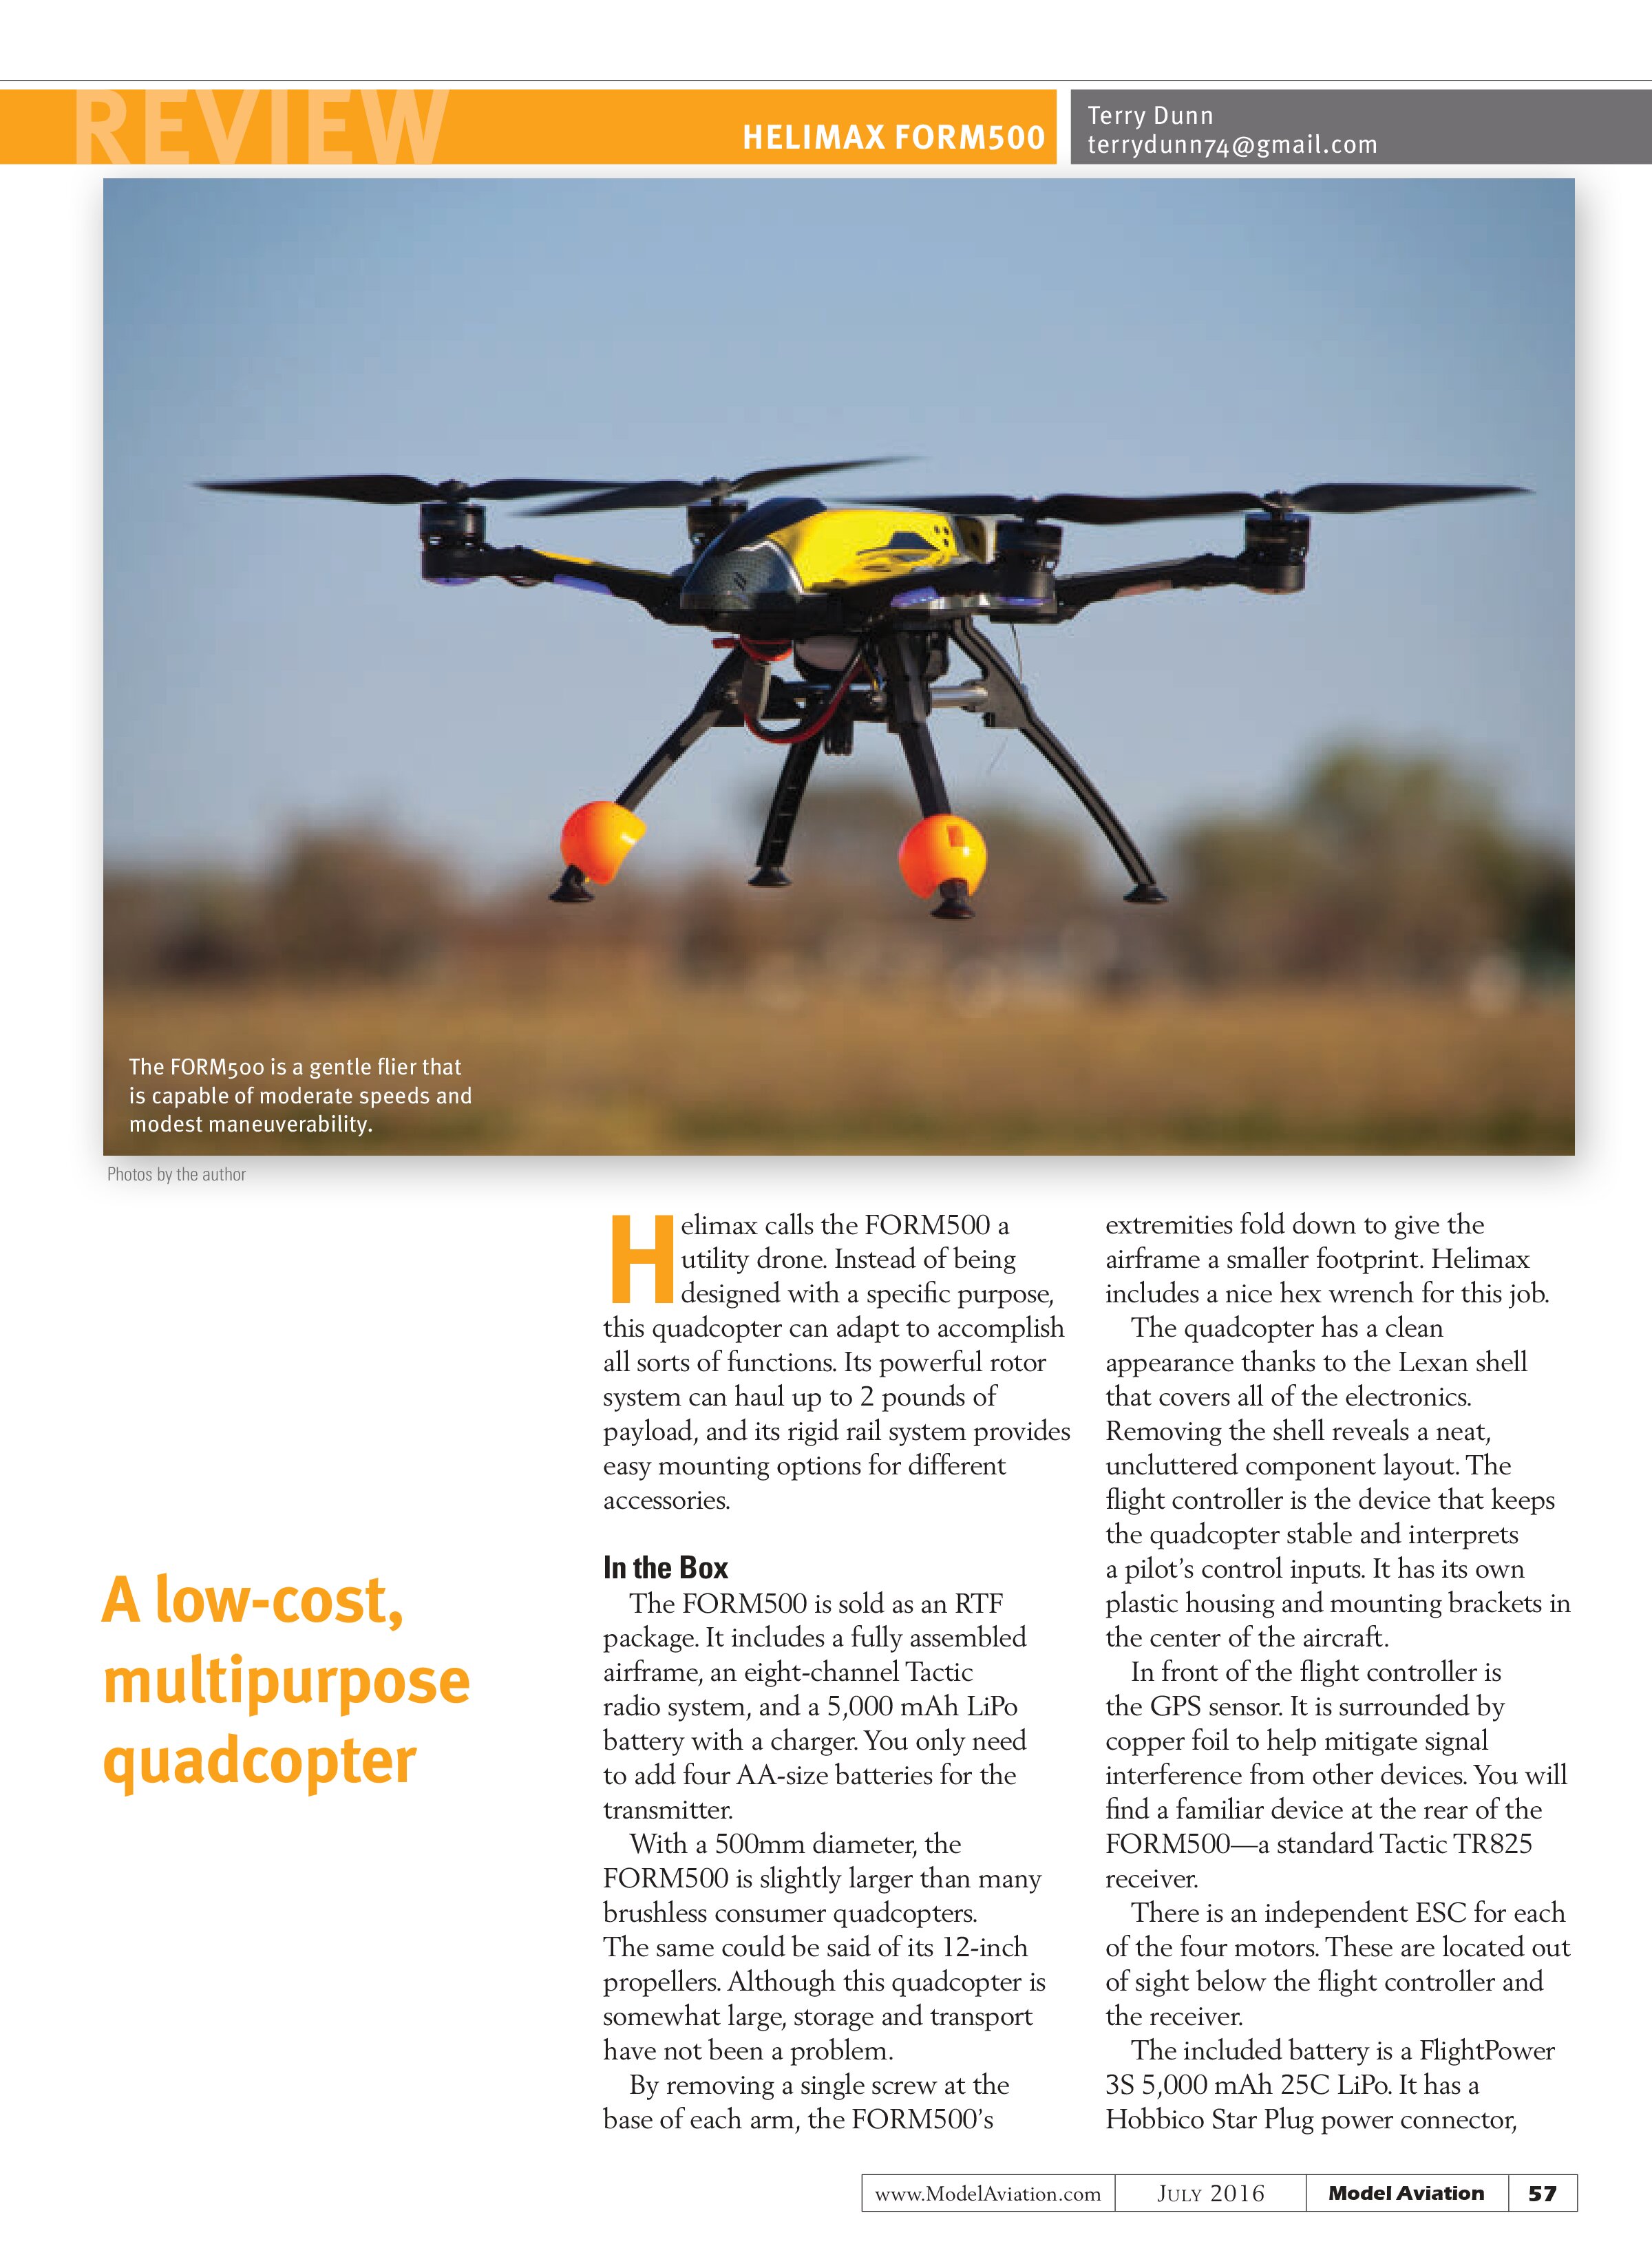
Helimax calls the FORM500 a utility drone. Instead of being designed with a specific purpose, this quadcopter can adapt to accomplish all sorts of functions. Its powerful rotor system can haul up to 2 pounds of payload, and its rigid rail system provides easy mounting options for different accessories.
In the Box
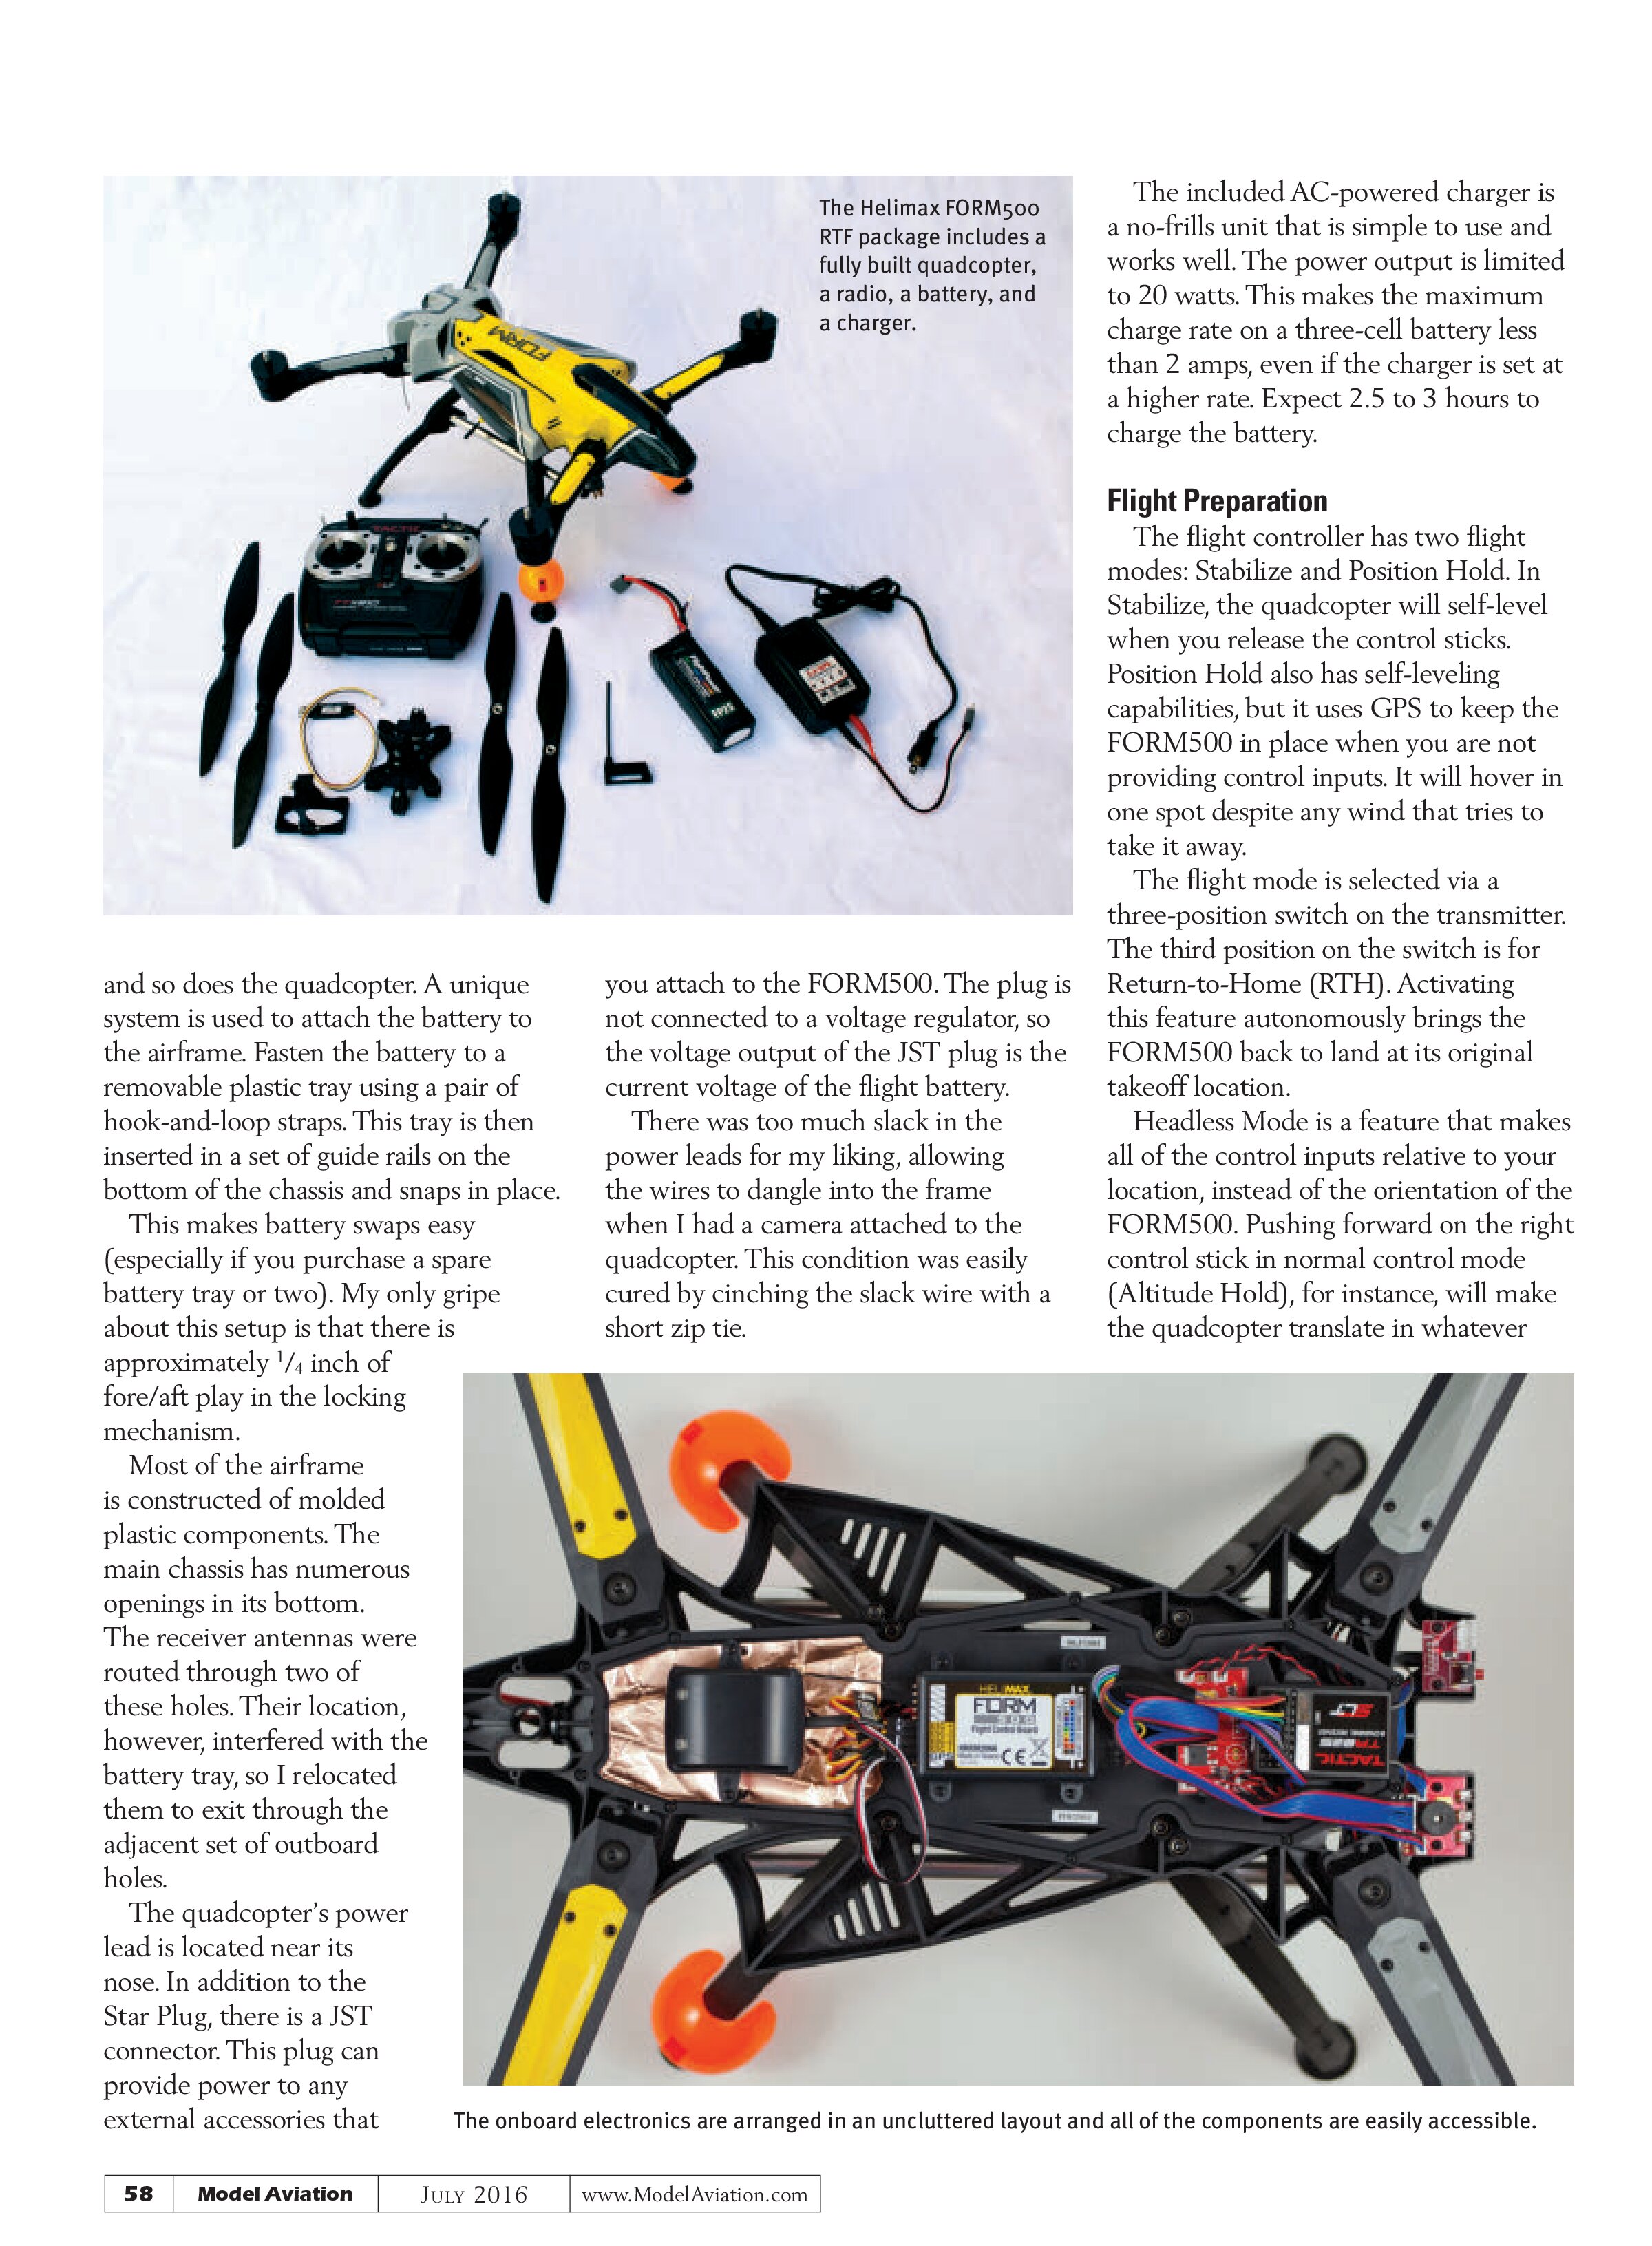
The FORM500 is sold as an RTF package. It includes a fully assembled airframe, an eight-channel Tactic radio system, and a 5,000 mAh LiPo battery with a charger. You only need to add four AA-size batteries for the transmitter.
With a 500mm diameter, the FORM500 is slightly larger than many brushless consumer quadcopters. The same could be said of its 12-inch propellers. Although this quadcopter is somewhat large, storage and transport have not been a problem.
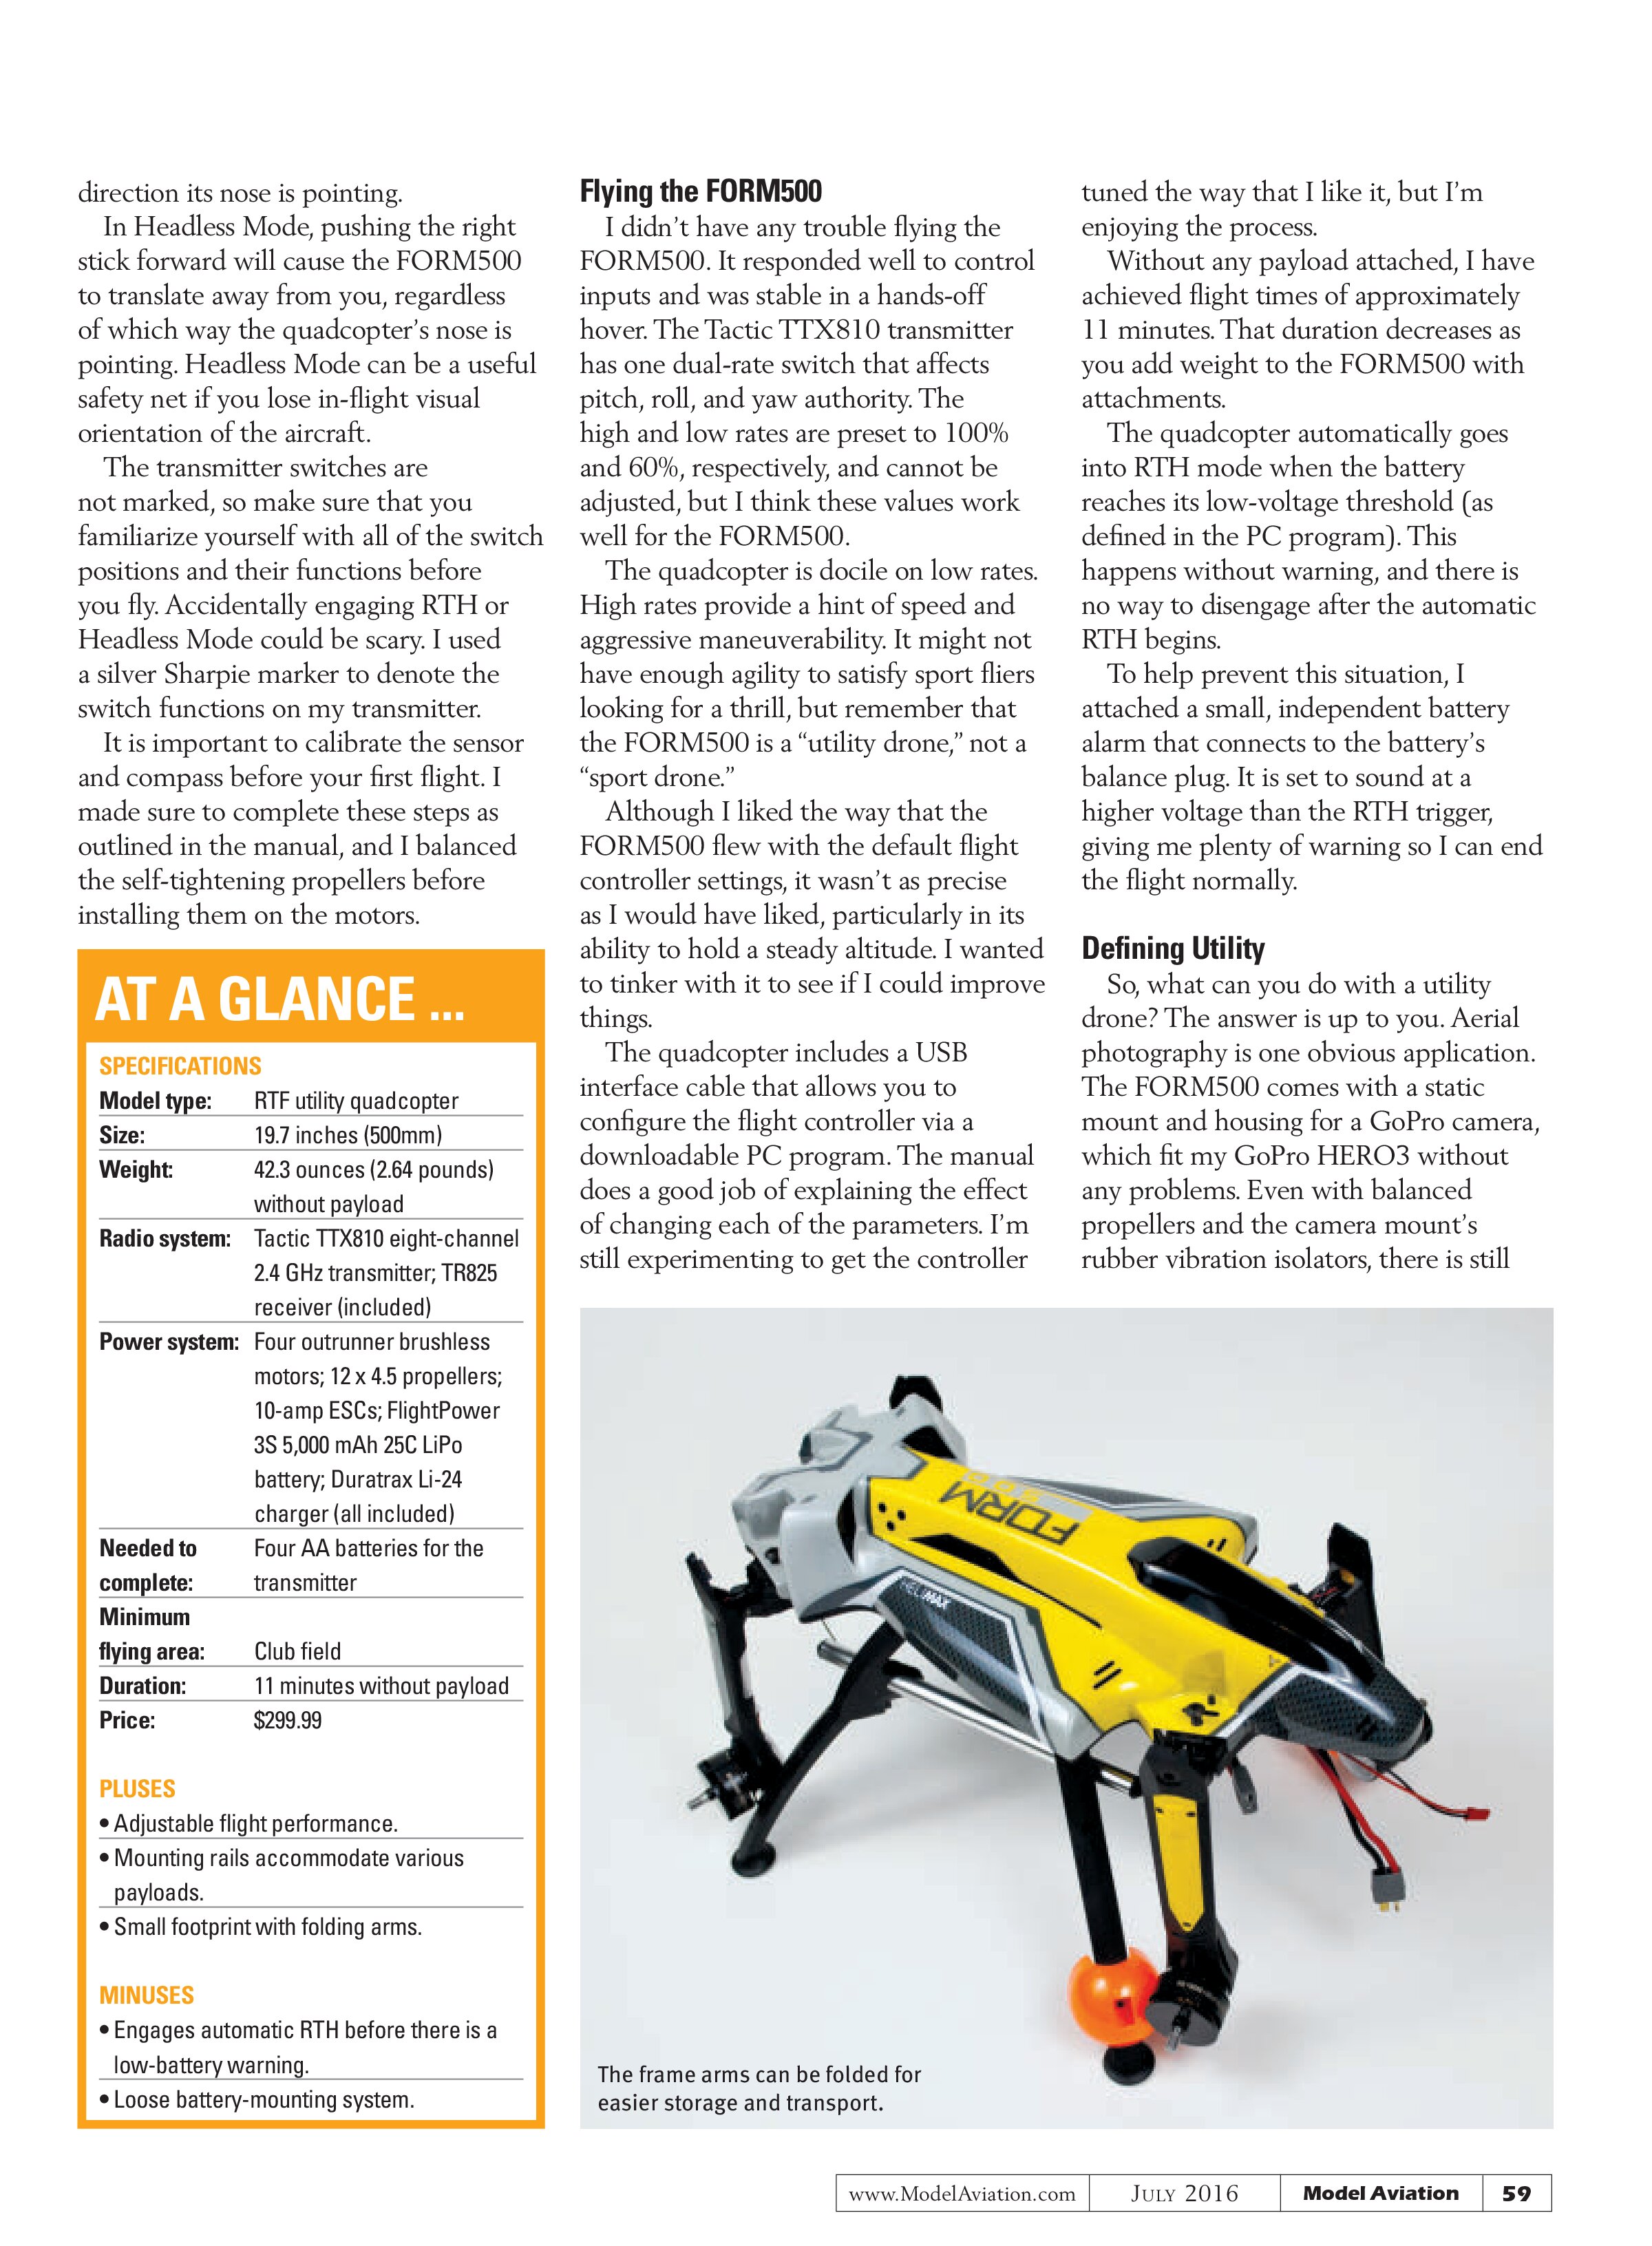
By removing a single screw at the base of each arm, the FORM500’s extremities fold down to give the airframe a smaller footprint. Helimax includes a nice hex wrench for this job.
The quadcopter has a clean appearance thanks to the Lexan shell that covers all of the electronics. Removing the shell reveals a neat, uncluttered component layout. The flight controller is the device that keeps the quadcopter stable and interprets a pilot’s control inputs. It has its own plastic housing and mounting brackets in the center of the aircraft.
In front of the flight controller is the GPS sensor. It is surrounded by copper foil to help mitigate signal interference from other devices. You will find a familiar device at the rear of the FORM500—a standard Tactic TR825 receiver.
There is an independent ESC for each of the four motors. These are located out of sight below the flight controller and the receiver.
The included battery is a FlightPower 3S 5,000 mAh 25C LiPo. It has a Hobbico Star Plug power connector,

and so does the quadcopter. A unique system is used to attach the battery to the airframe. Fasten the battery to a removable plastic tray using a pair of hook-and-loop straps. This tray is then inserted in a set of guide rails on the bottom of the chassis and snaps in place.
This makes battery swaps easy (especially if you purchase a spare battery tray or two). My only gripe about this setup is that there is approximately 1/4 inch of fore/aft play in the locking mechanism.
Most of the airframe is constructed of molded plastic components. The main chassis has numerous openings in its bottom. The receiver antennas were routed through two of these holes. Their location, however, interfered with the battery tray, so I relocated them to exit through the adjacent set of outboard holes.
The quadcopter’s power lead is located near its nose. In addition to the Star Plug, there is a JST connector. This plug can provide power to any external accessories that you attach to the FORM500. The plug is not connected to a voltage regulator, so the voltage output of the JST plug is the current voltage of the flight battery.
There was too much slack in the power leads for my liking, allowing the wires to dangle into the frame when I had a camera attached to the quadcopter. This condition was easily cured by cinching the slack wire with a short zip tie.
The included AC-powered charger is a no-frills unit that is simple to use and works well. The power output is limited to 20 watts. This makes the maximum charge rate on a three-cell battery less than 2 amps, even if the charger is set at a higher rate. Expect 2.5 to 3 hours to charge the battery.
Flight Preparation
The flight controller has two flight modes: Stabilize and Position Hold. In Stabilize, the quadcopter will self-level when you release the control sticks. Position Hold also has self-leveling capabilities, but it uses GPS to keep the FORM500 in place when you are not providing control inputs. It will hover in one spot despite any wind that tries to take it away.
The flight mode is selected via a three-position switch on the transmitter. The third position on the switch is for Return-to-Home (RTH). Activating this feature autonomously brings the FORM500 back to land at its original takeoff location.
Headless Mode is a feature that makes all of the control inputs relative to your location, instead of the orientation of the FORM500. Pushing forward on the right control stick in normal control mode (Altitude Hold), for instance, will make the quadcopter translate in whatever direction its nose is pointing.
In Headless Mode, pushing the right stick forward will cause the FORM500 to translate away from you, regardless of which way the quadcopter’s nose is pointing. Headless Mode can be a useful safety net if you lose in-flight visual orientation of the aircraft.
The transmitter switches are not marked, so make sure that you familiarize yourself with all of the switch positions and their functions before you fly. Accidentally engaging RTH or Headless Mode could be scary. I used a silver Sharpie marker to denote the switch functions on my transmitter.
It is important to calibrate the sensor and compass before your first flight. I made sure to complete these steps as outlined in the manual, and I balanced the self-tightening propellers before installing them on the motors.
AT A GLANCE ...
SPECIFICATIONS
Model type: RTF utility quadcopter
Size: 19.7 inches (500mm)
Weight: 42.3 ounces (2.64 pounds) without payload
Radio system: Tactic TTX810 eight-channel 2.4 GHz transmitter; TR825 receiver (included)
Power system: Four outrunner brushless motors; 12 x 4.5 propellers; 10-amp ESCs; FlightPower 3S 5,000 mAh 25C LiPo battery; Duratrax Li-24 charger (all included)
Needed to complete: Four AA batteries for the transmitter
Minimum flying area: Club field
Duration: 11 minutes without payload
Price: $299.99
PLUSES
- Adjustable flight performance.
- Mounting rails accommodate various payloads.
- Small footprint with folding arms.
MINUSES
- Engages automatic RTH before there is a low-battery warning.
- Loose battery-mounting system.
Flying the FORM500
I didn’t have any trouble flying the FORM500. It responded well to control inputs and was stable in a hands-off hover. The Tactic TTX810 transmitter has one dual-rate switch that affects pitch, roll, and yaw authority. The high and low rates are preset to 100% and 60%, respectively, and cannot be adjusted, but I think these values work well for the FORM500.
The quadcopter is docile on low rates. High rates provide a hint of speed and aggressive maneuverability. It might not have enough agility to satisfy sport fliers looking for a thrill, but remember that the FORM500 is a “utility drone,” not a “sport drone.”
Although I liked the way that the FORM500 flew with the default flight controller settings, it wasn’t as precise as I would have liked, particularly in its ability to hold a steady altitude. I wanted to tinker with it to see if I could improve things.
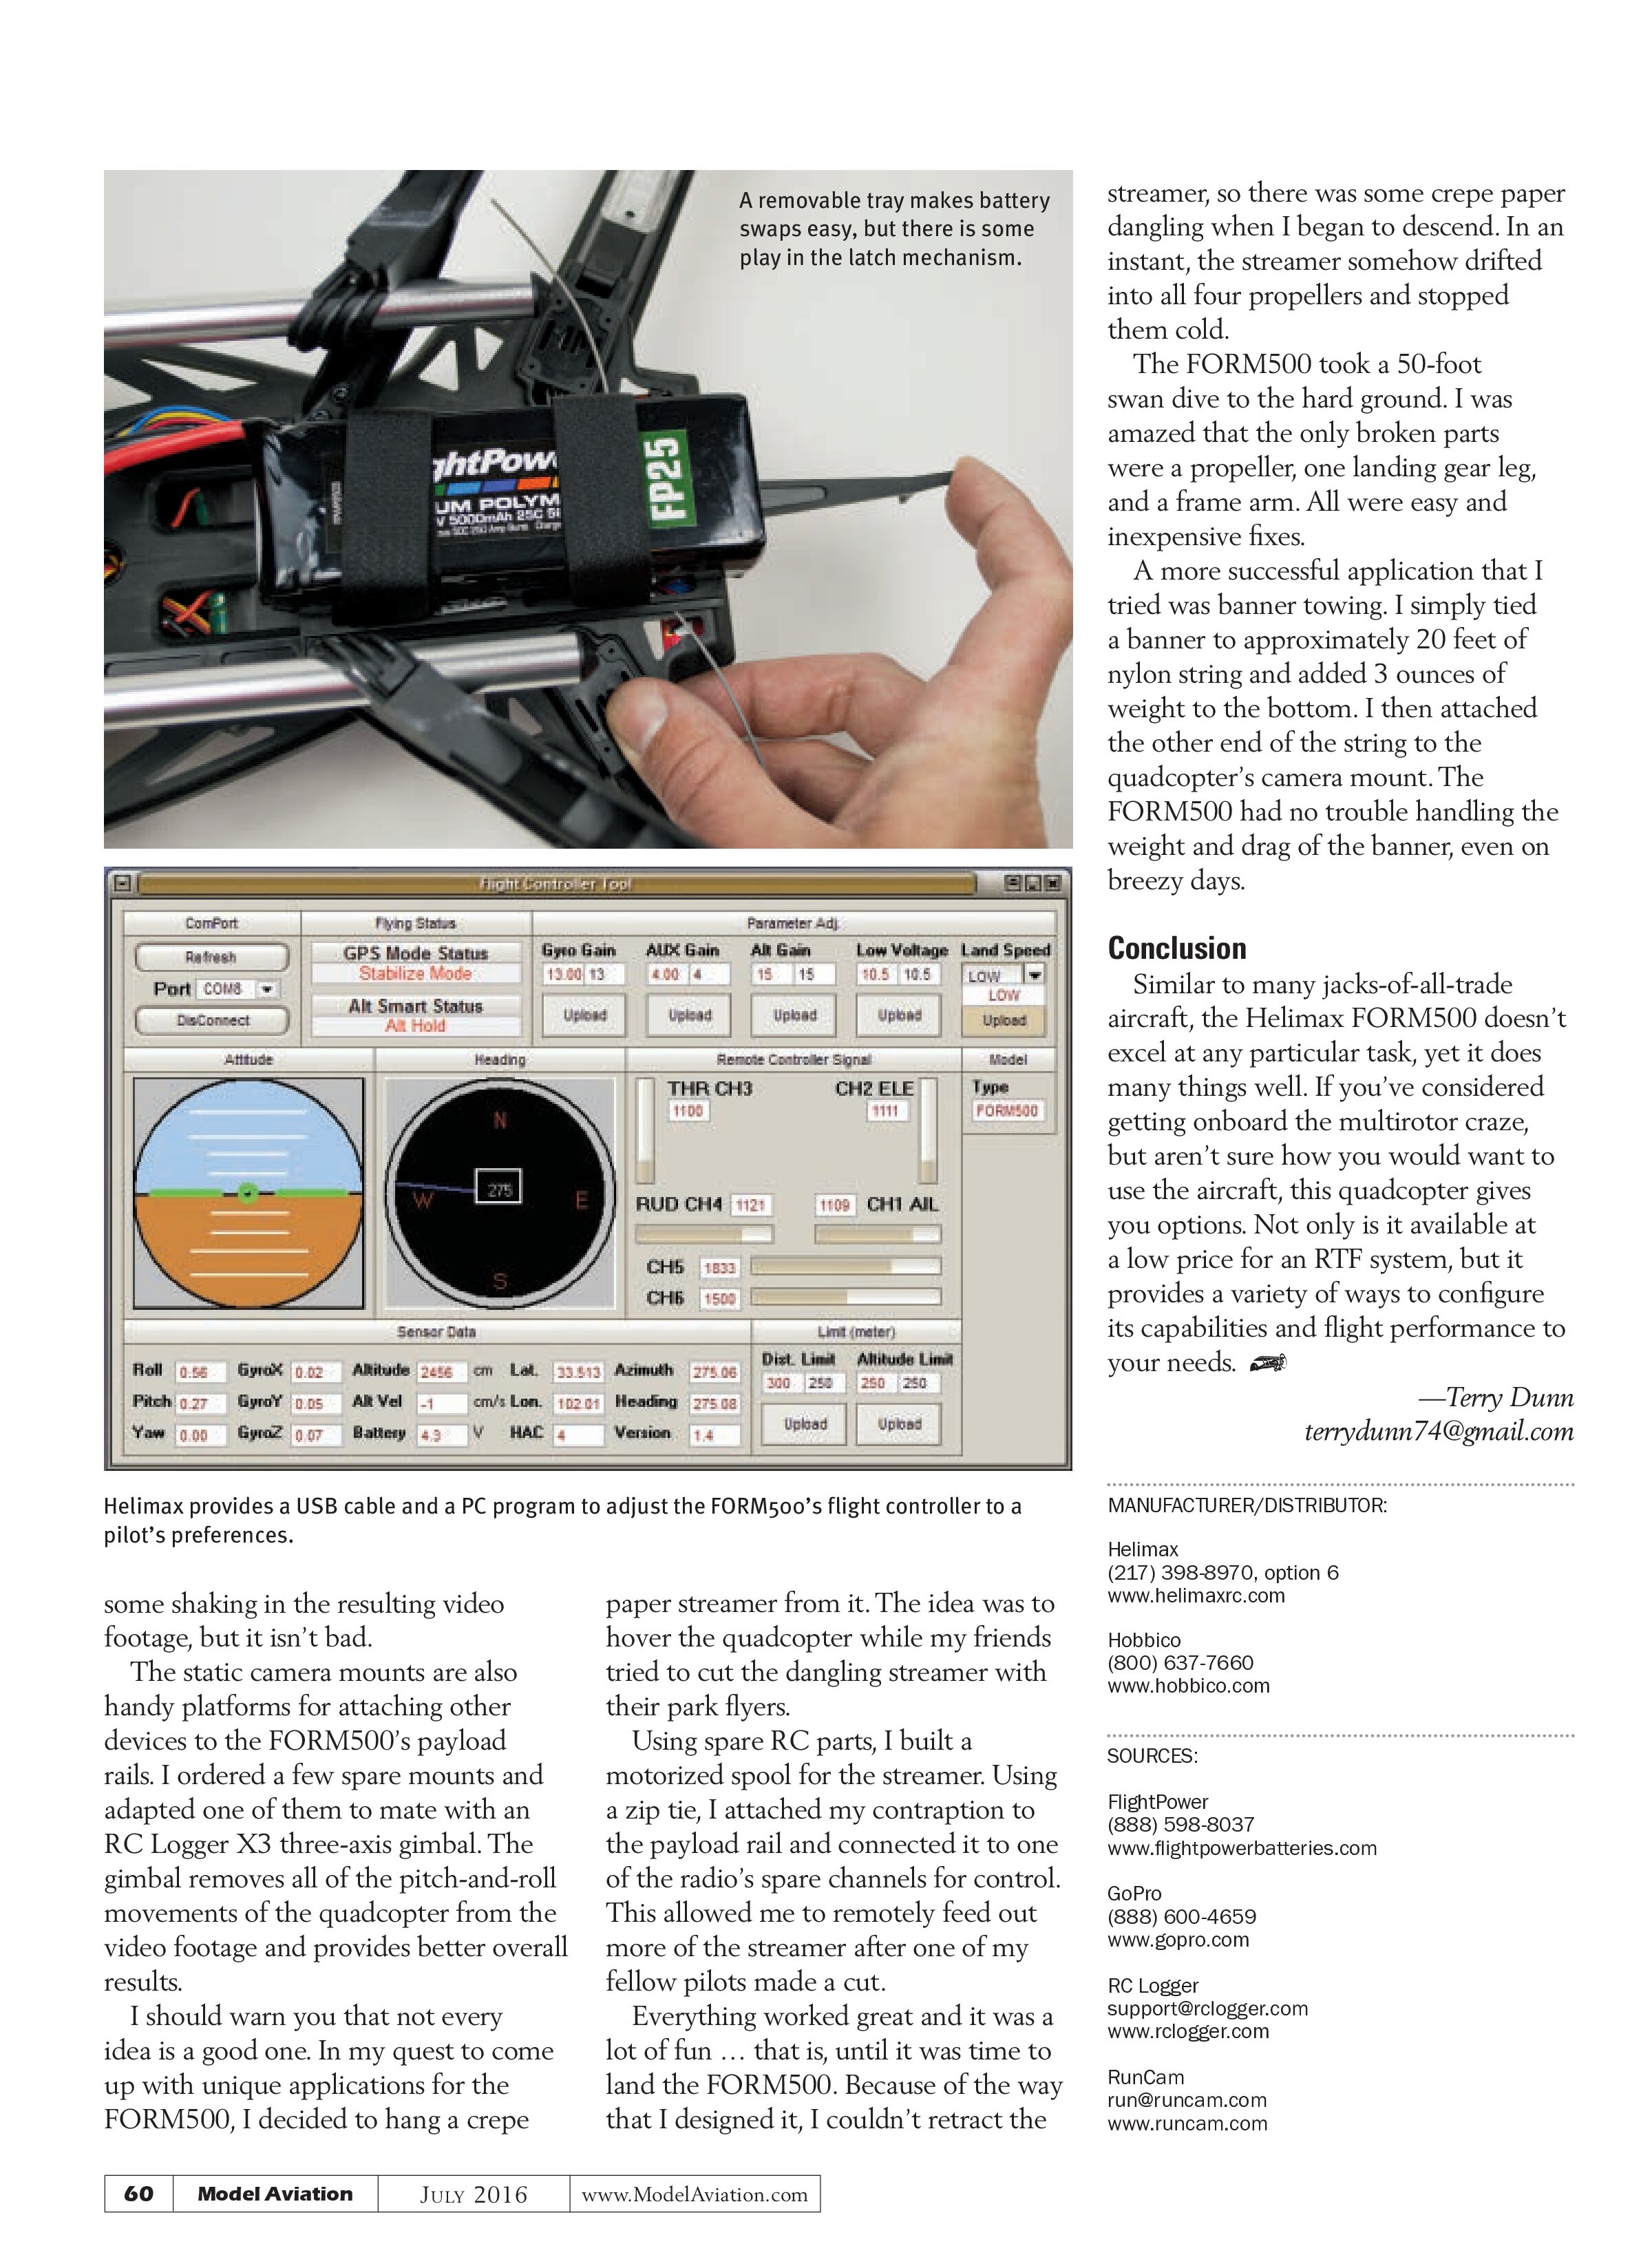
The quadcopter includes a USB interface cable that allows you to configure the flight controller via a downloadable PC program. The manual does a good job of explaining the effect of changing each of the parameters. I’m still experimenting to get the controller tuned the way that I like it, but I’m enjoying the process.
Without any payload attached, I have achieved flight times of approximately 11 minutes. That duration decreases as you add weight to the FORM500 with attachments.
The quadcopter automatically goes into RTH mode when the battery reaches its low-voltage threshold (as defined in the PC program). This happens without warning, and there is no way to disengage after the automatic RTH begins.
To help prevent this situation, I attached a small, independent battery alarm that connects to the battery’s balance plug. It is set to sound at a higher voltage than the RTH trigger, giving me plenty of warning so I can end the flight normally.
Defining Utility
So, what can you do with a utility drone? The answer is up to you. Aerial photography is one obvious application. The FORM500 comes with a static mount and housing for a GoPro camera, which fit my GoPro HERO3 without any problems. Even with balanced propellers and the camera mount’s rubber vibration isolators, there is still


some shaking in the resulting video footage, but it isn’t bad.
The static camera mounts are also handy platforms for attaching other devices to the FORM500’s payload rails. I ordered a few spare mounts and adapted one of them to mate with an RC Logger X3 three-axis gimbal. The gimbal removes all of the pitch-and-roll movements of the quadcopter from the video footage and provides better overall results.
I should warn you that not every idea is a good one. In my quest to come up with unique applications for the FORM500, I decided to hang a crepe paper streamer from it. The idea was to hover the quadcopter while my friends tried to cut the dangling streamer with their park flyers.
Using spare RC parts, I built a motorized spool for the streamer. Using a zip tie, I attached my contraption to the payload rail and connected it to one of the radio’s spare channels for control. This allowed me to remotely feed out more of the streamer after one of my fellow pilots made a cut.
Everything worked great and it was a lot of fun … that is, until it was time to land the FORM500. Because of the way that I designed it, I couldn’t retract the streamer, so there was some crepe paper dangling when I began to descend. In an instant, the streamer somehow drifted into all four propellers and stopped them cold.
The FORM500 took a 50-foot swan dive to the hard ground. I was amazed that the only broken parts were a propeller, one landing gear leg, and a frame arm. All were easy and inexpensive fixes.
A more successful application that I tried was banner towing. I simply tied a banner to approximately 20 feet of nylon string and added 3 ounces of weight to the bottom. I then attached the other end of the string to the quadcopter’s camera mount. The FORM500 had no trouble handling the weight and drag of the banner, even on breezy days.
Conclusion
Similar to many jacks-of-all-trade aircraft, the Helimax FORM500 doesn’t excel at any particular task, yet it does many things well. If you’ve considered getting onboard the multirotor craze, but aren’t sure how you would want to use the aircraft, this quadcopter gives you options. Not only is it available at a low price for an RTF system, but it provides a variety of ways to configure its capabilities and flight performance to your needs.
—Terry Dunn
terrydunn74@gmail.com
MANUFACTURER/DISTRIBUTOR:
Helimax
(217) 398-8970, option 6
www.helimaxrc.com
Hobbico
(800) 637-7660
www.hobbico.com
SOURCES:
FlightPower
(888) 598-8037
www.flightpowerbatteries.com
GoPro
(888) 600-4659
www.gopro.com
RC Logger
support@rclogger.com
www.rclogger.com