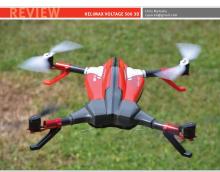
HELIMAX VOLTAGE 500 3D
Chris Mulcahy
cspaced@gmail.com

Take your quad experience to the extreme
Quadcopters are becoming more popular by the day. Love them or hate them, they are here to stay!
I’m sure by now that we are all familiar with camera-toting drones cruising lazily across the sky.
What you don’t see in a quadcopter every day is something that can actually challenge your flying skills. Whether you are new to multirotors, or maybe even a helicopter pilot, Helimax might have just the thing to take your flying to the next level.
The Voltage 500 is a 3-D quadcopter. Like the few that paved the way before it, the Voltage features reversible motors with symmetrical propellers so you can fly inverted. Unlike the others, the Voltage offers extreme flexibility for flight batteries, an efficient motor/propeller combination for extended flight times, and a unique canopy design that makes orientation a breeze. Did I also mention that as well as having a 3D Mode, its Stability Mode can be used for bailing out of maneuvers?
In the Box
The Voltage comes in a large box, hinting at the aircraft’s size. Inside of the box is the fully assembled Voltage 500, an instruction manual, a piece of Velcro (presumably for the flight battery or receiver), and a spare set of propellers. I did not expect there to be an entire set of spare propellers in the box, so I was pleasantly surprised.
I also received two 4S FlightPower LiPo batteries for this review—a 2,500 mAh pack and a 3,300 mAh pack. Your own receiver and a flight battery are needed for completion. I chose to use my Futaba 14SG, with an S.Bus-compatible receiver (more on that later).
The Voltage 500
As you might have guessed from its name, the Voltage 500 is a 500-class quadcopter. If you are wondering what 500 stands for, the multirotor measures 500mm from one motor to the other diagonally across. This 3-D quad is larger than others on the market.
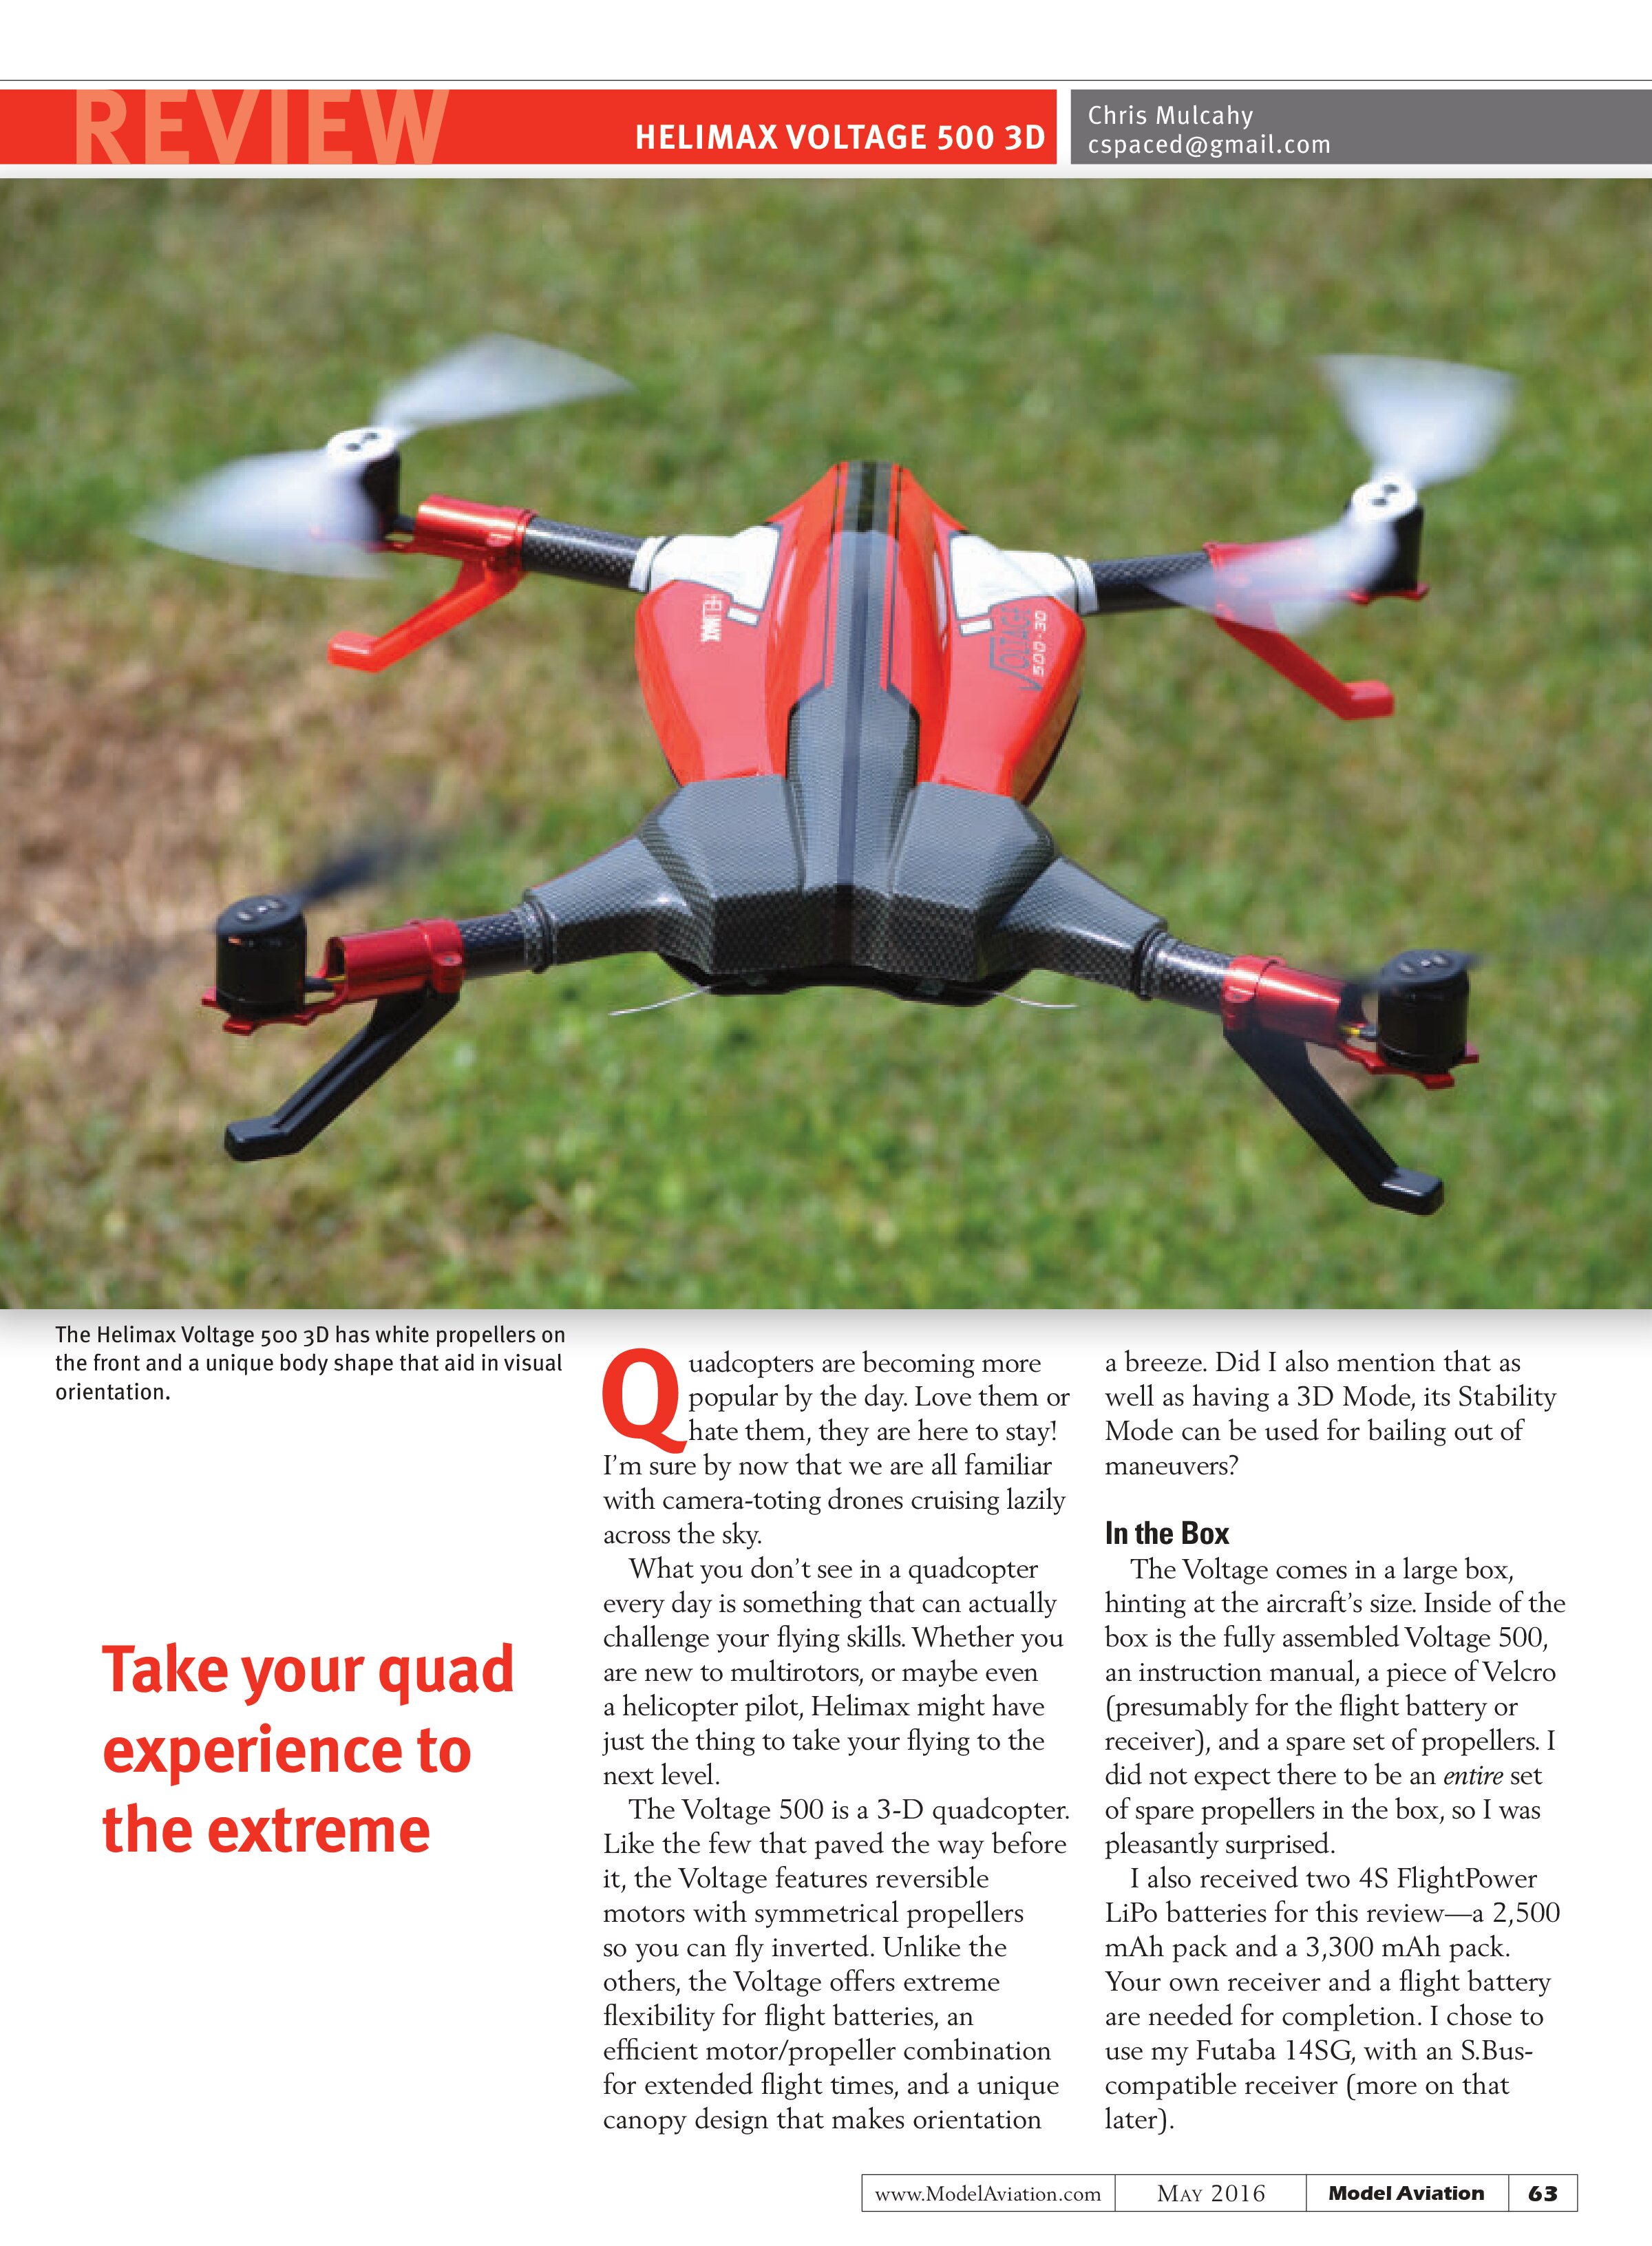
I instantly liked its unique canopy design. Its shape will be identifiable no matter what the aircraft’s orientation is.
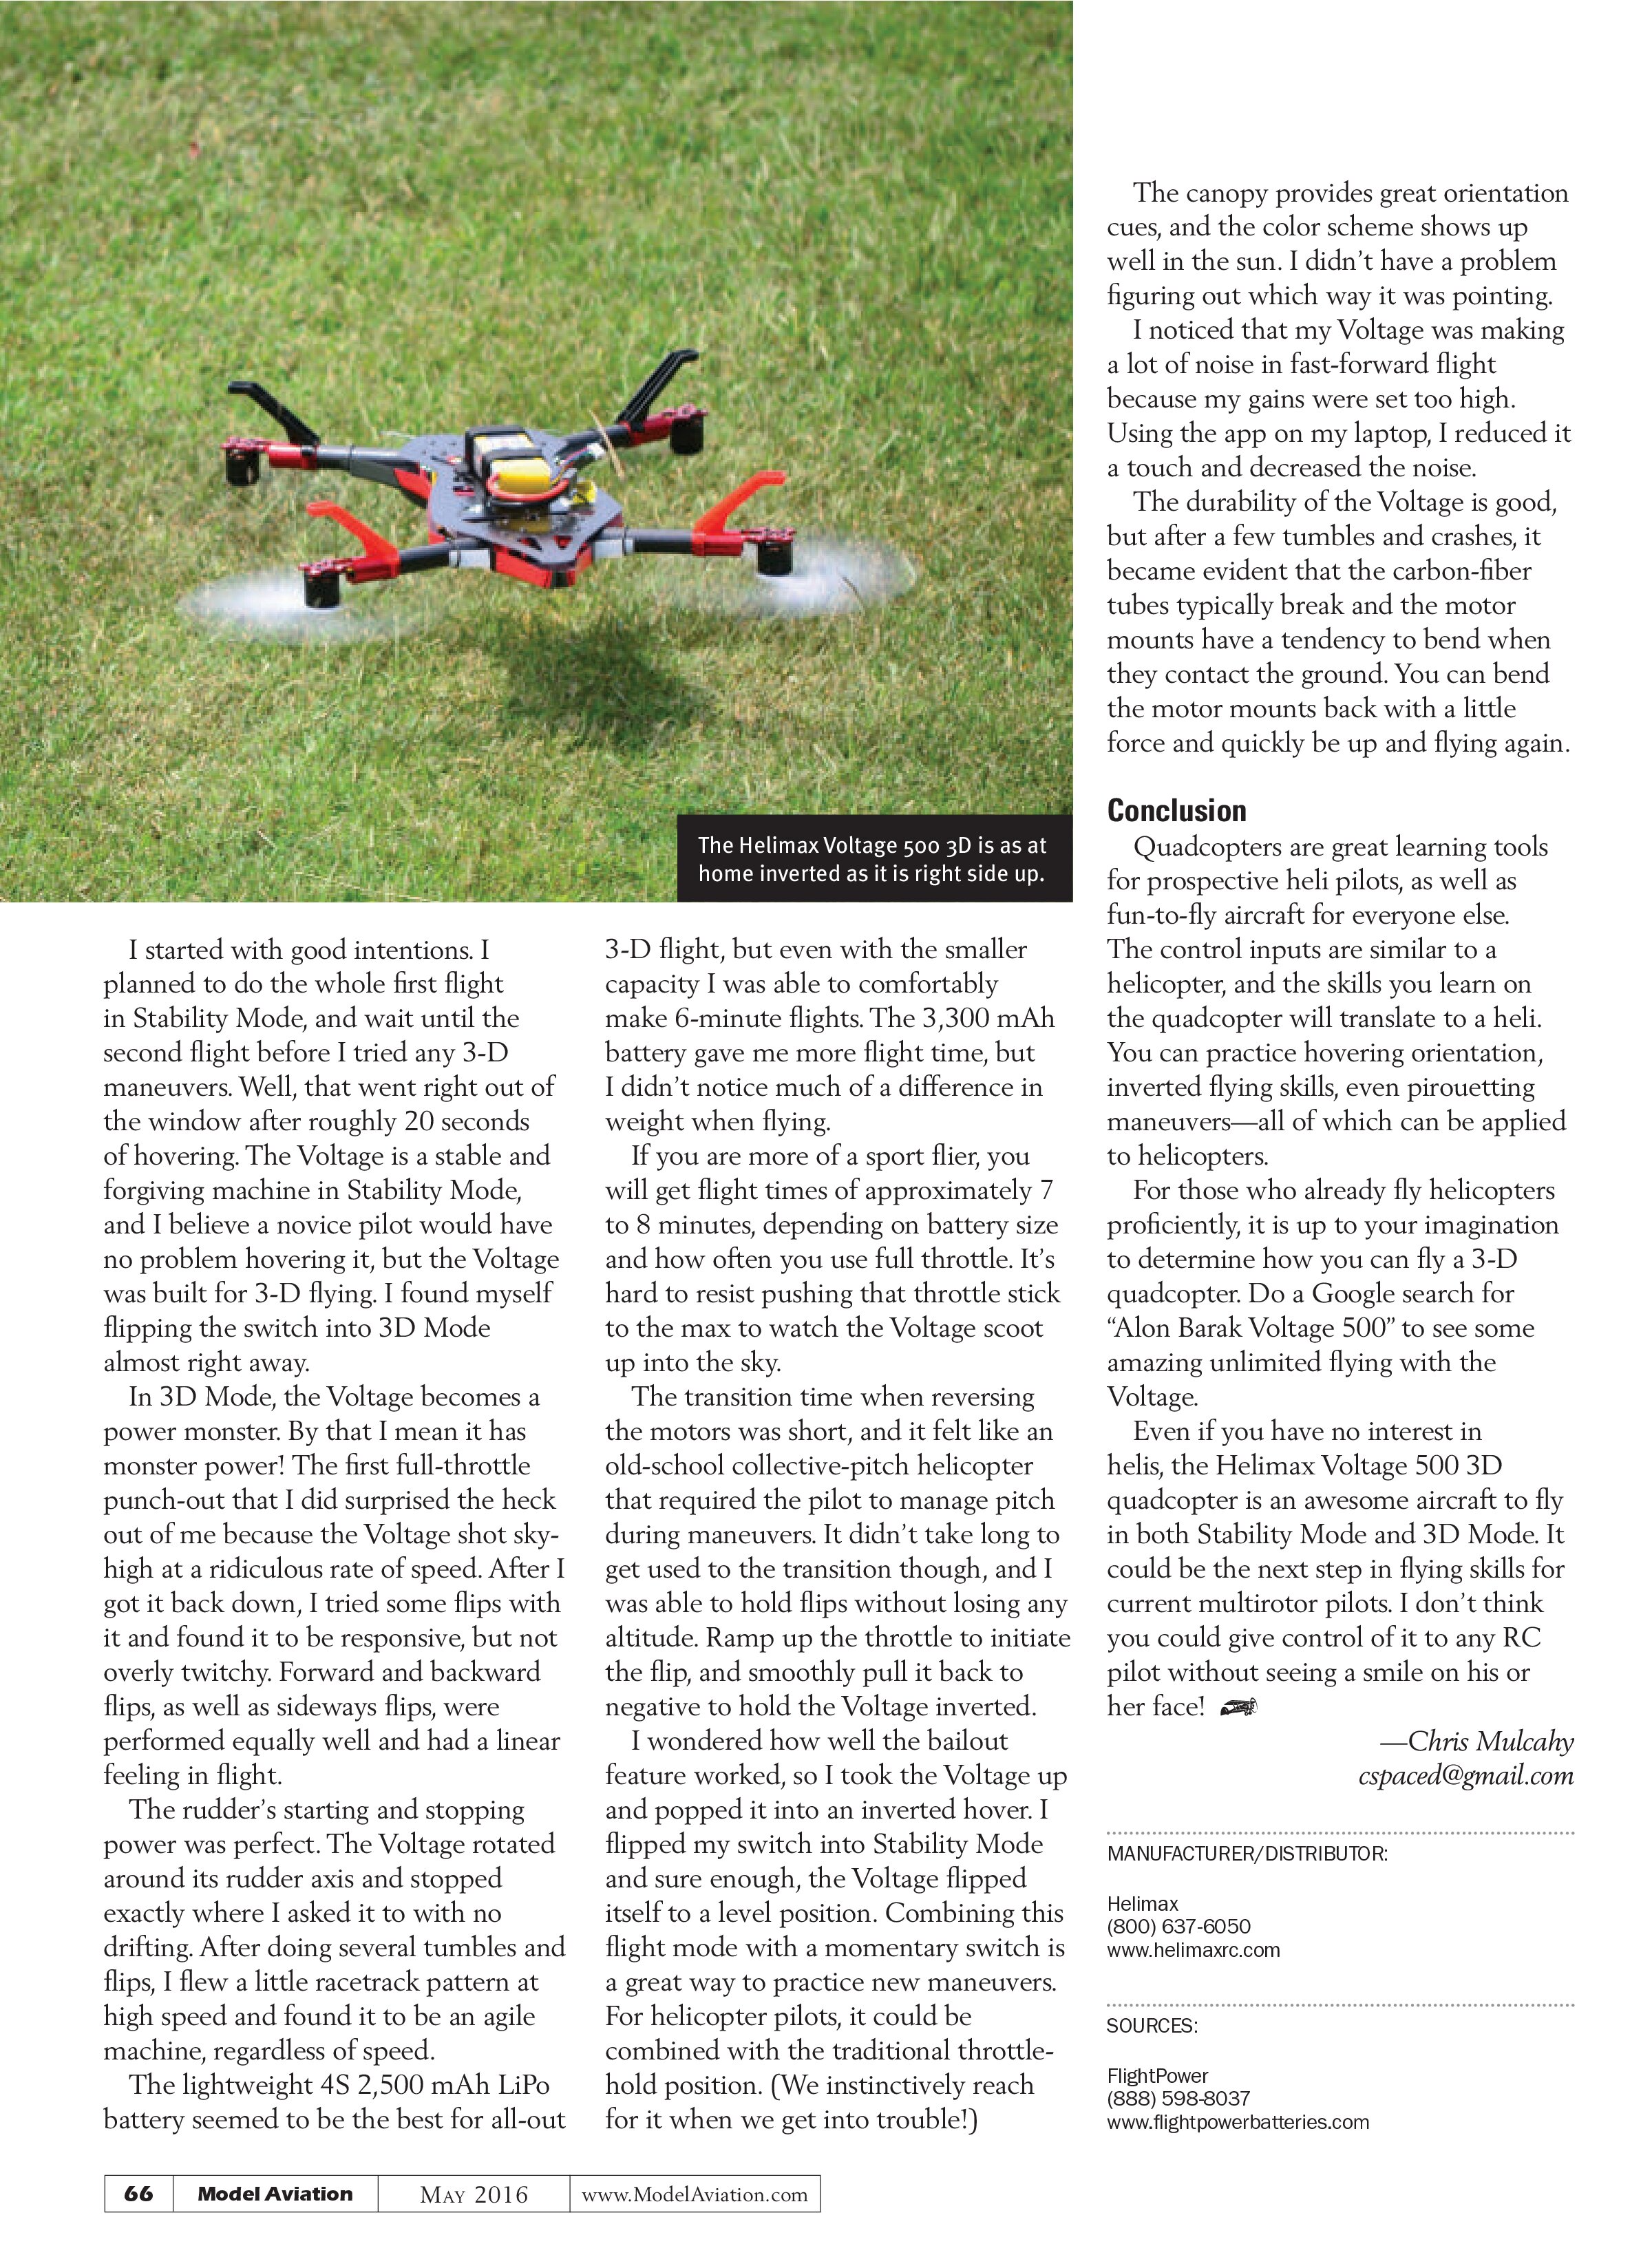
The bright red color also helps with visibility in the air. The canopy is a light Lexan shell, similar to what is used on RC cars, and is held in place with four rubber O-rings that simply slide off of the four canopy arms on the motor boom/arms. You don’t have to remove the canopy to insert the flight battery. It’s slung under the multirotor and held in place with Velcro straps.
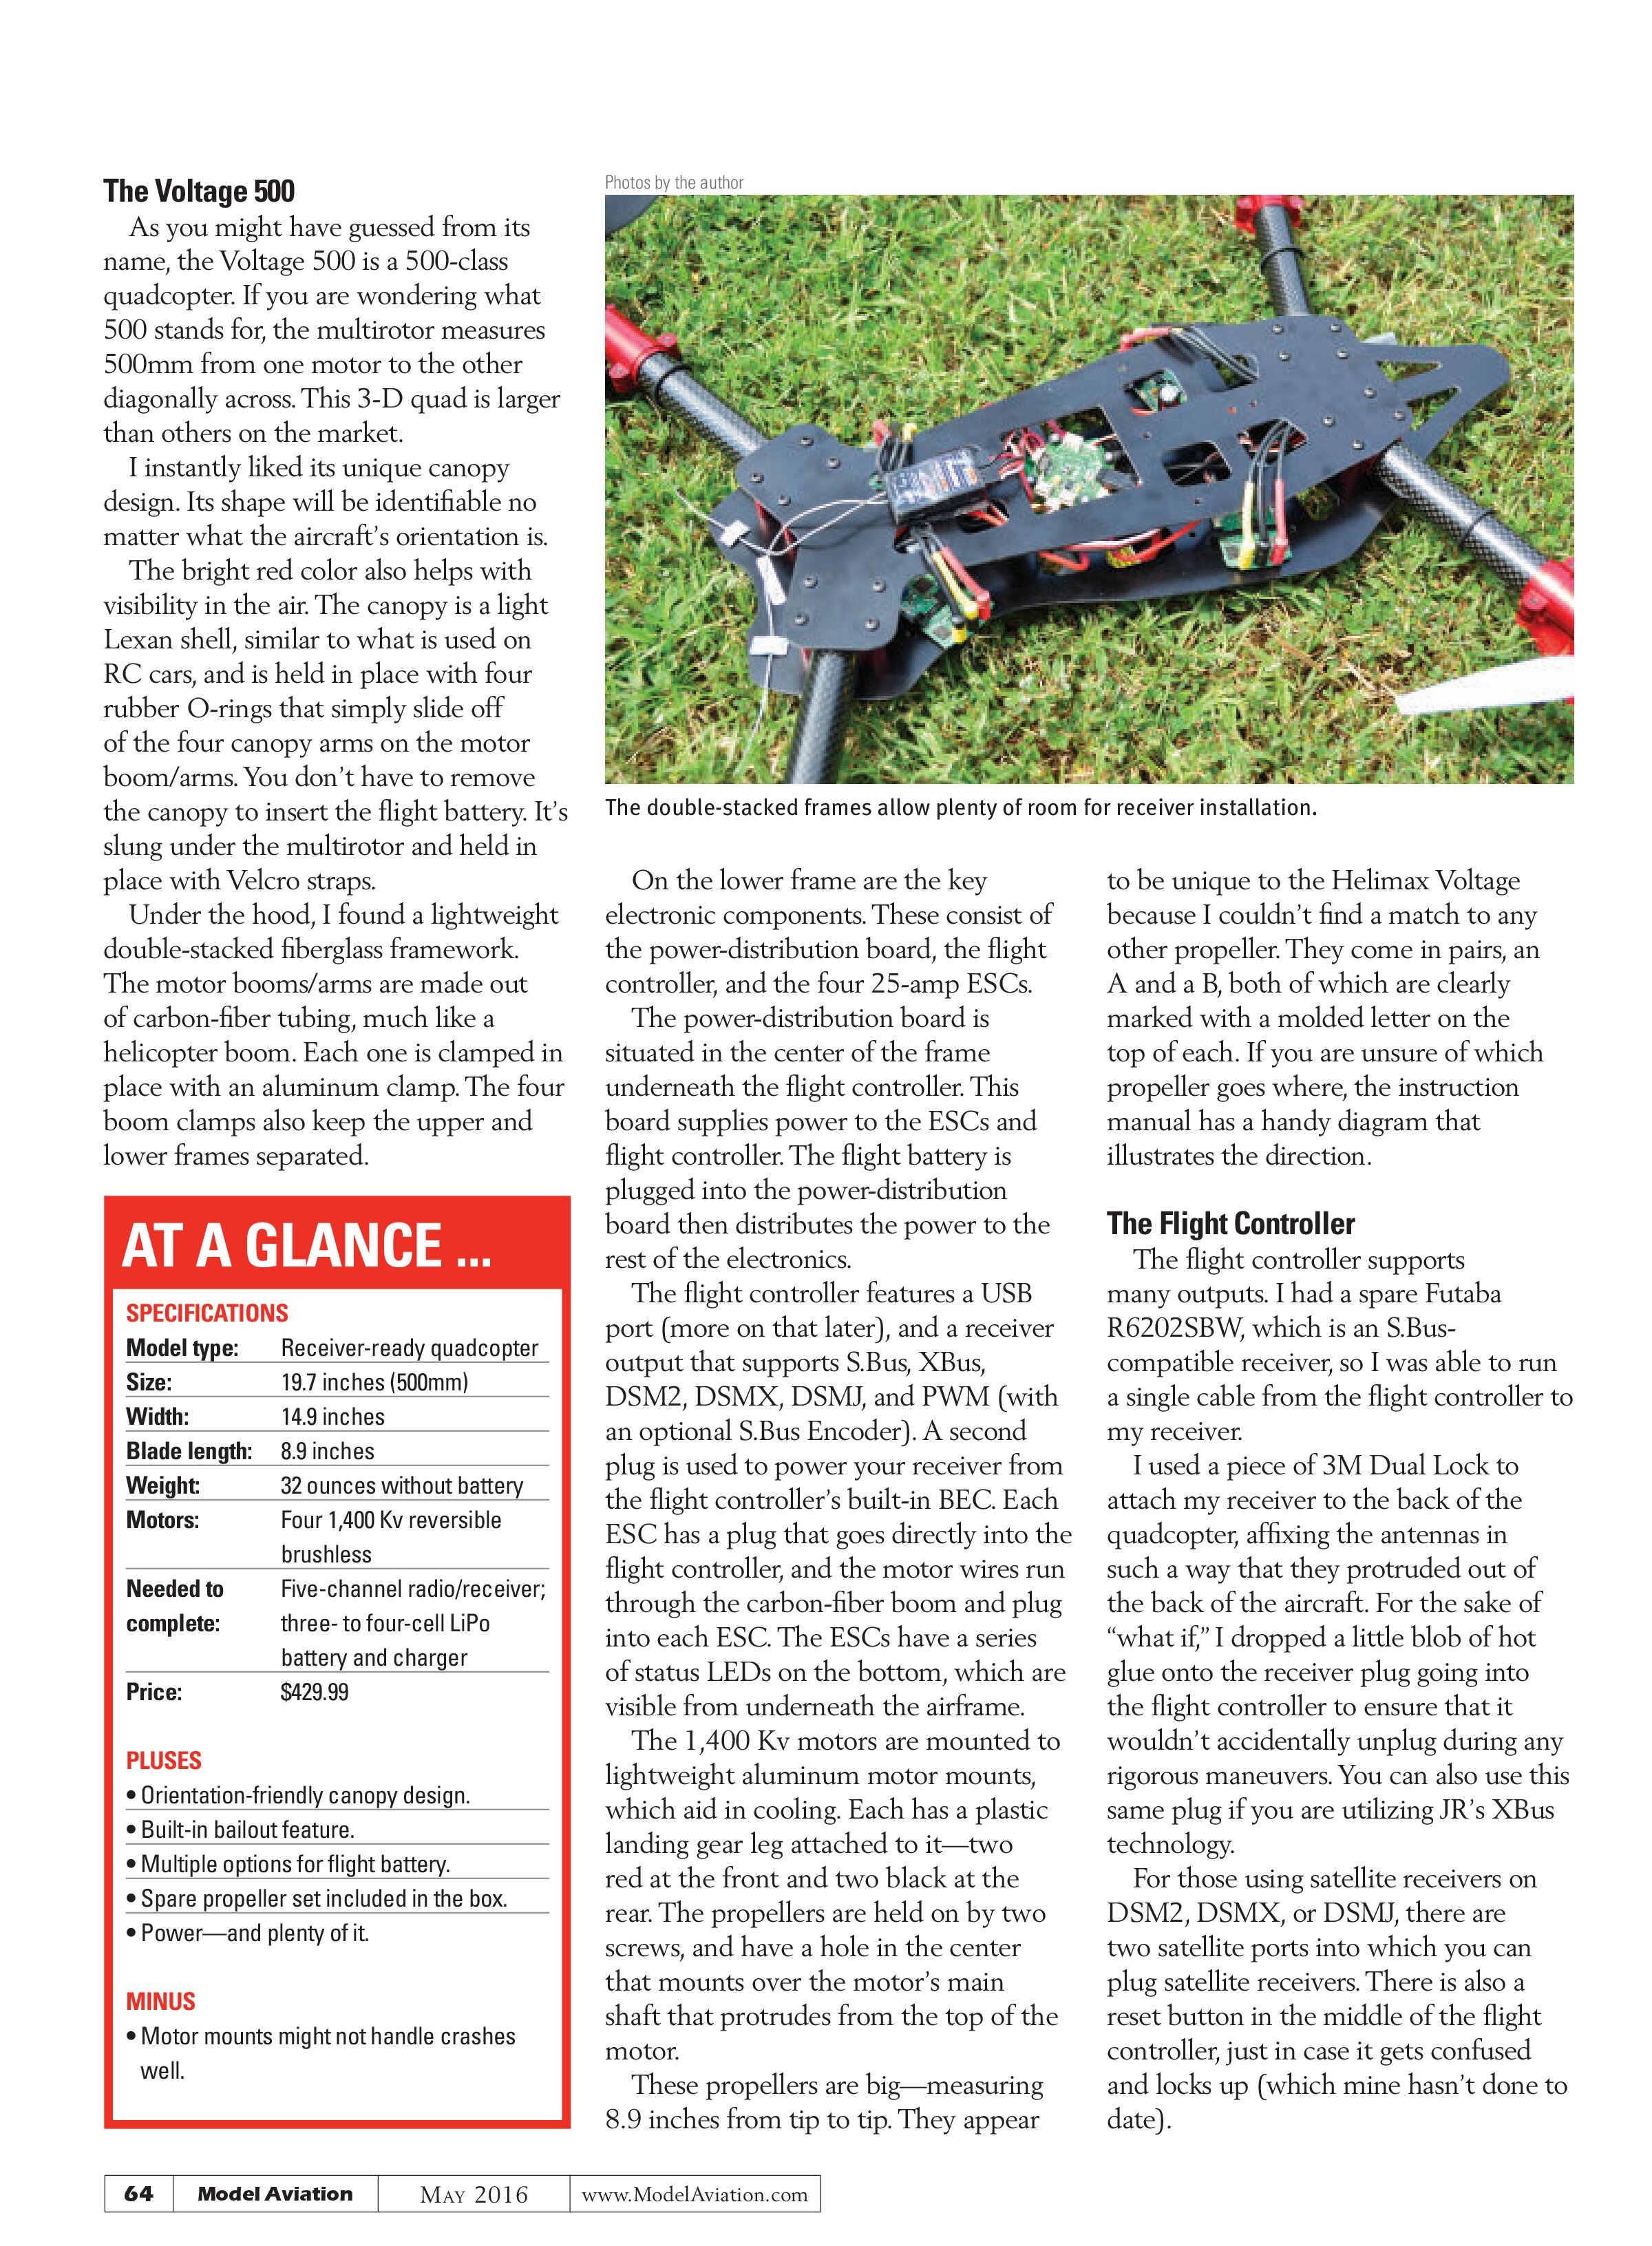
Under the hood, I found a lightweight double-stacked fiberglass framework. The motor booms/arms are made out of carbon-fiber tubing, much like a helicopter boom. Each one is clamped in place with an aluminum clamp. The four boom clamps also keep the upper and lower frames separated.
AT A GLANCE ...
SPECIFICATIONS
- Model type: Receiver-ready quadcopter
- Size: 19.7 inches (500mm)
- Width: 14.9 inches
- Blade length: 8.9 inches
- Weight: 32 ounces without battery
- Motors: Four 1,400 Kv reversible brushless
- Needed to complete: Five-channel radio/receiver; three- to four-cell LiPo battery and charger
- Price: $429.99
PLUSES
- Orientation-friendly canopy design.
- Built-in bailout feature.
- Multiple options for flight battery.
- Spare propeller set included in the box.
- Power—and plenty of it.
MINUS
- Motor mounts might not handle crashes well.
Photos by the author

On the lower frame are the key electronic components. These consist of the power-distribution board, the flight controller, and the four 25-amp ESCs.
The power-distribution board is situated in the center of the frame underneath the flight controller. This board supplies power to the ESCs and flight controller. The flight battery is plugged into the power-distribution board then distributes the power to the rest of the electronics.
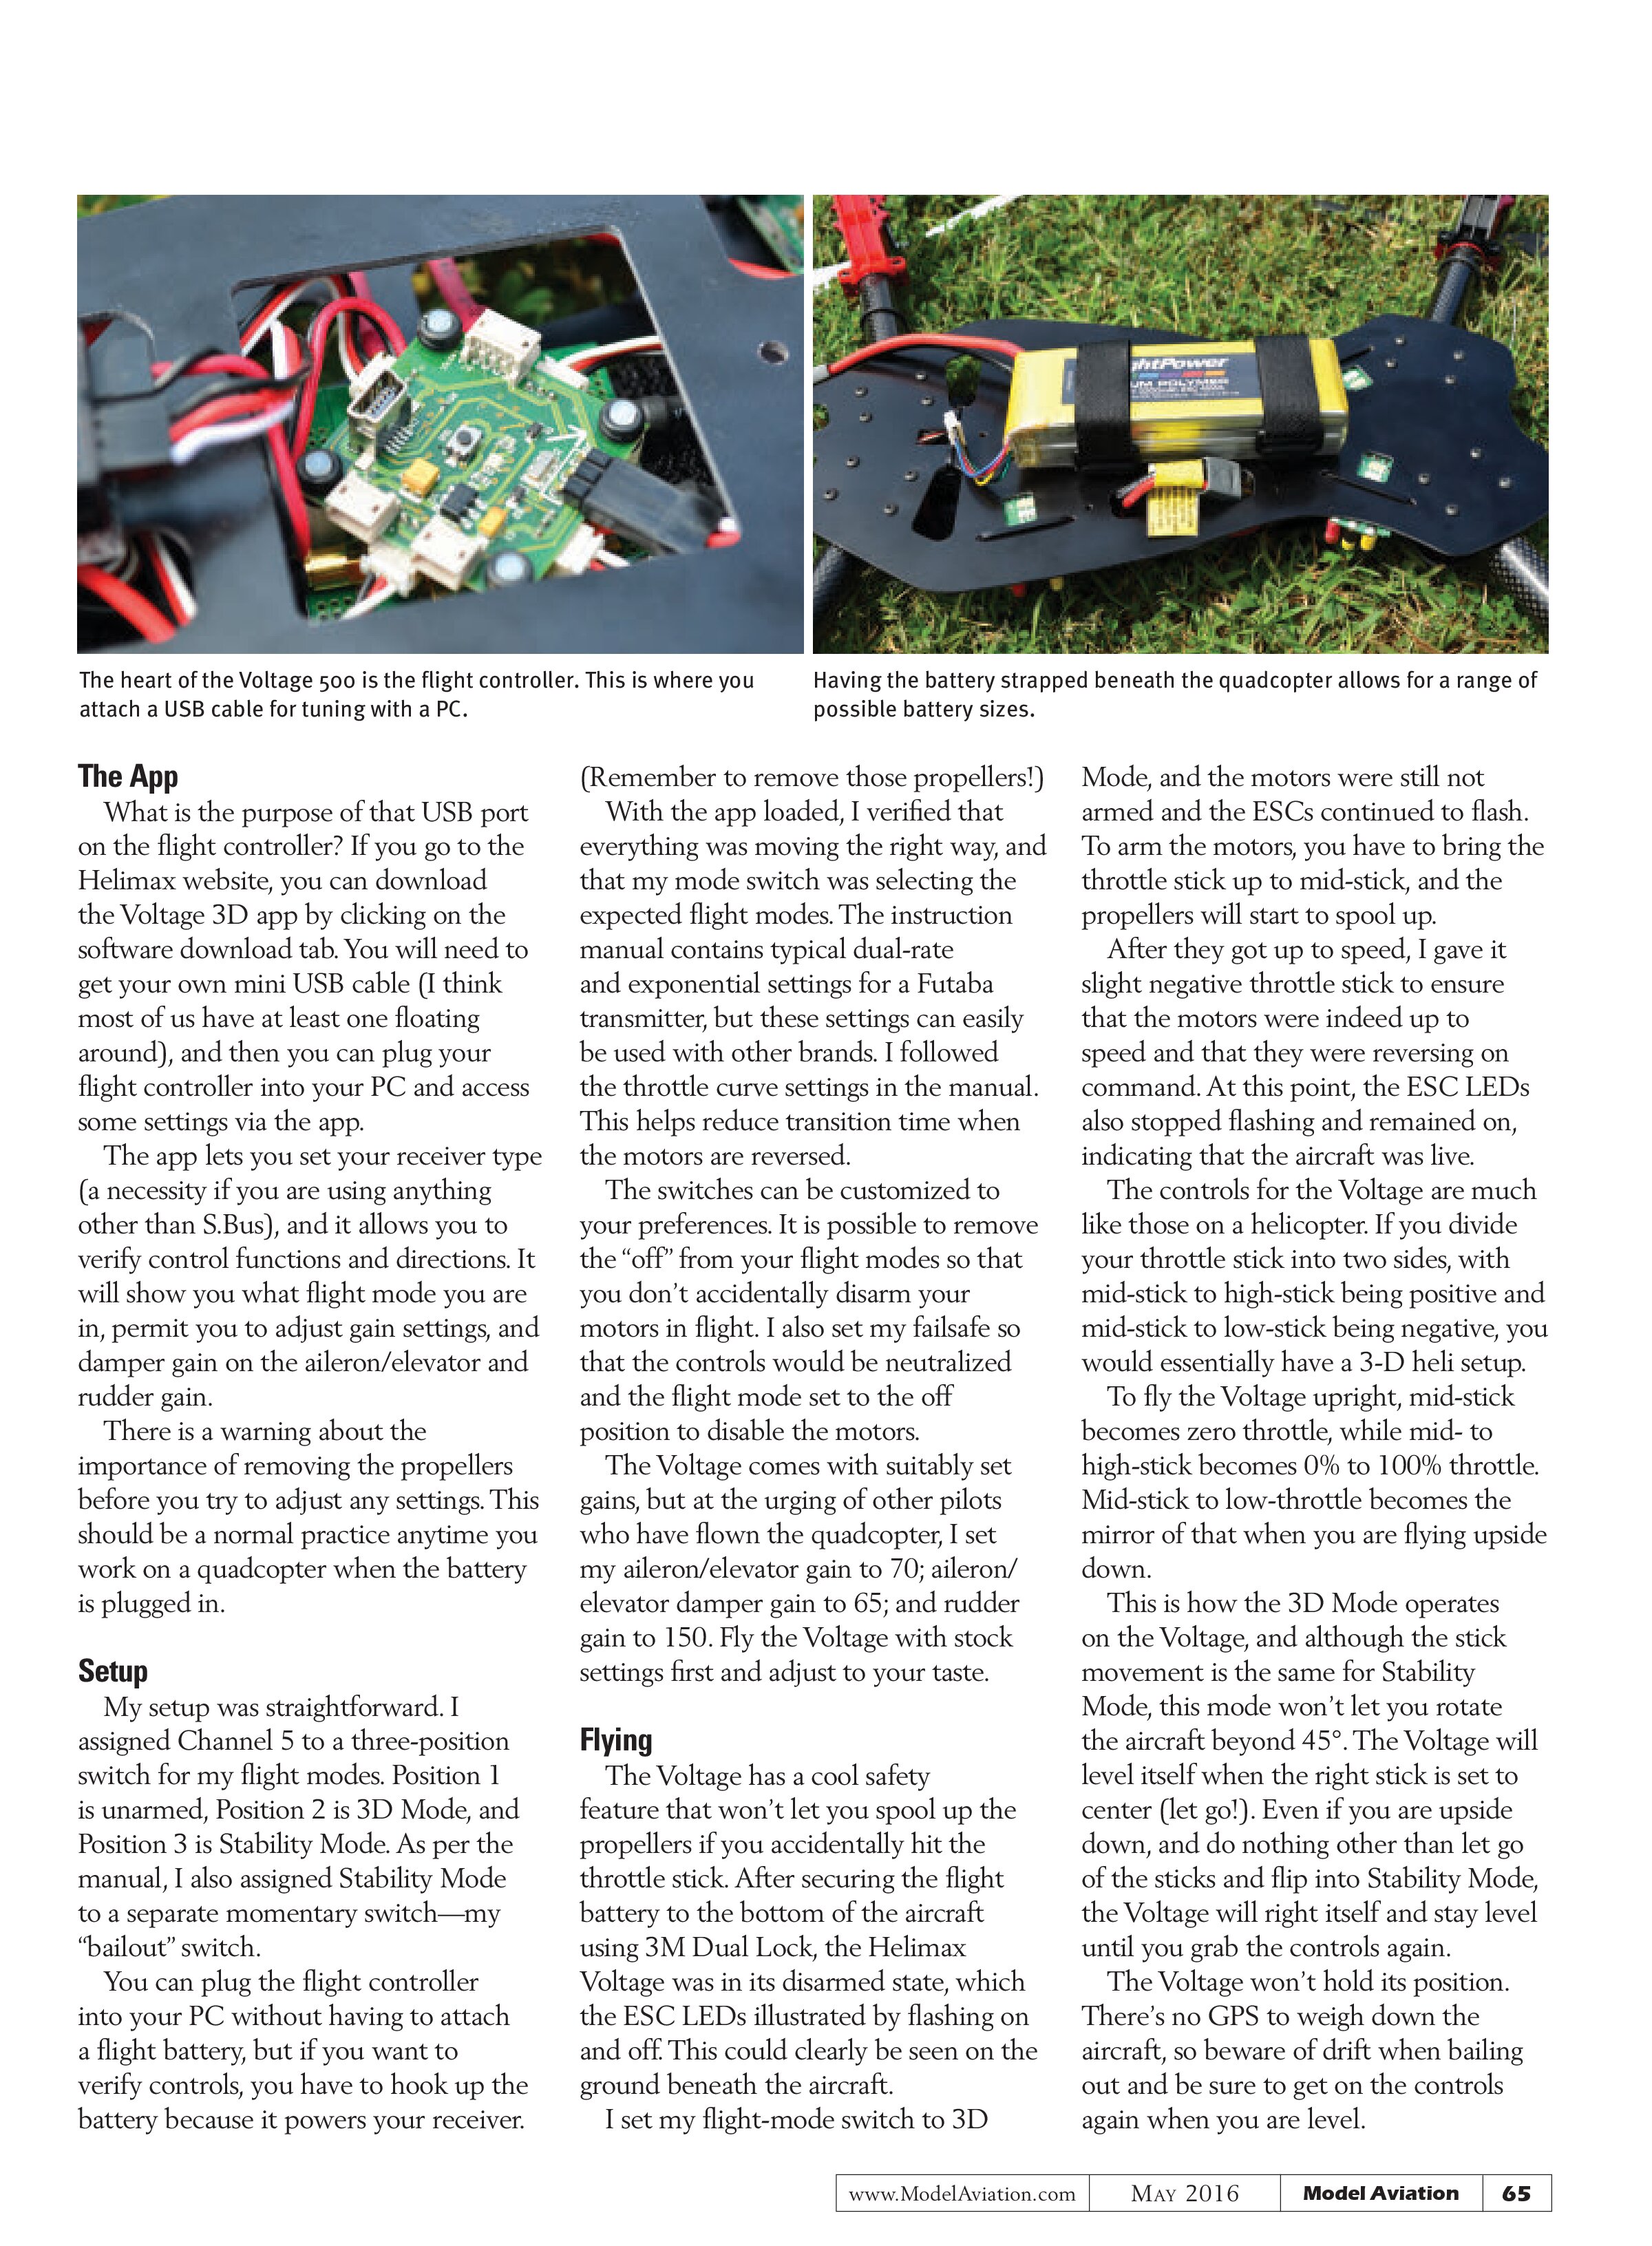
The flight controller features a USB port (more on that later), and a receiver output that supports S.Bus, XBus, DSM2, DSMX, DSMJ, and PWM (with an optional S.Bus Encoder). A second plug is used to power your receiver from the flight controller’s built-in BEC. Each ESC has a plug that goes directly into the flight controller, and the motor wires run through the carbon-fiber boom and plug into each ESC. The ESCs have a series of status LEDs on the bottom, which are visible from underneath the airframe.
The 1,400 Kv motors are mounted to lightweight aluminum motor mounts, which aid in cooling. Each has a plastic landing gear leg attached to it—two red at the front and two black at the rear. The propellers are held on by two screws, and have a hole in the center that mounts over the motor’s main shaft that protrudes from the top of the motor.
These propellers are big—measuring 8.9 inches from tip to tip. They appear to be unique to the Helimax Voltage because I couldn’t find a match to any other propeller. They come in pairs, an A and a B, both of which are clearly marked with a molded letter on the top of each. If you are unsure of which propeller goes where, the instruction manual has a handy diagram that illustrates the direction.
The Flight Controller
The flight controller supports many outputs. I had a spare Futaba R6202SBW, which is an S.Bus-compatible receiver, so I was able to run a single cable from the flight controller to my receiver.
I used a piece of 3M Dual Lock to attach my receiver to the back of the quadcopter, affixing the antennas in such a way that they protruded out of the back of the aircraft. For the sake of “what if,” I dropped a little blob of hot glue onto the receiver plug going into the flight controller to ensure that it wouldn’t accidentally unplug during any rigorous maneuvers. You can also use this same plug if you are utilizing JR’s XBus technology.
For those using satellite receivers on DSM2, DSMX, or DSMJ, there are two satellite ports into which you can plug satellite receivers. There is also a reset button in the middle of the flight controller, just in case it gets confused and locks up (which mine hasn’t done to date).
Figure caption: The double-stacked frames allow plenty of room for receiver installation.
The App
What is the purpose of that USB port on the flight controller? If you go to the Helimax website, you can download the Voltage 3D app by clicking on the software download tab. You will need to get your own mini USB cable (I think most of us have at least one floating around), and then you can plug your flight controller into your PC and access some settings via the app.
The app lets you set your receiver type (a necessity if you are using anything other than S.Bus), and it allows you to verify control functions and directions. It will show you what flight mode you are in, permit you to adjust gain settings, and damper gain on the aileron/elevator and rudder gain.
There is a warning about the importance of removing the propellers before you try to adjust any settings. This should be a normal practice anytime you work on a quadcopter when the battery is plugged in.
Setup
My setup was straightforward. I assigned Channel 5 to a three-position switch for my flight modes. Position 1 is unarmed, Position 2 is 3D Mode, and Position 3 is Stability Mode. As per the manual, I also assigned Stability Mode to a separate momentary switch—my “bailout” switch.
You can plug the flight controller into your PC without having to attach a flight battery, but if you want to verify controls, you have to hook up the battery because it powers your receiver.
(Remember to remove those propellers!)
With the app loaded, I verified that everything was moving the right way, and that my mode switch was selecting the expected flight modes. The instruction manual contains typical dual-rate and exponential settings for a Futaba transmitter, but these settings can easily be used with other brands. I followed the throttle curve settings in the manual. This helps reduce transition time when the motors are reversed.
The switches can be customized to your preferences. It is possible to remove the “off” from your flight modes so that you don’t accidentally disarm your motors in flight. I also set my failsafe so that the controls would be neutralized and the flight mode set to the off position to disable the motors.
The Voltage comes with suitably set gains, but at the urging of other pilots who have flown the quadcopter, I set my aileron/elevator gain to 70; aileron/elevator damper gain to 65; and rudder gain to 150. Fly the Voltage with stock settings first and adjust to your taste.
Flying
The Voltage has a cool safety feature that won’t let you spool up the propellers if you accidentally hit the throttle stick. After securing the flight battery to the bottom of the aircraft using 3M Dual Lock, the Helimax Voltage was in its disarmed state, which the ESC LEDs illustrated by flashing on and off. This could clearly be seen on the ground beneath the aircraft.
I set my flight-mode switch to 3D Mode, and the motors were still not armed and the ESCs continued to flash. To arm the motors, you have to bring the throttle stick up to mid-stick, and the propellers will start to spool up.
After they got up to speed, I gave it slight negative throttle stick to ensure that the motors were indeed up to speed and that they were reversing on command. At this point, the ESC LEDs also stopped flashing and remained on, indicating that the aircraft was live.
The controls for the Voltage are much like those on a helicopter. If you divide your throttle stick into two sides, with mid-stick to high-stick being positive and mid-stick to low-stick being negative, you would essentially have a 3-D heli setup.
To fly the Voltage upright, mid-stick becomes zero throttle, while mid- to high-stick becomes 0% to 100% throttle. Mid-stick to low-throttle becomes the mirror of that when you are flying upside down.
This is how the 3D Mode operates on the Voltage, and although the stick movement is the same for Stability Mode, this mode won’t let you rotate the aircraft beyond 45°. The Voltage will level itself when the right stick is set to center (let go!). Even if you are upside down, and do nothing other than let go of the sticks and flip into Stability Mode, the Voltage will right itself and stay level until you grab the controls again.
The Voltage won’t hold its position. There’s no GPS to weigh down the aircraft, so beware of drift when bailing out and be sure to get on the controls again when you are level.


I started with good intentions. I planned to do the whole first flight in Stability Mode, and wait until the second flight before I tried any 3-D maneuvers. Well, that went right out of the window after roughly 20 seconds of hovering. The Voltage is a stable and forgiving machine in Stability Mode, and I believe a novice pilot would have no problem hovering it, but the Voltage was built for 3-D flying. I found myself flipping the switch into 3D Mode almost right away.
In 3D Mode, the Voltage becomes a power monster. By that I mean it has monster power! The first full-throttle punch-out that I did surprised the heck out of me because the Voltage shot sky-high at a ridiculous rate of speed. After I got it back down, I tried some flips with it and found it to be responsive, but not overly twitchy. Forward and backward flips, as well as sideways flips, were performed equally well and had a linear feeling in flight.
The rudder’s starting and stopping power was perfect. The Voltage rotated around its rudder axis and stopped exactly where I asked it to with no drifting. After doing several tumbles and flips, I flew a little racetrack pattern at high speed and found it to be an agile machine, regardless of speed.
The lightweight 4S 2,500 mAh LiPo battery seemed to be the best for all-out 3-D flight, but even with the smaller capacity I was able to comfortably make 6-minute flights. The 3,300 mAh battery gave me more flight time, but I didn’t notice much of a difference in weight when flying.
If you are more of a sport flier, you will get flight times of approximately 7 to 8 minutes, depending on battery size and how often you use full throttle. It’s hard to resist pushing that throttle stick to the max to watch the Voltage scoot up into the sky.
The transition time when reversing the motors was short, and it felt like an old-school collective-pitch helicopter that required the pilot to manage pitch during maneuvers. It didn’t take long to get used to the transition though, and I was able to hold flips without losing any altitude. Ramp up the throttle to initiate the flip, and smoothly pull it back to negative to hold the Voltage inverted.
I wondered how well the bailout feature worked, so I took the Voltage up and popped it into an inverted hover. I flipped my switch into Stability Mode and sure enough, the Voltage flipped itself to a level position. Combining this flight mode with a momentary switch is a great way to practice new maneuvers. For helicopter pilots, it could be combined with the traditional throttle-hold position. (We instinctively reach for it when we get into trouble!)
The canopy provides great orientation cues, and the color scheme shows up well in the sun. I didn’t have a problem figuring out which way it was pointing.
I noticed that my Voltage was making a lot of noise in fast-forward flight because my gains were set too high. Using the app on my laptop, I reduced it a touch and decreased the noise.
The durability of the Voltage is good, but after a few tumbles and crashes, it became evident that the carbon-fiber tubes typically break and the motor mounts have a tendency to bend when they contact the ground. You can bend the motor mounts back with a little force and quickly be up and flying again.
Conclusion
Quadcopters are great learning tools for prospective heli pilots, as well as fun-to-fly aircraft for everyone else. The control inputs are similar to a helicopter, and the skills you learn on the quadcopter will translate to a heli. You can practice hovering orientation, inverted flying skills, even pirouetting maneuvers—all of which can be applied to helicopters.
For those who already fly helicopters proficiently, it is up to your imagination to determine how you can fly a 3-D quadcopter. Do a Google search for “Alon Barak Voltage 500” to see some amazing unlimited flying with the Voltage.
Even if you have no interest in helis, the Helimax Voltage 500 3D quadcopter is an awesome aircraft to fly in both Stability Mode and 3D Mode. It could be the next step in flying skills for current multirotor pilots. I don’t think you could give control of it to any RC pilot without seeing a smile on his or her face!
—Chris Mulcahy
cspaced@gmail.com
MANUFACTURER/DISTRIBUTOR:
Helimax
(800) 637-6050
www.helimaxrc.com
SOURCES:
FlightPower
(888) 598-8037
www.flightpowerbatteries.com