GREAT PLANES TWINSTAR EP ARF
Tom Sullivan
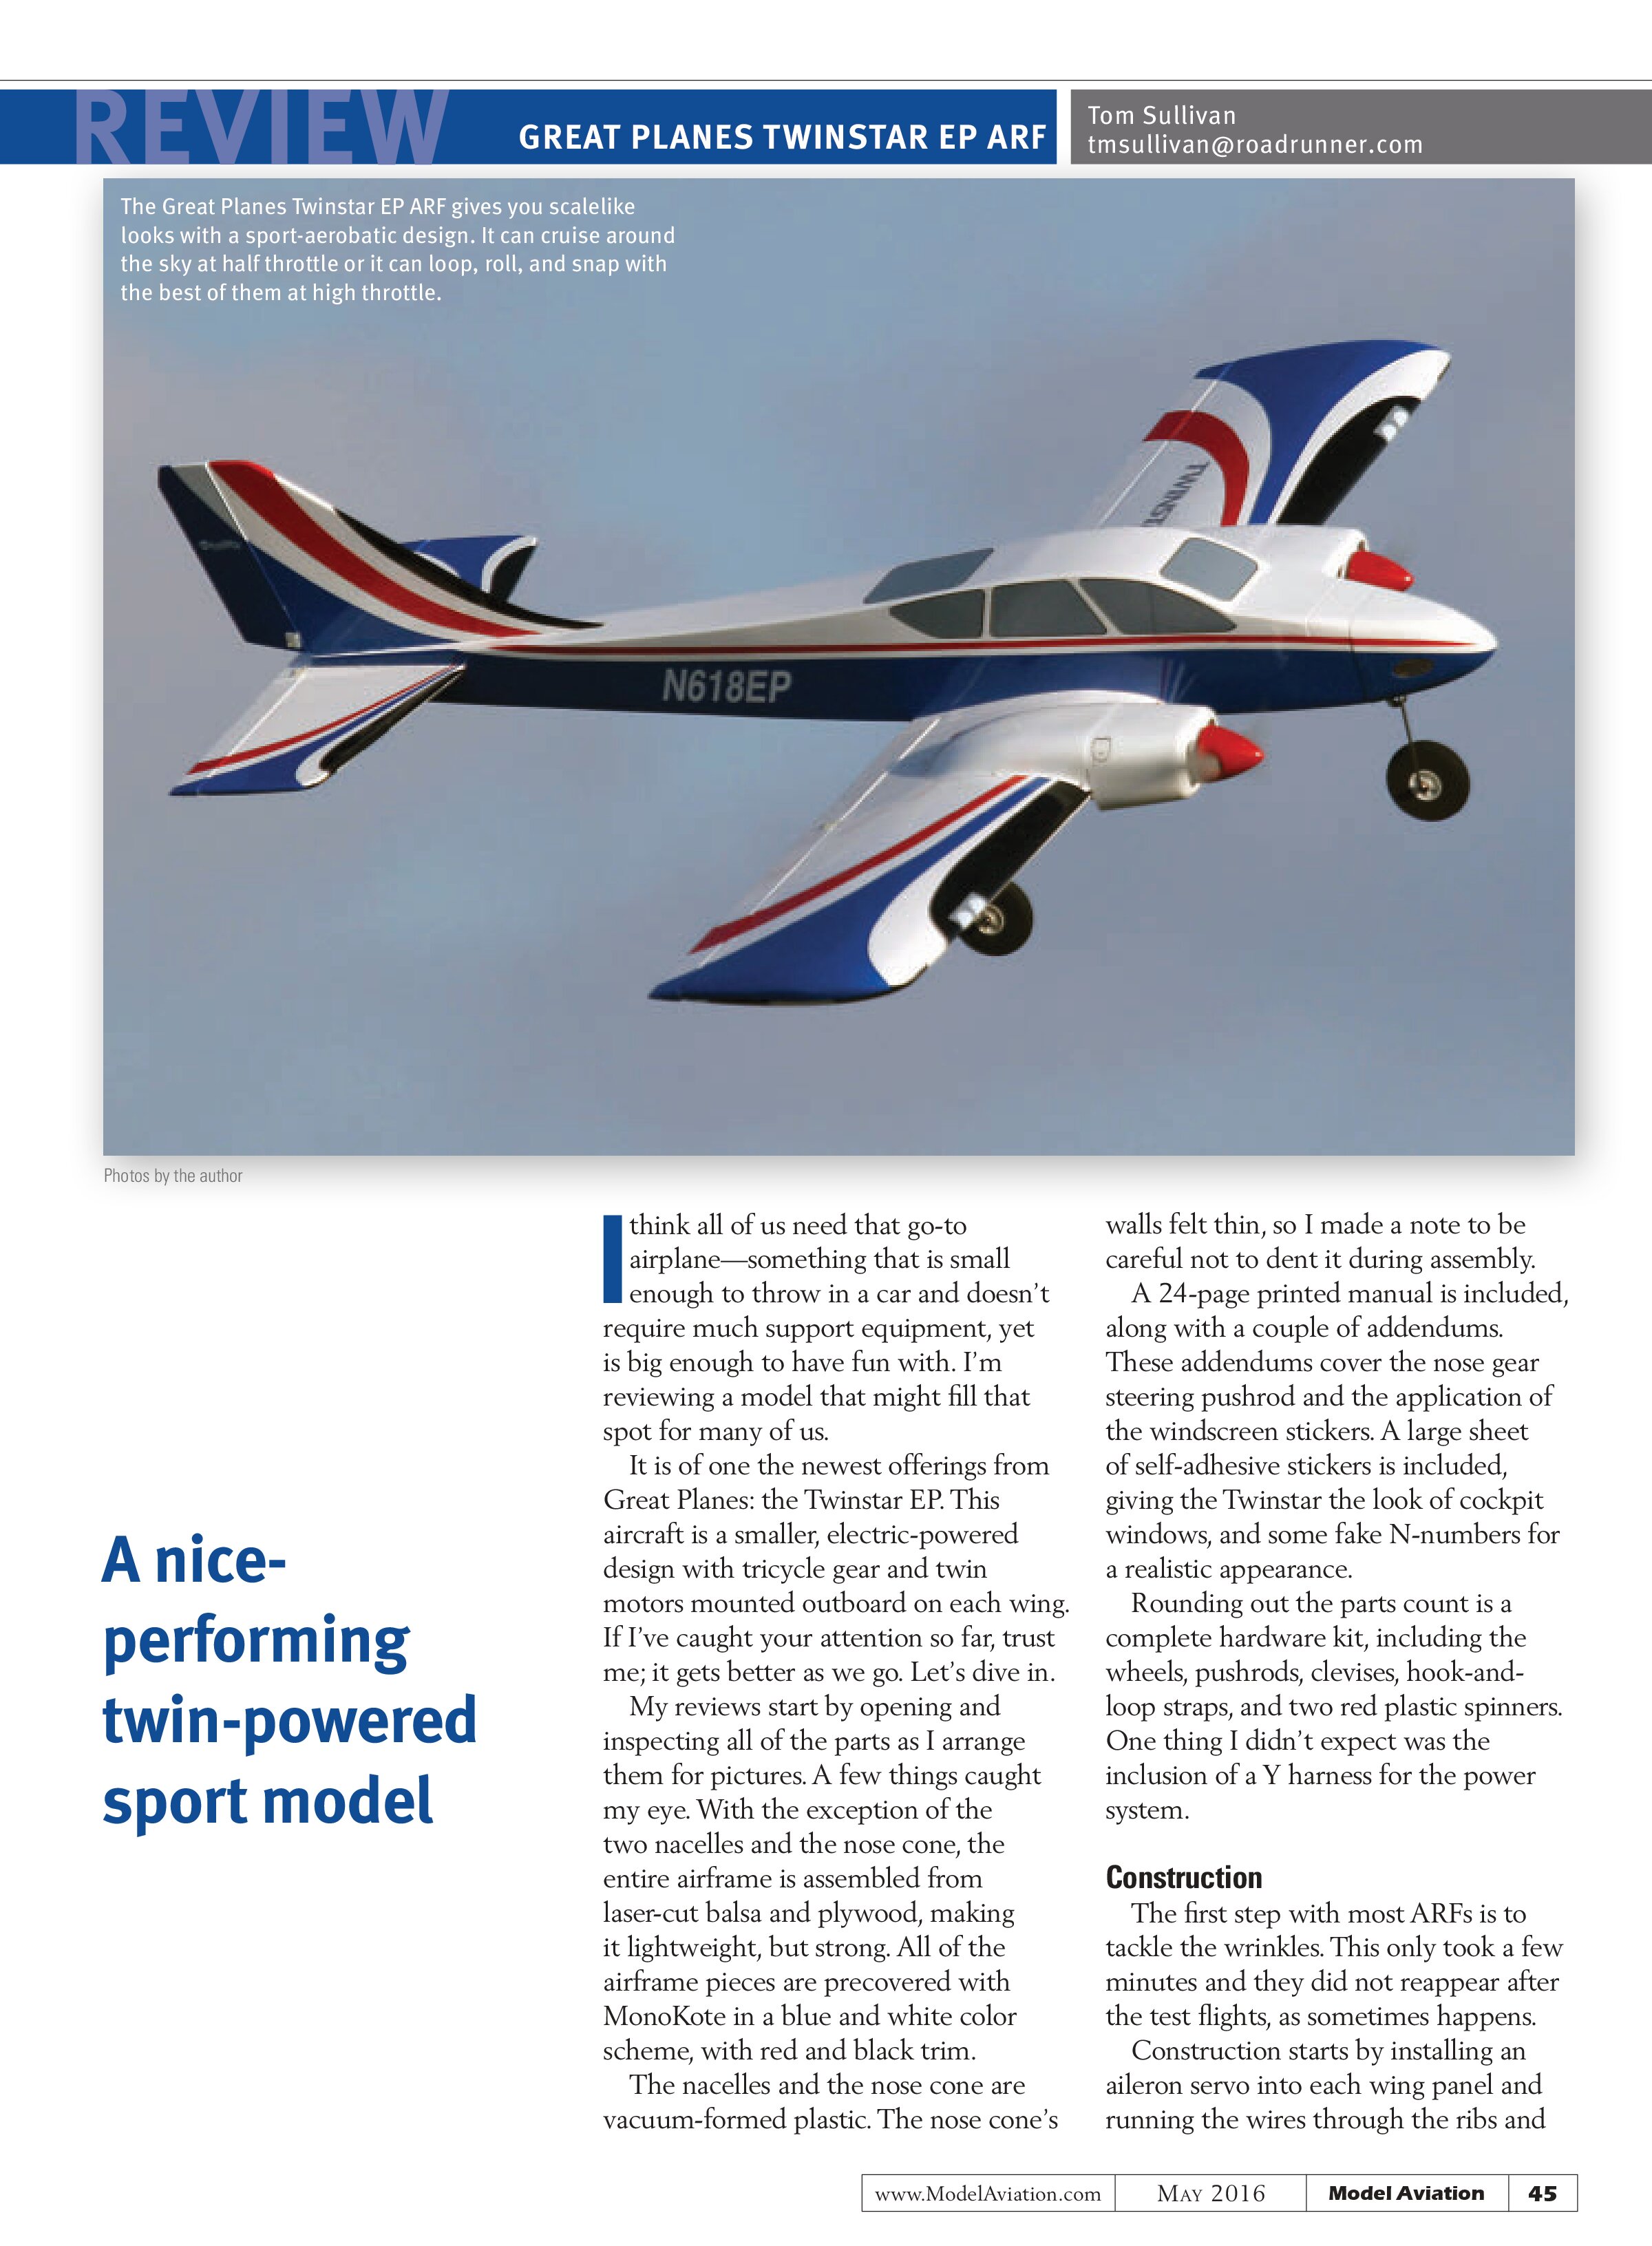
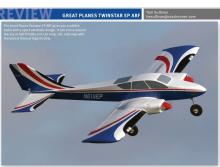
The Great Planes Twinstar EP ARF gives you scalelike looks with a sport-aerobatic design. It can cruise around the sky at half throttle or it can loop, roll, and snap with the best of them at high throttle.

A nice-performing twin-powered sport model
I think all of us need that go-to airplane—something that is small enough to throw in a car and doesn’t require much support equipment, yet is big enough to have fun with. I’m reviewing a model that might fill that spot for many of us.
It is of one the newest offerings from Great Planes: the Twinstar EP. This aircraft is a smaller, electric-powered design with tricycle gear and twin motors mounted outboard on each wing. If I’ve caught your attention so far, trust me; it gets better as we go. Let’s dive in.
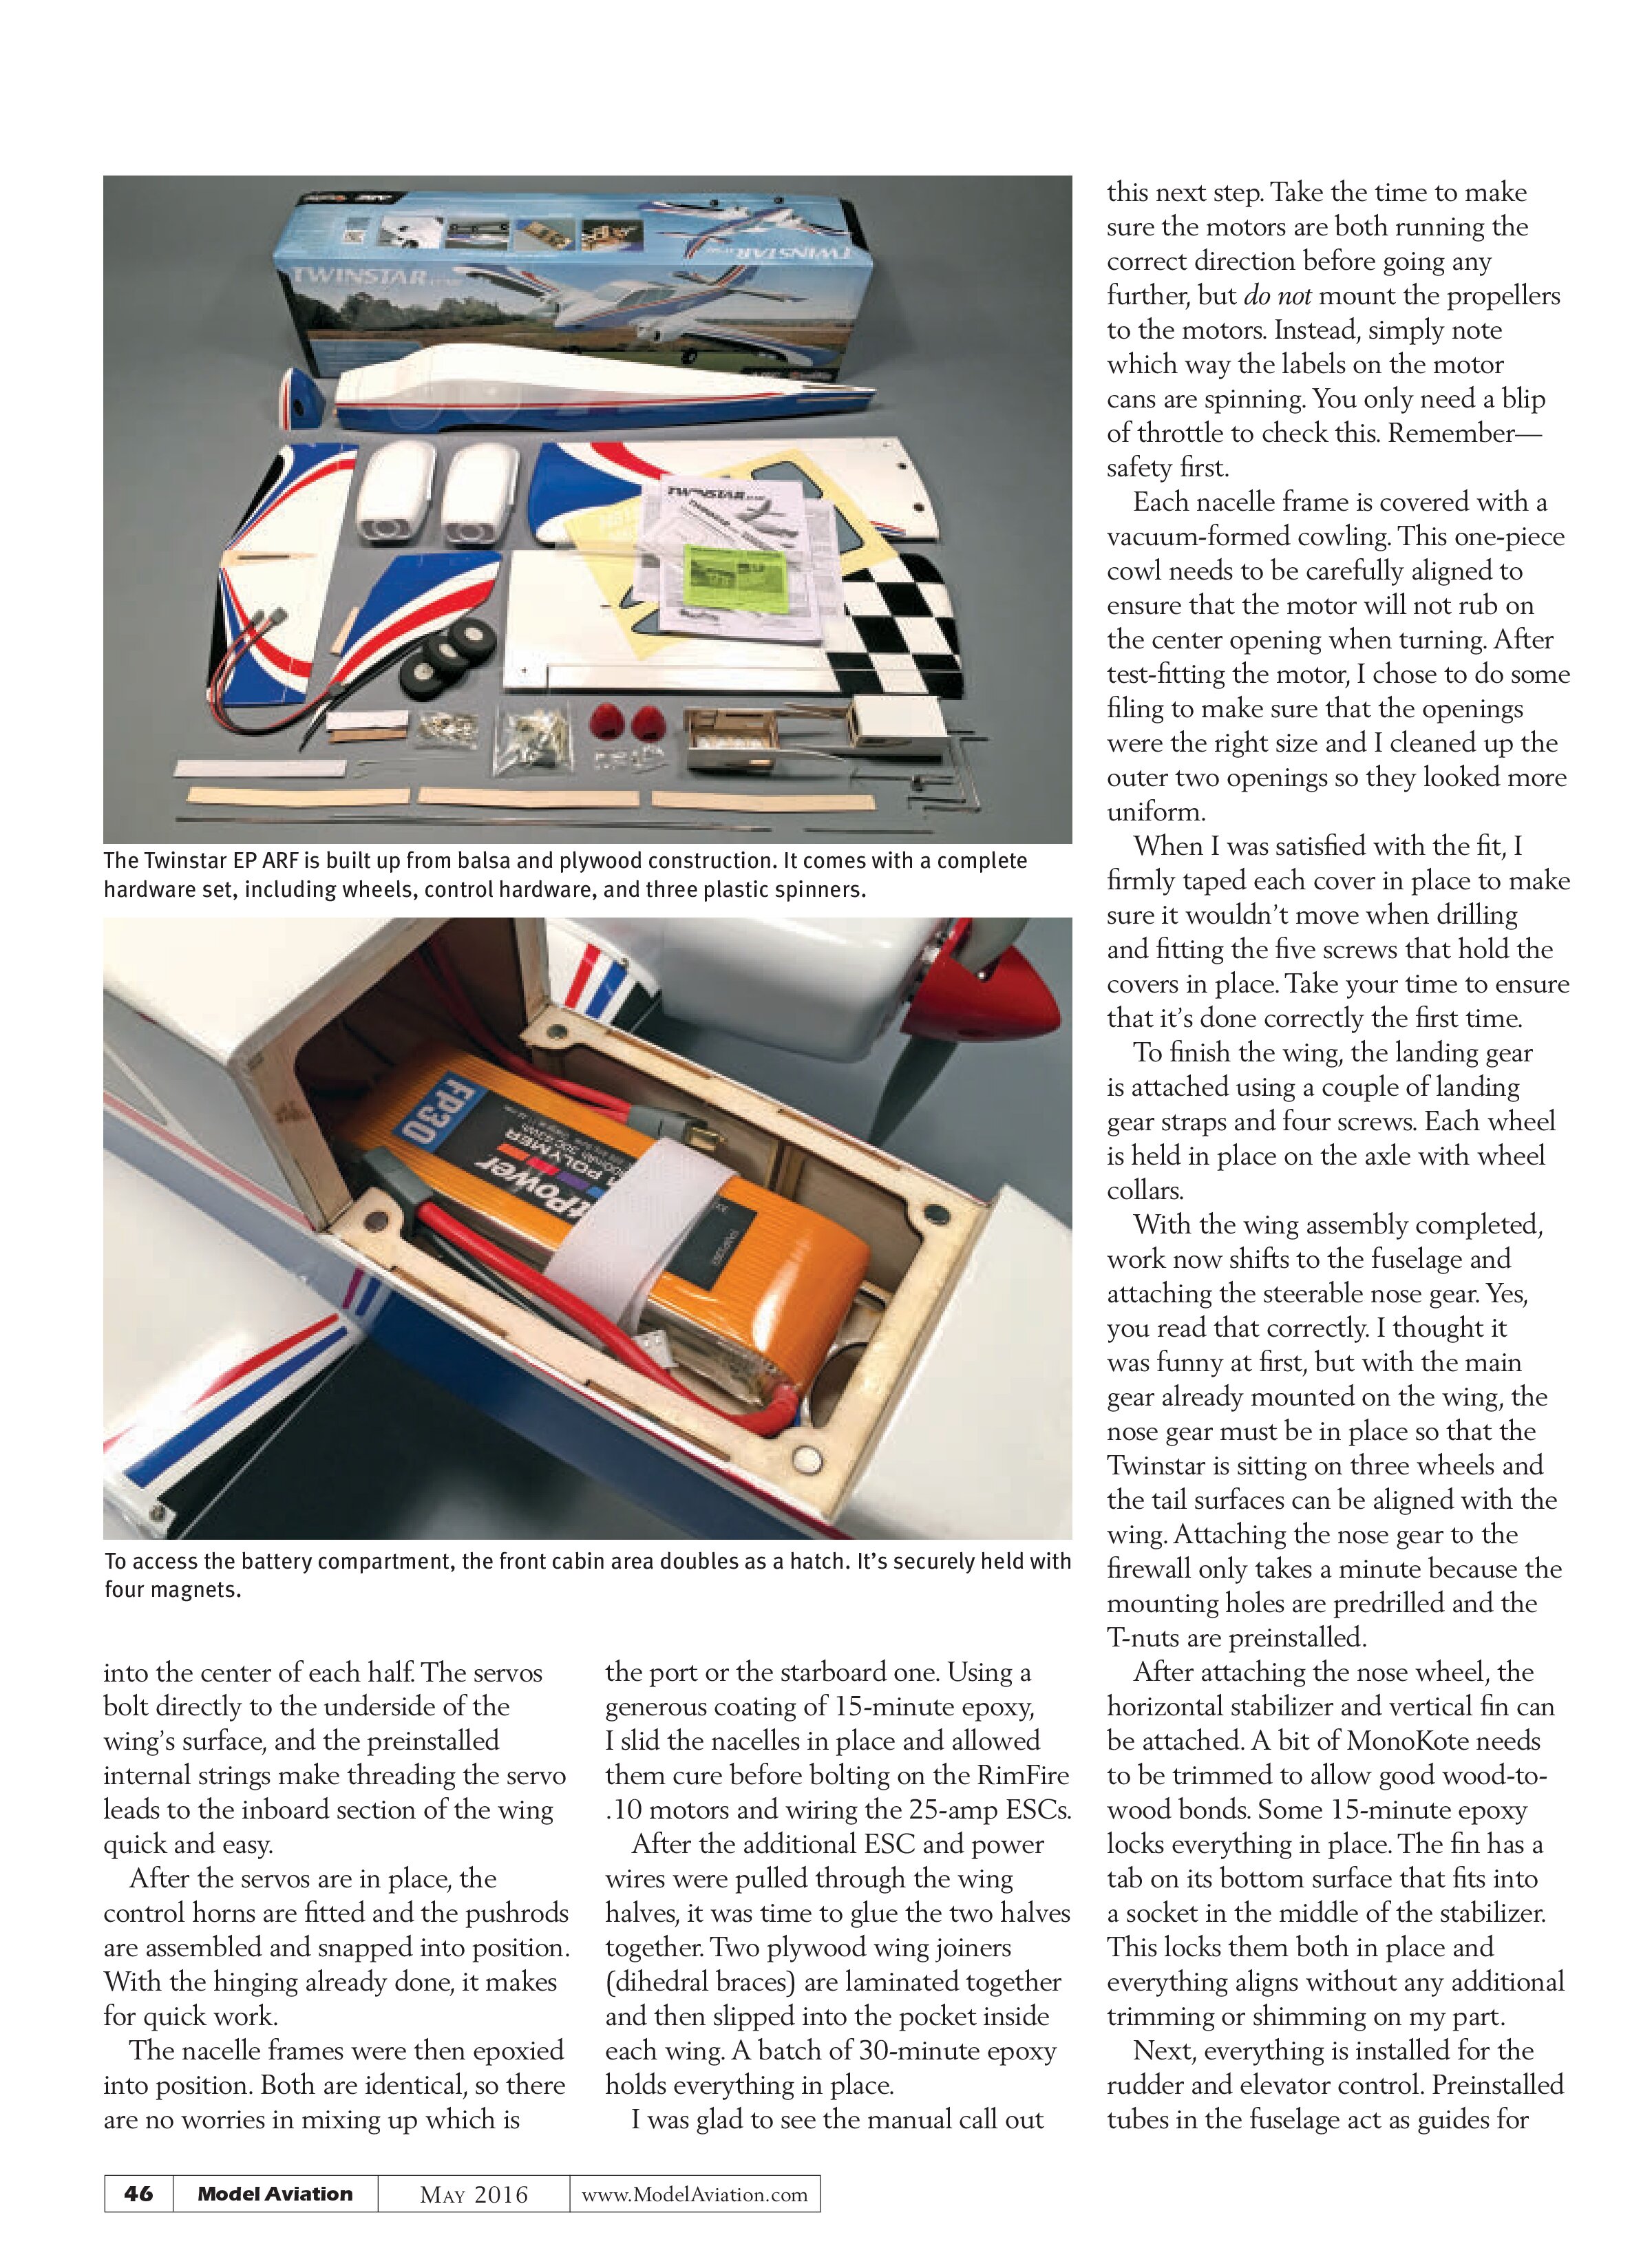
My reviews start by opening and inspecting all of the parts as I arrange them for pictures. A few things caught my eye. With the exception of the two nacelles and the nose cone, the entire airframe is assembled from laser-cut balsa and plywood, making it lightweight, but strong. All of the airframe pieces are precovered with MonoKote in a blue and white color scheme, with red and black trim.
The nacelles and the nose cone are vacuum-formed plastic. The nose cone’s walls felt thin, so I made a note to be careful not to dent it during assembly.
A 24-page printed manual is included, along with a couple of addendums. These addendums cover the nose gear steering pushrod and the application of the windscreen stickers. A large sheet of self-adhesive stickers is included, giving the Twinstar the look of cockpit windows, and some fake N-numbers for a realistic appearance.
Rounding out the parts count is a complete hardware kit, including the wheels, pushrods, clevises, hook-and-loop straps, and two red plastic spinners. One thing I didn’t expect was the inclusion of a Y harness for the power system.
Construction
The first step with most ARFs is to tackle the wrinkles. This only took a few minutes and they did not reappear after the test flights, as sometimes happens.
Construction starts by installing an aileron servo into each wing panel and running the wires through the ribs and

The Twinstar EP ARF is built up from balsa and plywood construction. It comes with a complete hardware set, including wheels, control hardware, and three plastic spinners.

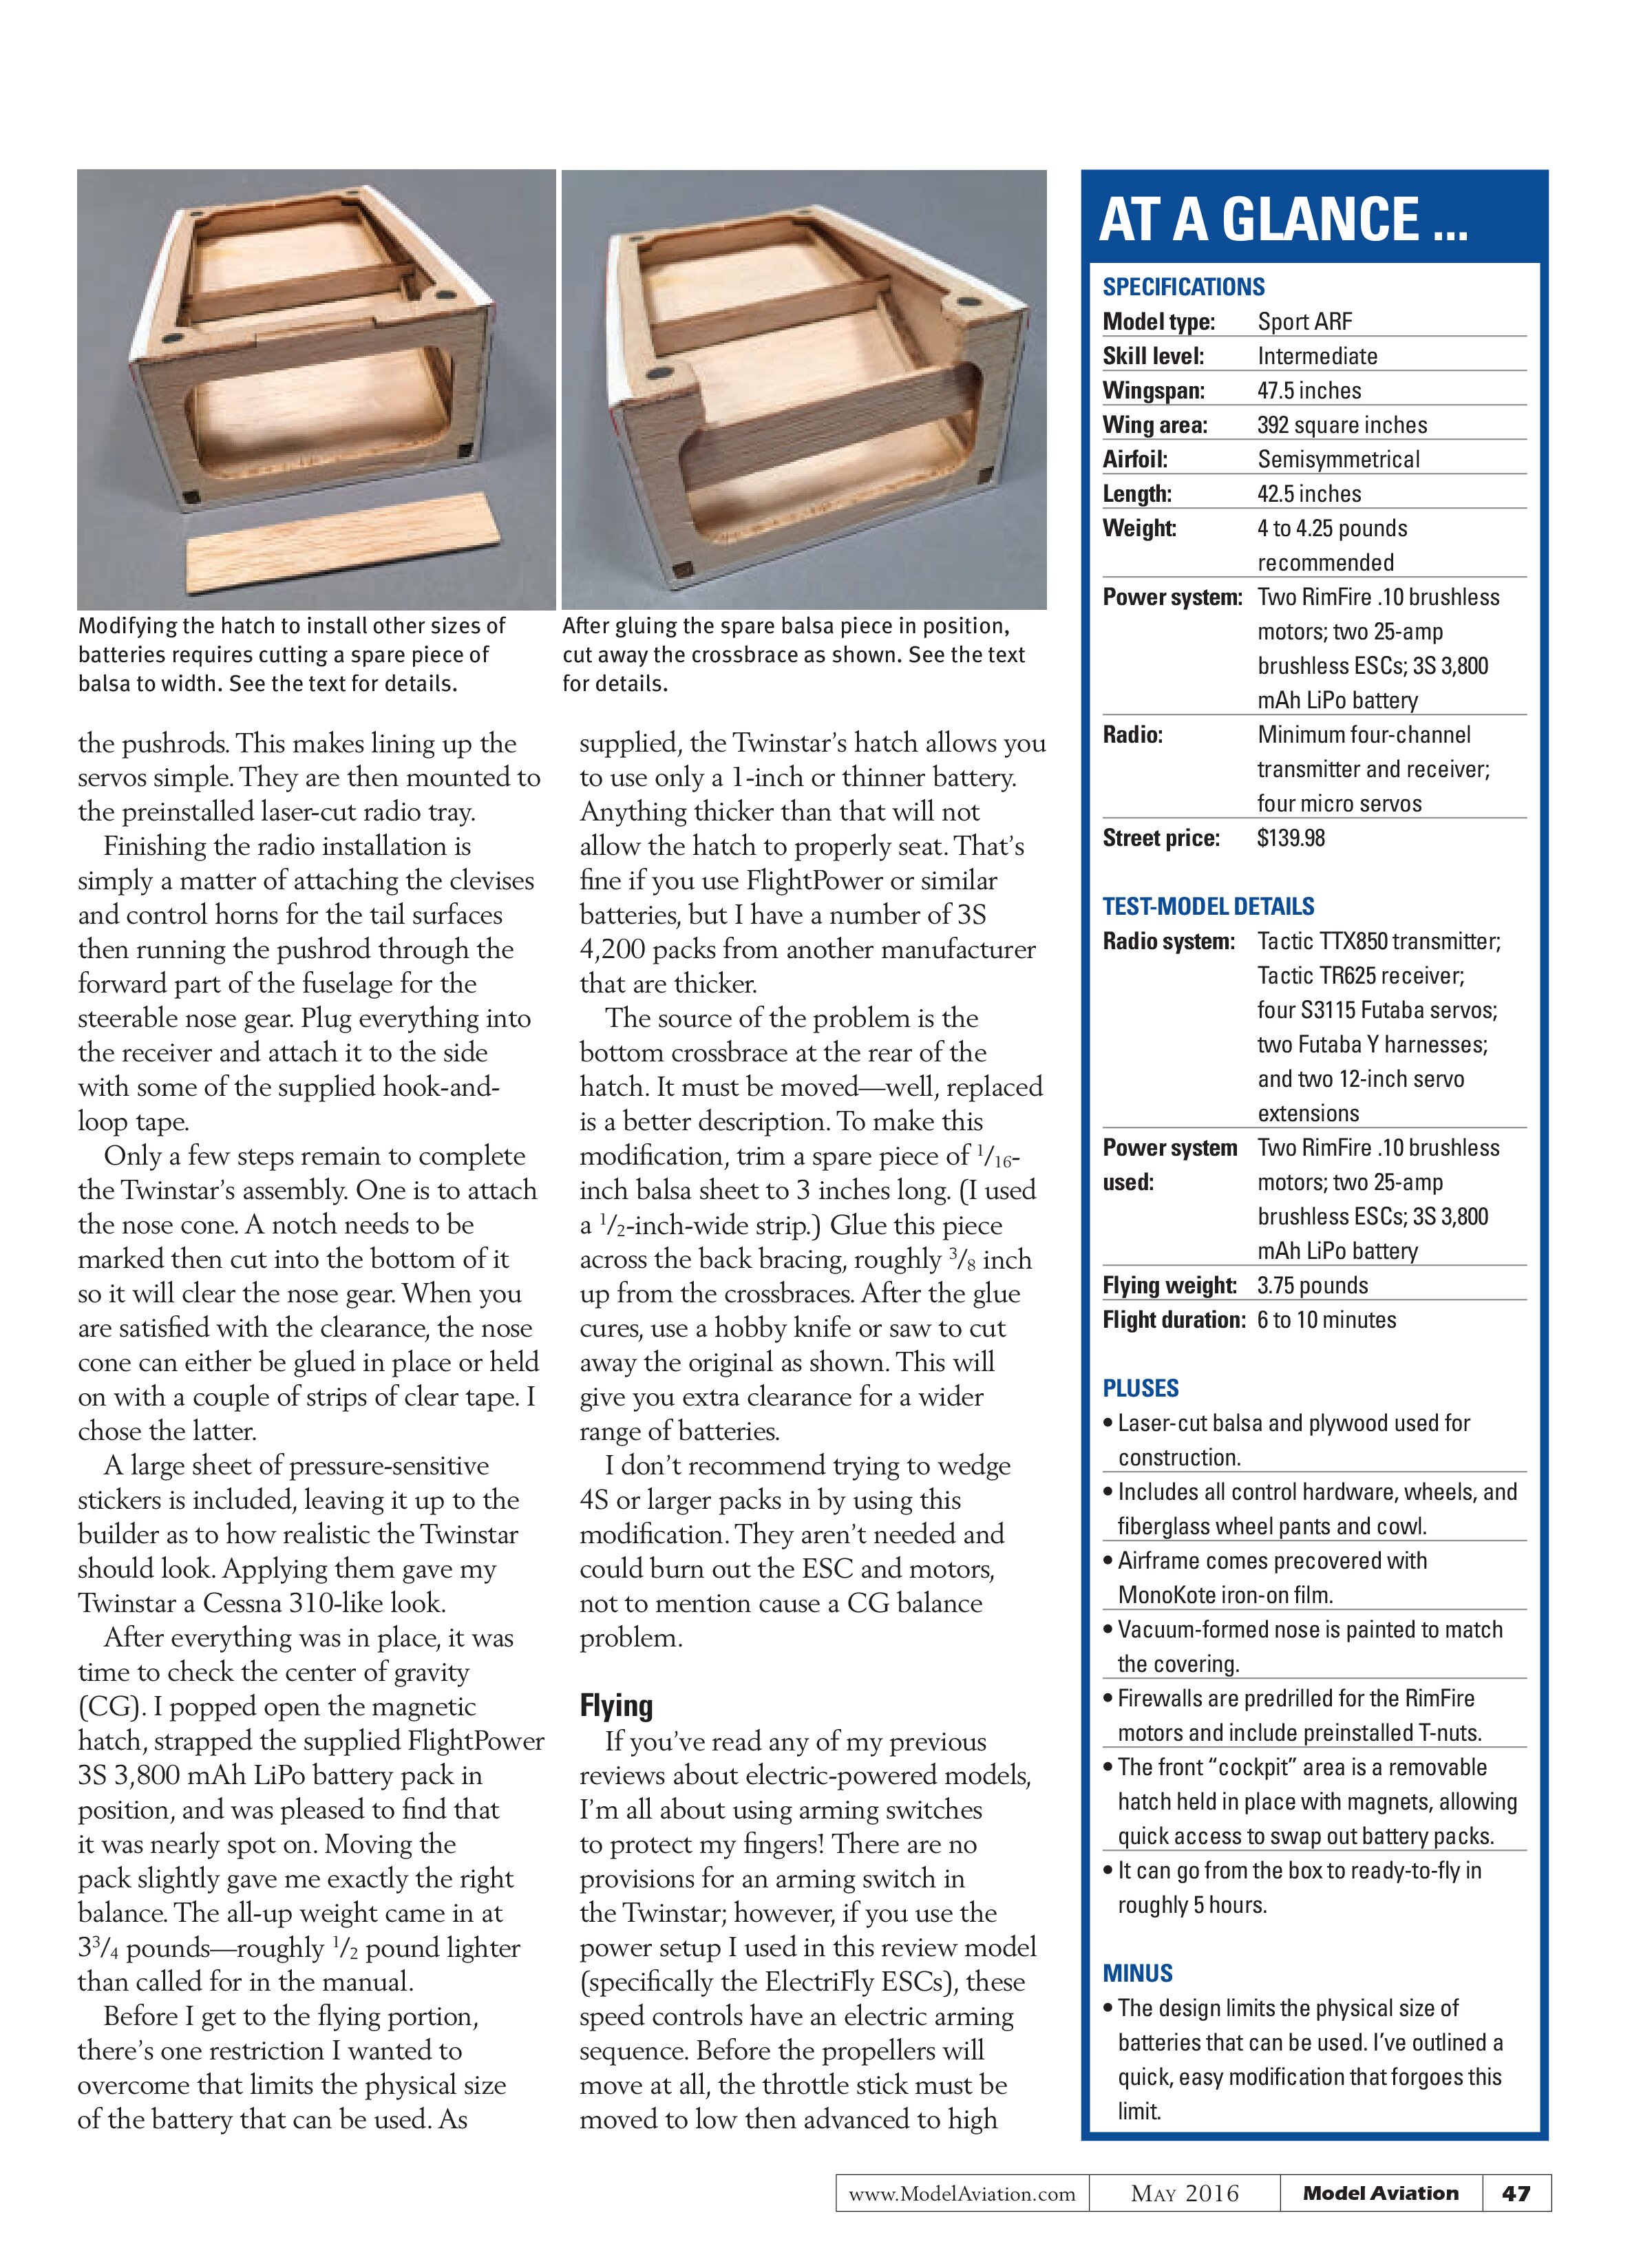
To access the battery compartment, the front cabin area doubles as a hatch. It’s securely held with four magnets.
into the center of each half. The servos bolt directly to the underside of the wing’s surface, and the preinstalled internal strings make threading the servo leads to the inboard section of the wing quick and easy.
After the servos are in place, the control horns are fitted and the pushrods are assembled and snapped into position. With the hinging already done, it makes for quick work.
The nacelle frames were then epoxied into position. Both are identical, so there are no worries in mixing up which is the port or the starboard one. Using a generous coating of 15-minute epoxy, I slid the nacelles in place and allowed them cure before bolting on the RimFire .10 motors and wiring the 25-amp ESCs.
After the additional ESC and power wires were pulled through the wing halves, it was time to glue the two halves together. Two plywood wing joiners (dihedral braces) are laminated together and then slipped into the pocket inside each wing. A batch of 30-minute epoxy holds everything in place.
I was glad to see the manual call out this next step. Take the time to make sure the motors are both running the correct direction before going any further, but do not mount the propellers to the motors. Instead, simply note which way the labels on the motor cans are spinning. You only need a blip of throttle to check this. Remember—safety first.
Each nacelle frame is covered with a vacuum-formed cowling. This one-piece cowl needs to be carefully aligned to ensure that the motor will not rub on the center opening when turning. After test-fitting the motor, I chose to do some filing to make sure that the openings were the right size and I cleaned up the outer two openings so they looked more uniform.
When I was satisfied with the fit, I firmly taped each cover in place to make sure it wouldn’t move when drilling and fitting the five screws that hold the covers in place. Take your time to ensure that it’s done correctly the first time.
To finish the wing, the landing gear is attached using a couple of landing gear straps and four screws. Each wheel is held in place on the axle with wheel collars.
With the wing assembly completed, work now shifts to the fuselage and attaching the steerable nose gear. Yes, you read that correctly. I thought it was funny at first, but with the main gear already mounted on the wing, the nose gear must be in place so that the Twinstar is sitting on three wheels and the tail surfaces can be aligned with the wing. Attaching the nose gear to the firewall only takes a minute because the mounting holes are predrilled and the T-nuts are preinstalled.
After attaching the nose wheel, the horizontal stabilizer and vertical fin can be attached. A bit of MonoKote needs to be trimmed to allow good wood-to-wood bonds. Some 15-minute epoxy locks everything in place. The fin has a tab on its bottom surface that fits into a socket in the middle of the stabilizer. This locks them both in place and everything aligns without any additional trimming or shimming on my part.
Next, everything is installed for the rudder and elevator control. Preinstalled tubes in the fuselage act as guides for the pushrods. This makes lining up the servos simple. They are then mounted to the preinstalled laser-cut radio tray.
Finishing the radio installation is simply a matter of attaching the clevises and control horns for the tail surfaces then running the pushrod through the forward part of the fuselage for the steerable nose gear. Plug everything into the receiver and attach it to the side with some of the supplied hook-and-loop tape.
Only a few steps remain to complete the Twinstar’s assembly. One is to attach the nose cone. A notch needs to be marked then cut into the bottom of it so it will clear the nose gear. When you are satisfied with the clearance, the nose cone can either be glued in place or held on with a couple of strips of clear tape. I chose the latter.
A large sheet of pressure-sensitive stickers is included, leaving it up to the builder as to how realistic the Twinstar should look. Applying them gave my Twinstar a Cessna 310-like look.
After everything was in place, it was time to check the center of gravity (CG). I popped open the magnetic hatch, strapped the supplied FlightPower 3S 3,800 mAh LiPo battery pack in position, and was pleased to find that it was nearly spot on. Moving the pack slightly gave me exactly the right balance. The all-up weight came in at 3¾ pounds—roughly ½ pound lighter than called for in the manual.
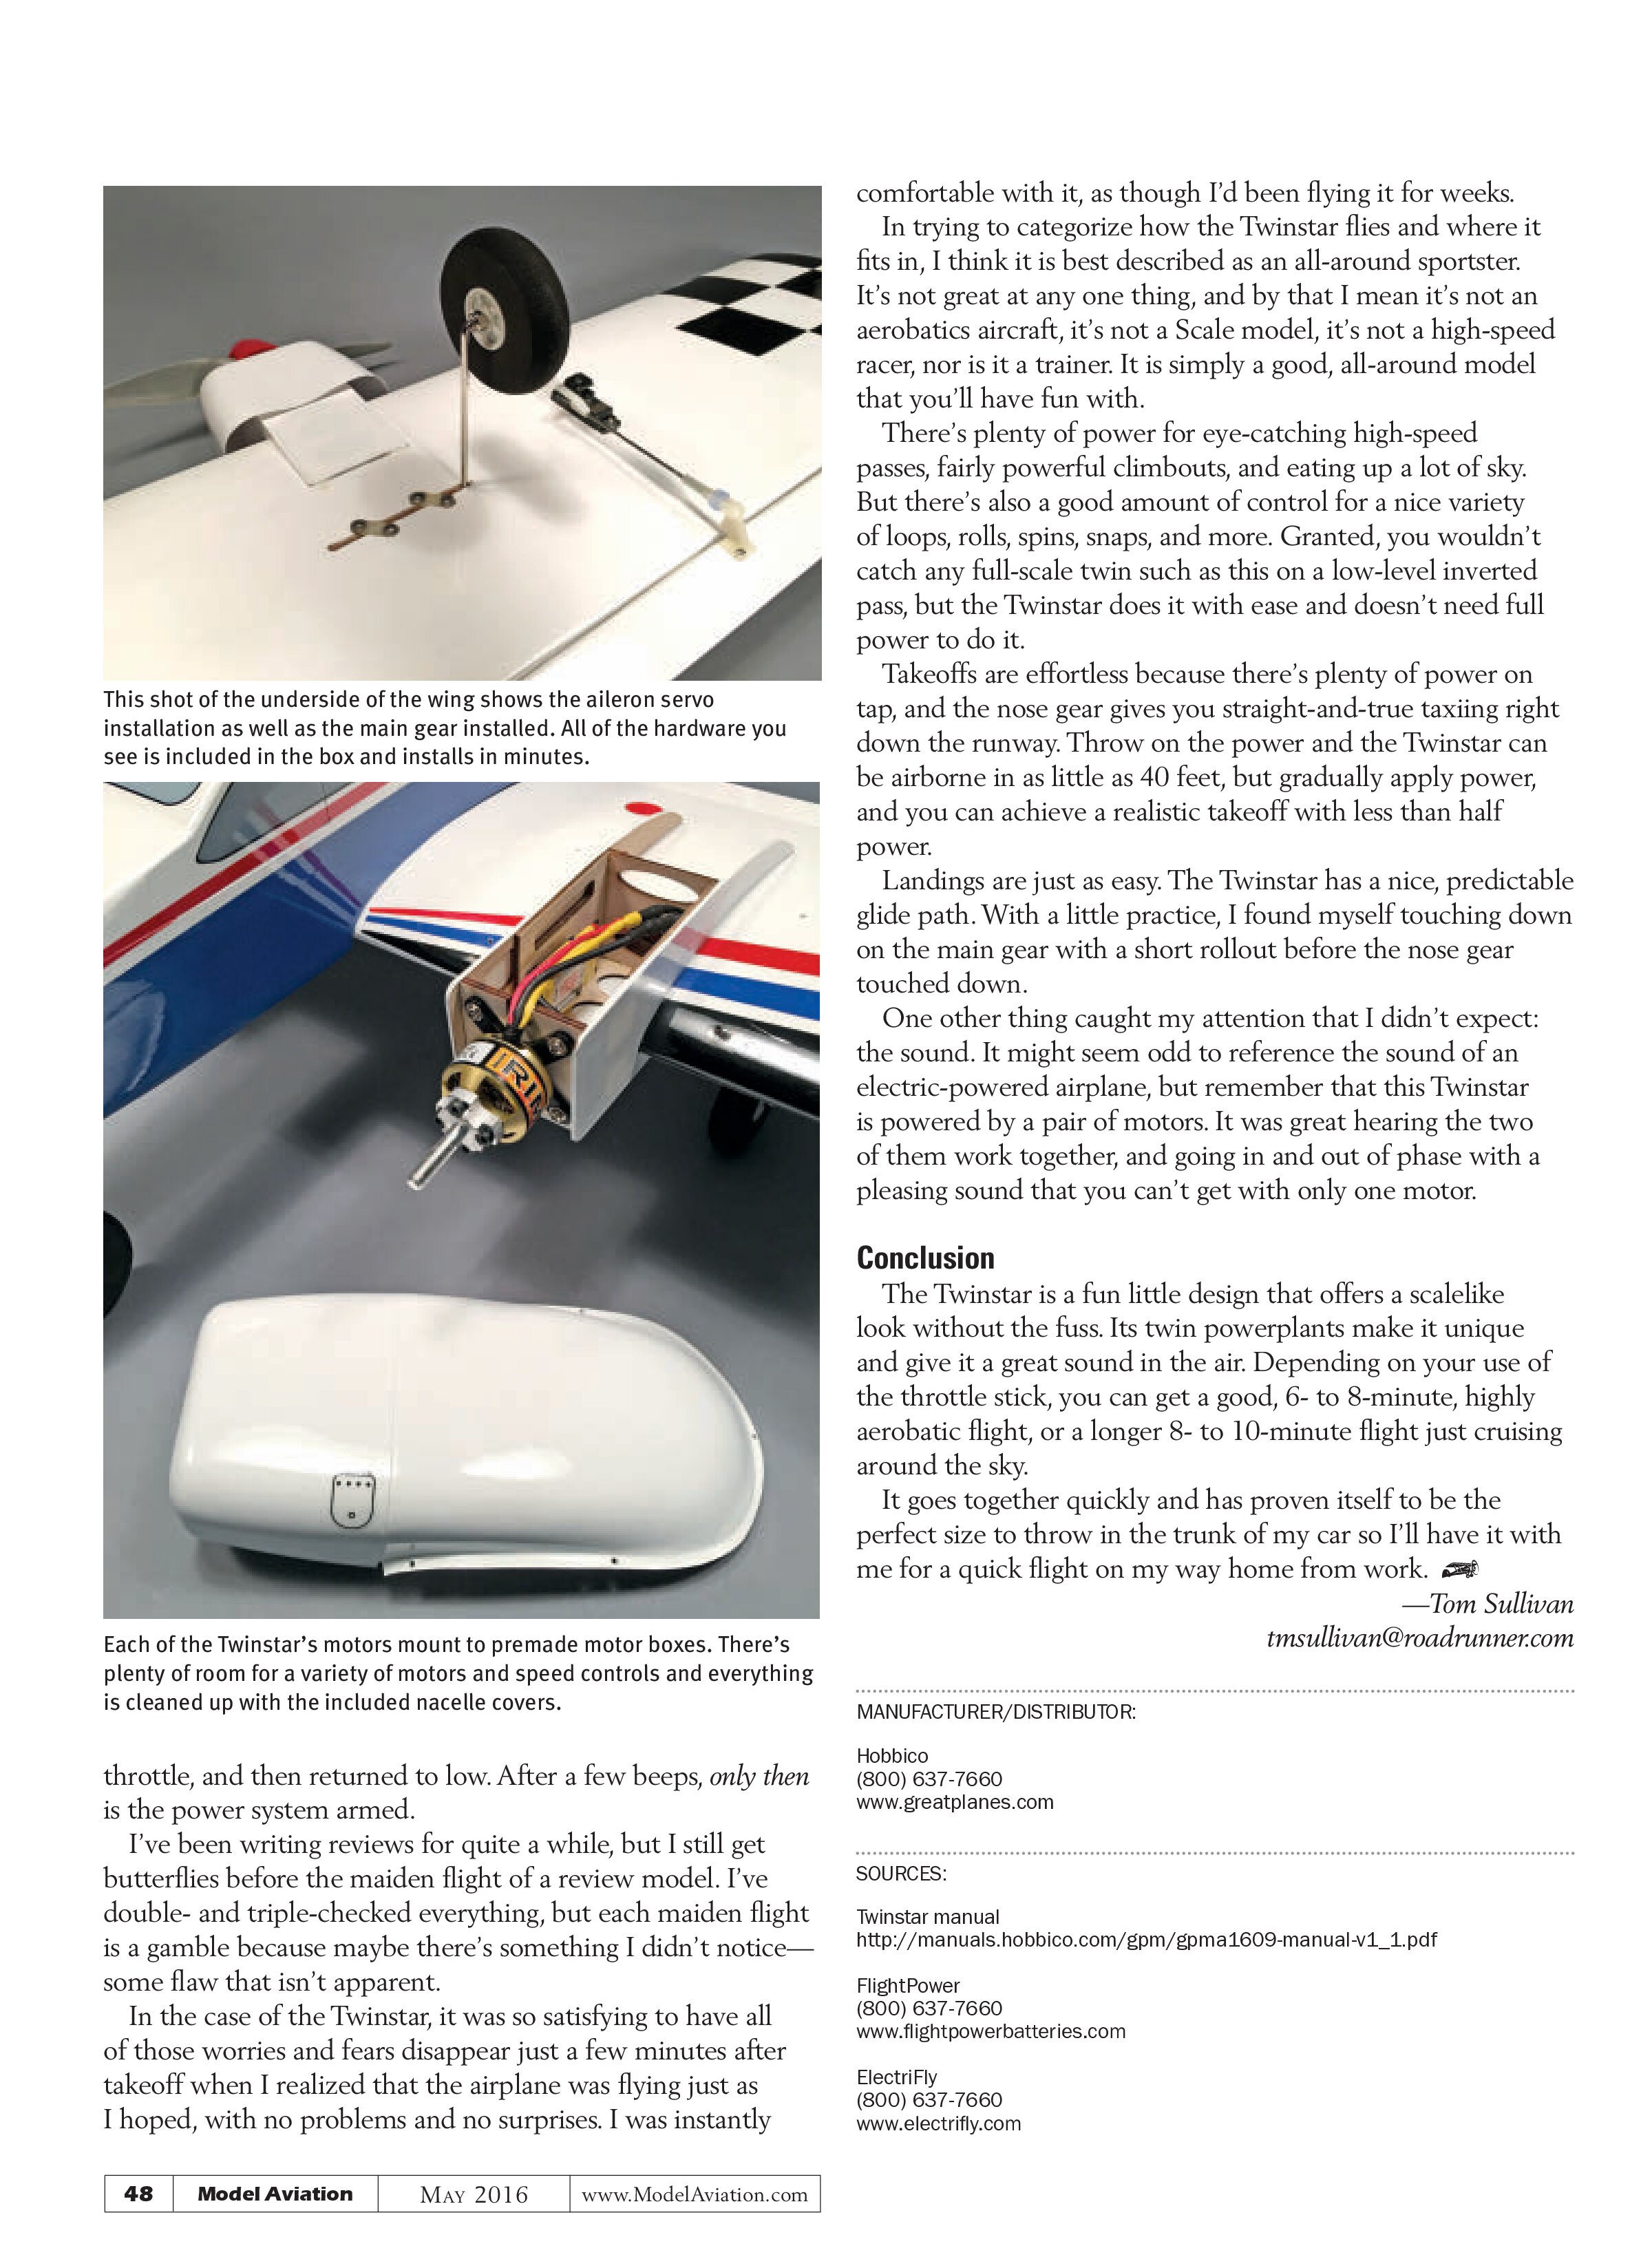
Before I get to the flying portion, there’s one restriction I wanted to overcome that limits the physical size of the battery that can be used. As supplied, the Twinstar’s hatch allows you to use only a 1-inch or thinner battery. Anything thicker than that will not allow the hatch to properly seat. That’s fine if you use FlightPower or similar batteries, but I have a number of 3S 4,200 packs from another manufacturer that are thicker.
The source of the problem is the bottom crossbrace at the rear of the hatch. It must be moved—well, replaced is a better description. To make this modification, trim a spare piece of 1/16-inch balsa sheet to 3 inches long. (I used a 1/2-inch-wide strip.) Glue this piece across the back bracing, roughly 3/8 inch up from the crossbraces. After the glue cures, use a hobby knife or saw to cut away the original as shown. This will give you extra clearance for a wider range of batteries.
I don’t recommend trying to wedge 4S or larger packs in by using this modification. They aren’t needed and could burn out the ESC and motors, not to mention cause a CG balance problem.

Modifying the hatch to install other sizes of batteries requires cutting a spare piece of balsa to width. See the text for details.

After gluing the spare balsa piece in position, cut away the crossbrace as shown. See the text for details.
Flying
If you’ve read any of my previous reviews about electric-powered models, I’m all about using arming switches to protect my fingers! There are no provisions for an arming switch in the Twinstar; however, if you use the power setup I used in this review model (specifically the ElectriFly ESCs), these speed controls have an electric arming sequence. Before the propellers will move at all, the throttle stick must be moved to low then advanced to high.
AT A GLANCE ...
SPECIFICATIONS
Model type: Sport ARF
Skill level: Intermediate
Wingspan: 47.5 inches
Wing area: 392 square inches
Airfoil: Semisymmetrical
Length: 42.5 inches
Weight: 4 to 4.25 pounds recommended
Power system: Two RimFire .10 brushless motors; two 25-amp brushless ESCs; 3S 3,800 mAh LiPo battery
Radio: Minimum four-channel transmitter and receiver; four micro servos
Street price: $139.98
TEST-MODEL DETAILS
Radio system: Tactic TTX850 transmitter; Tactic TR625 receiver; four S3115 Futaba servos; two Futaba Y harnesses; and two 12-inch servo extensions
Power system used: Two RimFire .10 brushless motors; two 25-amp brushless ESCs; 3S 3,800 mAh LiPo battery
Flying weight: 3.75 pounds
Flight duration: 6 to 10 minutes
PLUSES
- Laser-cut balsa and plywood used for construction.
- Includes all control hardware, wheels, and fiberglass wheel pants and cowl.
- Airframe comes precovered with MonoKote iron-on film.
- Vacuum-formed nose is painted to match the covering.
- Firewalls are predrilled for the RimFire motors and include preinstalled T-nuts.
- The front “cockpit” area is a removable hatch held in place with magnets, allowing quick access to swap out battery packs.
- It can go from the box to ready-to-fly in roughly 5 hours.
MINUS
- The design limits the physical size of batteries that can be used. I’ve outlined a quick, easy modification that forgoes this limit.


This shot of the underside of the wing shows the aileron servo installation as well as the main gear installed. All of the hardware you see is included in the box and installs in minutes.
Each of the Twinstar’s motors mount to premade motor boxes. There’s plenty of room for a variety of motors and speed controls and everything is cleaned up with the included nacelle covers.
throttle, and then returned to low. After a few beeps, only then is the power system armed.
I’ve been writing reviews for quite a while, but I still get butterflies before the maiden flight of a review model. I’ve double- and triple-checked everything, but each maiden flight is a gamble because maybe there’s something I didn’t notice—some flaw that isn’t apparent.
In the case of the Twinstar, it was so satisfying to have all of those worries and fears disappear just a few minutes after takeoff when I realized that the airplane was flying just as I hoped, with no problems and no surprises. I was instantly comfortable with it, as though I’d been flying it for weeks.
In trying to categorize how the Twinstar flies and where it fits in, I think it is best described as an all-around sportster. It’s not great at any one thing, and by that I mean it’s not an aerobatics aircraft, it’s not a Scale model, it’s not a high-speed racer, nor is it a trainer. It is simply a good, all-around model that you’ll have fun with.
There’s plenty of power for eye-catching high-speed passes, fairly powerful climbouts, and eating up a lot of sky. But there’s also a good amount of control for a nice variety of loops, rolls, spins, snaps, and more. Granted, you wouldn’t catch any full-scale twin such as this on a low-level inverted pass, but the Twinstar does it with ease and doesn’t need full power to do it.
Takeoffs are effortless because there’s plenty of power on tap, and the nose gear gives you straight-and-true taxiing right down the runway. Throw on the power and the Twinstar can be airborne in as little as 40 feet, but gradually apply power, and you can achieve a realistic takeoff with less than half power.
Landings are just as easy. The Twinstar has a nice, predictable glide path. With a little practice, I found myself touching down on the main gear with a short rollout before the nose gear touched down.
One other thing caught my attention that I didn’t expect: the sound. It might seem odd to reference the sound of an electric-powered airplane, but remember that this Twinstar is powered by a pair of motors. It was great hearing the two of them work together, and going in and out of phase with a pleasing sound that you can’t get with only one motor.
Conclusion
The Twinstar is a fun little design that offers a scalelike look without the fuss. Its twin powerplants make it unique and give it a great sound in the air. Depending on your use of the throttle stick, you can get a good, 6- to 8-minute, highly aerobatic flight, or a longer 8- to 10-minute flight just cruising around the sky.
It goes together quickly and has proven itself to be the perfect size to throw in the trunk of my car so I’ll have it with me for a quick flight on my way home from work.
—Tom Sullivan
tmsullivan@roadrunner.com
MANUFACTURER/DISTRIBUTOR:
Hobbico
(800) 637-7660
www.greatplanes.com
SOURCES:
Twinstar manual
http://manuals.hobbico.com/gpm/gpma1609-manual-v1_1.pdf
FlightPower
(800) 637-7660
www.flightpowerbatteries.com
ElectriFly
(800) 637-7660
www.electrifly.com