Beginner FF model is fun for the whole family
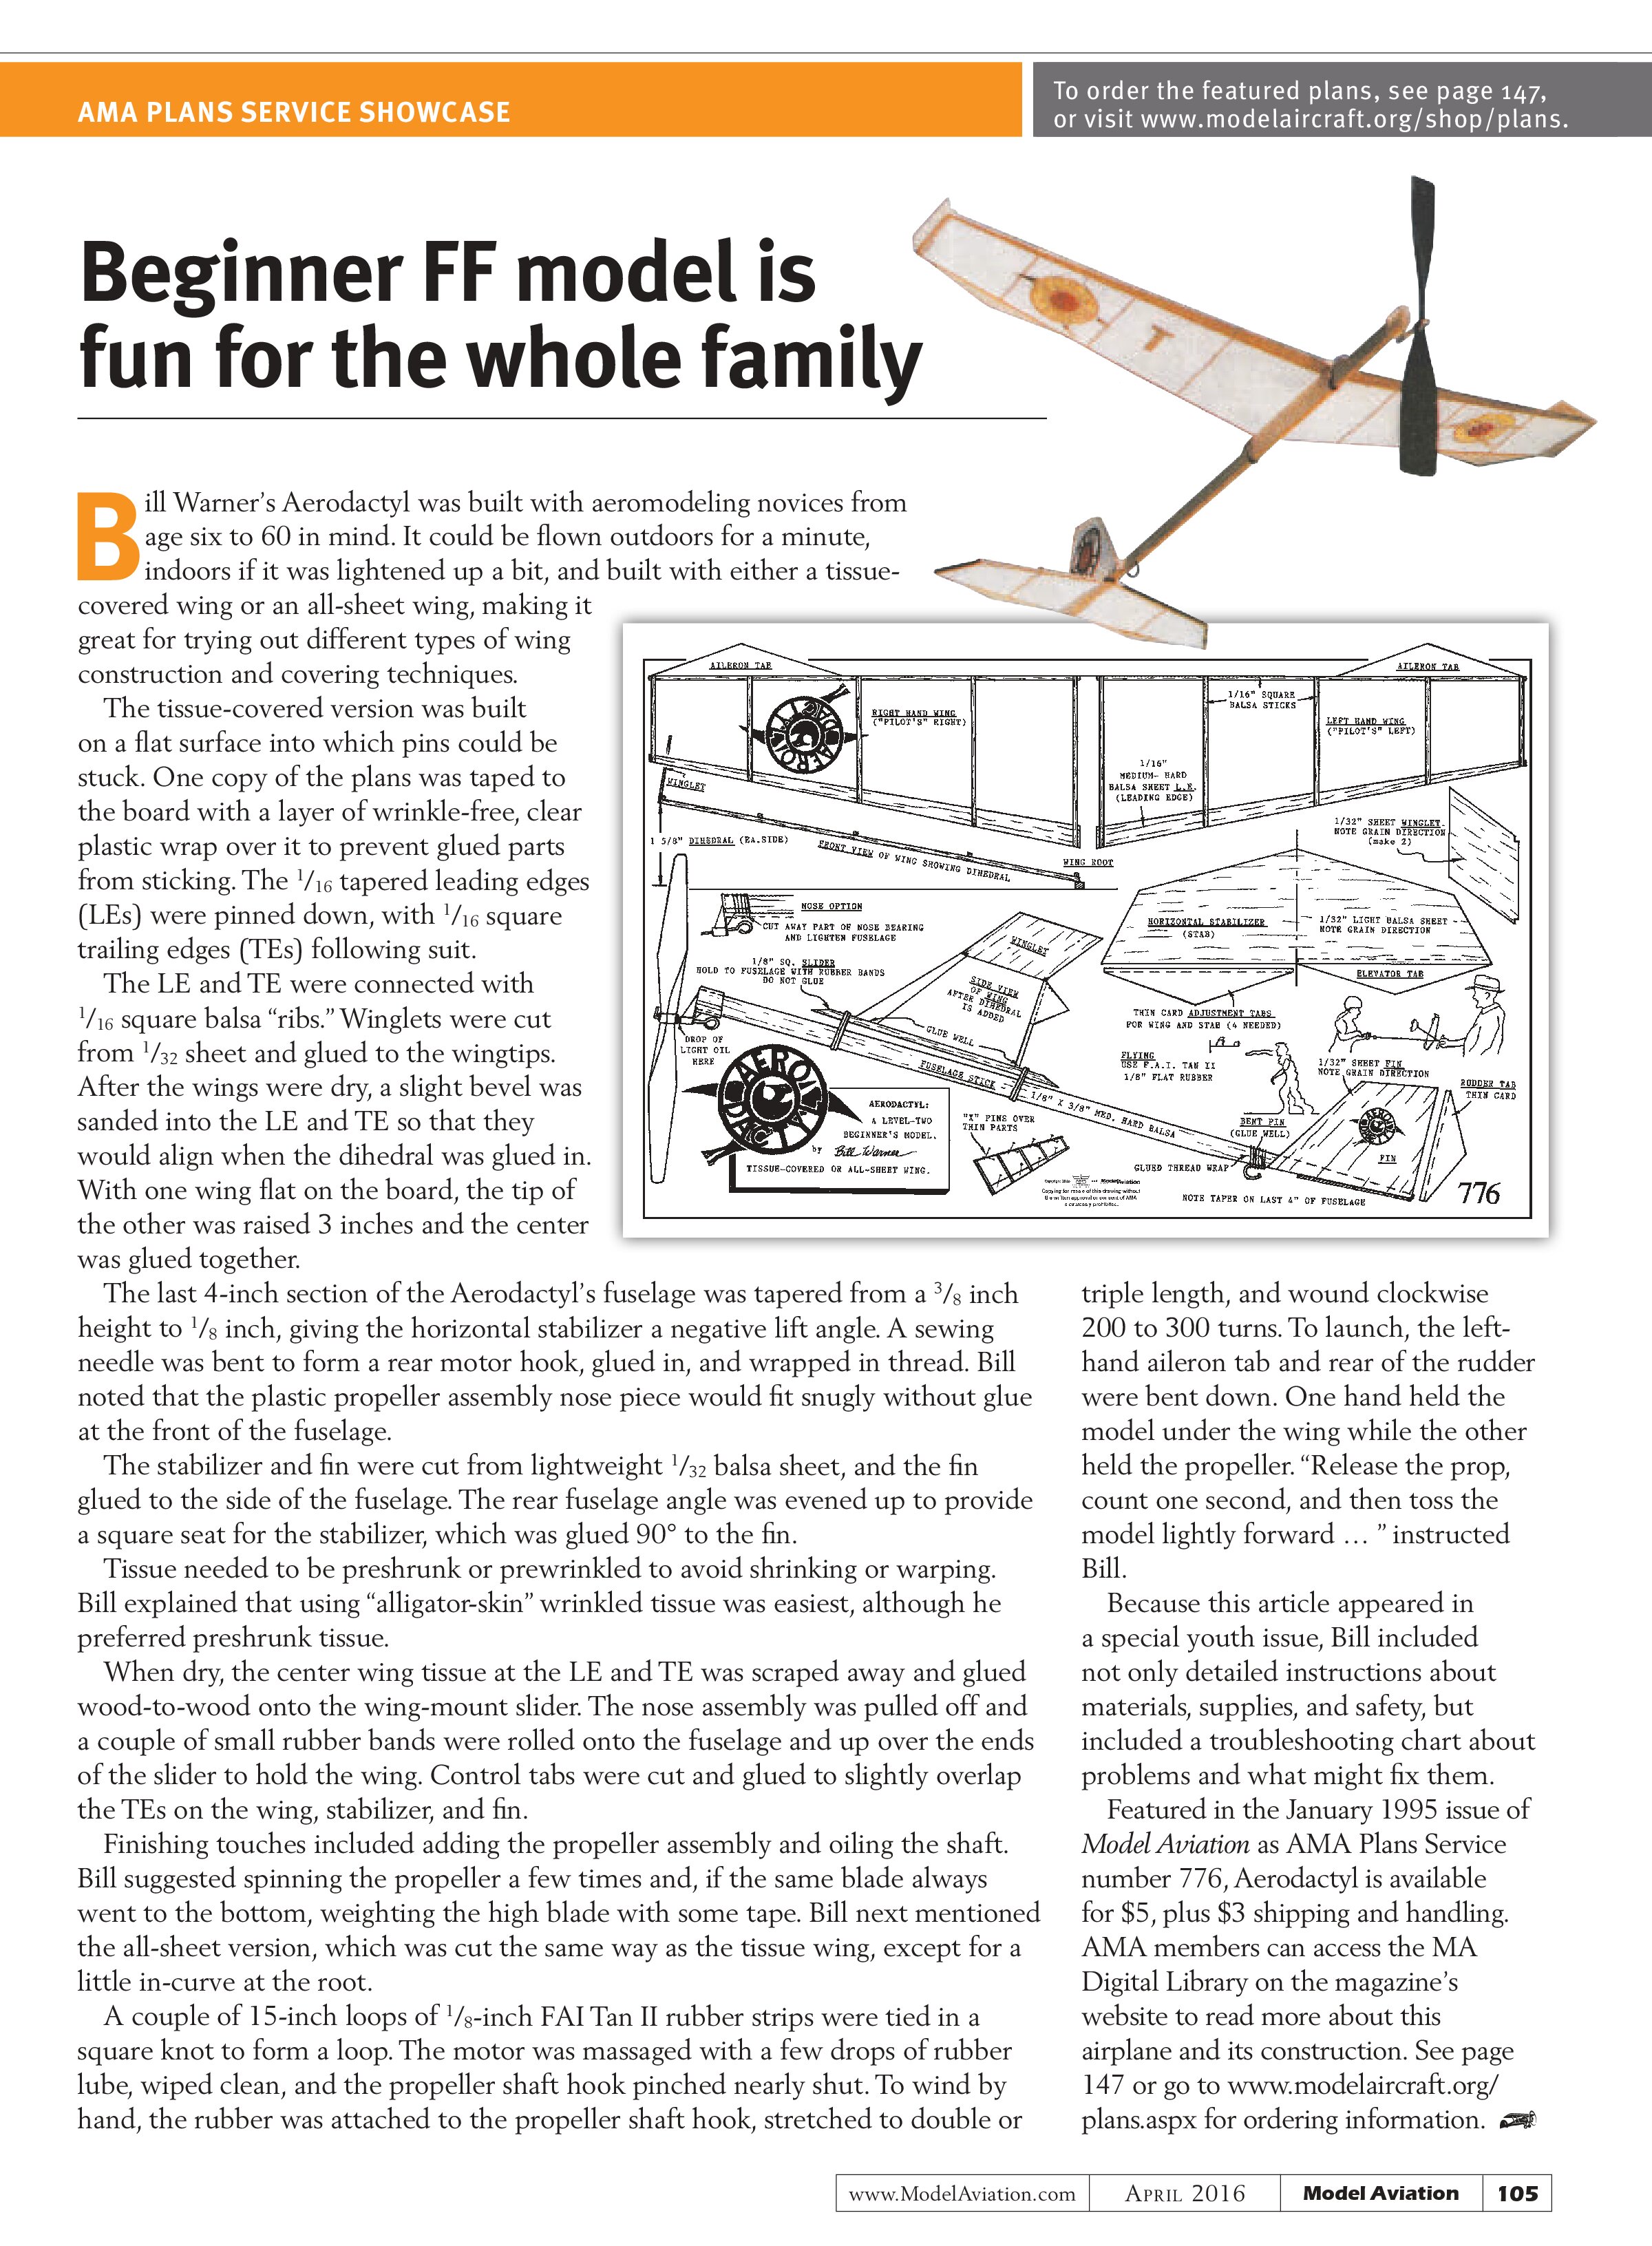
Bill Warner’s Aerodactyl was built with aeromodeling novices from age six to 60 in mind. It could be flown outdoors for a minute, indoors if it was lightened up a bit, and built with either a tissue-covered wing or an all-sheet wing, making it great for trying out different types of wing construction and covering techniques.
The tissue-covered version was built on a flat surface into which pins could be stuck. One copy of the plans was taped to the board with a layer of wrinkle-free, clear plastic wrap over it to prevent glued parts from sticking. The ¹⁄₁₆ tapered leading edges (LEs) were pinned down, with ¹⁄₁₆ square trailing edges (TEs) following suit.
The LE and TE were connected with ¹⁄₁₆ square balsa “ribs.” Winglets were cut from ¹⁄₃₂ sheet and glued to the wingtips. After the wings were dry, a slight bevel was sanded into the LE and TE so that they would align when the dihedral was glued in. With one wing flat on the board, the tip of the other was raised 3 inches and the center was glued together.


The last 4-inch section of the Aerodactyl’s fuselage was tapered from a ³⁄₈ inch height to ¹⁄₈ inch, giving the horizontal stabilizer a negative lift angle. A sewing needle was bent to form a rear motor hook, glued in, and wrapped in thread. Bill noted that the plastic propeller assembly nose piece would fit snugly without glue at the front of the fuselage.
The stabilizer and fin were cut from lightweight ¹⁄₃₂ balsa sheet, and the fin glued to the side of the fuselage. The rear fuselage angle was evened up to provide a square seat for the stabilizer, which was glued 90° to the fin.
Tissue needed to be preshrunk or prewrinkled to avoid shrinking or warping. Bill explained that using “alligator-skin” wrinkled tissue was easiest, although he preferred preshrunk tissue.
When dry, the center wing tissue at the LE and TE was scraped away and glued wood-to-wood onto the wing-mount slider. The nose assembly was pulled off and a couple of small rubber bands were rolled onto the fuselage and up over the ends of the slider to hold the wing. Control tabs were cut and glued to slightly overlap the TEs on the wing, stabilizer, and fin.
Finishing touches included adding the propeller assembly and oiling the shaft. Bill suggested spinning the propeller a few times and, if the same blade always went to the bottom, weighting the high blade with some tape. Bill next mentioned the all-sheet version, which was cut the same way as the tissue wing, except for a little in-curve at the root.
A couple of 15-inch loops of ¹⁄₈-inch FAI Tan II rubber strips were tied in a square knot to form a loop. The motor was massaged with a few drops of rubber lube, wiped clean, and the propeller shaft hook pinched nearly shut. To wind by hand, the rubber was attached to the propeller shaft hook, stretched to double or triple length, and wound clockwise 200 to 300 turns. To launch, the left-hand aileron tab and rear of the rudder were bent down. One hand held the model under the wing while the other held the propeller. “Release the prop, count one second, and then toss the model lightly forward . . .” instructed Bill.
Because this article appeared in a special youth issue, Bill included not only detailed instructions about materials, supplies, and safety, but included a troubleshooting chart about problems and what might fix them.
Featured in the January 1995 issue of Model Aviation as AMA Plans Service number 776, Aerodactyl is available for $5, plus $3 shipping and handling. AMA members can access the MA Digital Library on the magazine’s website to read more about this airplane and its construction. See page 147 or go to www.modelaircraft.org/plans.aspx for ordering information.