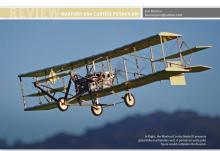
MAXFORD USA CURTISS PUSHER ARF
Jon Barnes
barnesjonr@yahoo.com

What do the Rumpler Taube, the Blériot XI, and the Curtiss Model D all have in common? All three airplanes harken to the infancy of fixed-wing aviation. They each made their first flights shortly after the start of the 20th century (1909-1911). This, however, is not the only thing that united these three vintage aircraft. More relevant to the readers of this magazine is that all are available as RC models from Maxford USA.
I had the pleasure of shooting photos and videos of the Maxford Blériot XI for Robb Wilson when he reviewed it for the July 2014 issue of Model Aviation. The Blériot was gorgeous in flight and seeing it gracefully float across the sky stirred within me a desire to build and fly my own model of a historically significant airplane from the early days of aviation.
Although many mainstream model manufacturers focus on creating new versions of commonly modeled airplanes, Maxford USA has earned a reputation for offering a stimulating variety of ARF kits based on infrequently modeled and vintage airplanes. I was interested to see Maxford announce the release of its 1/9-scale 1911 Curtiss Model D and I eagerly agreed to review the kit.
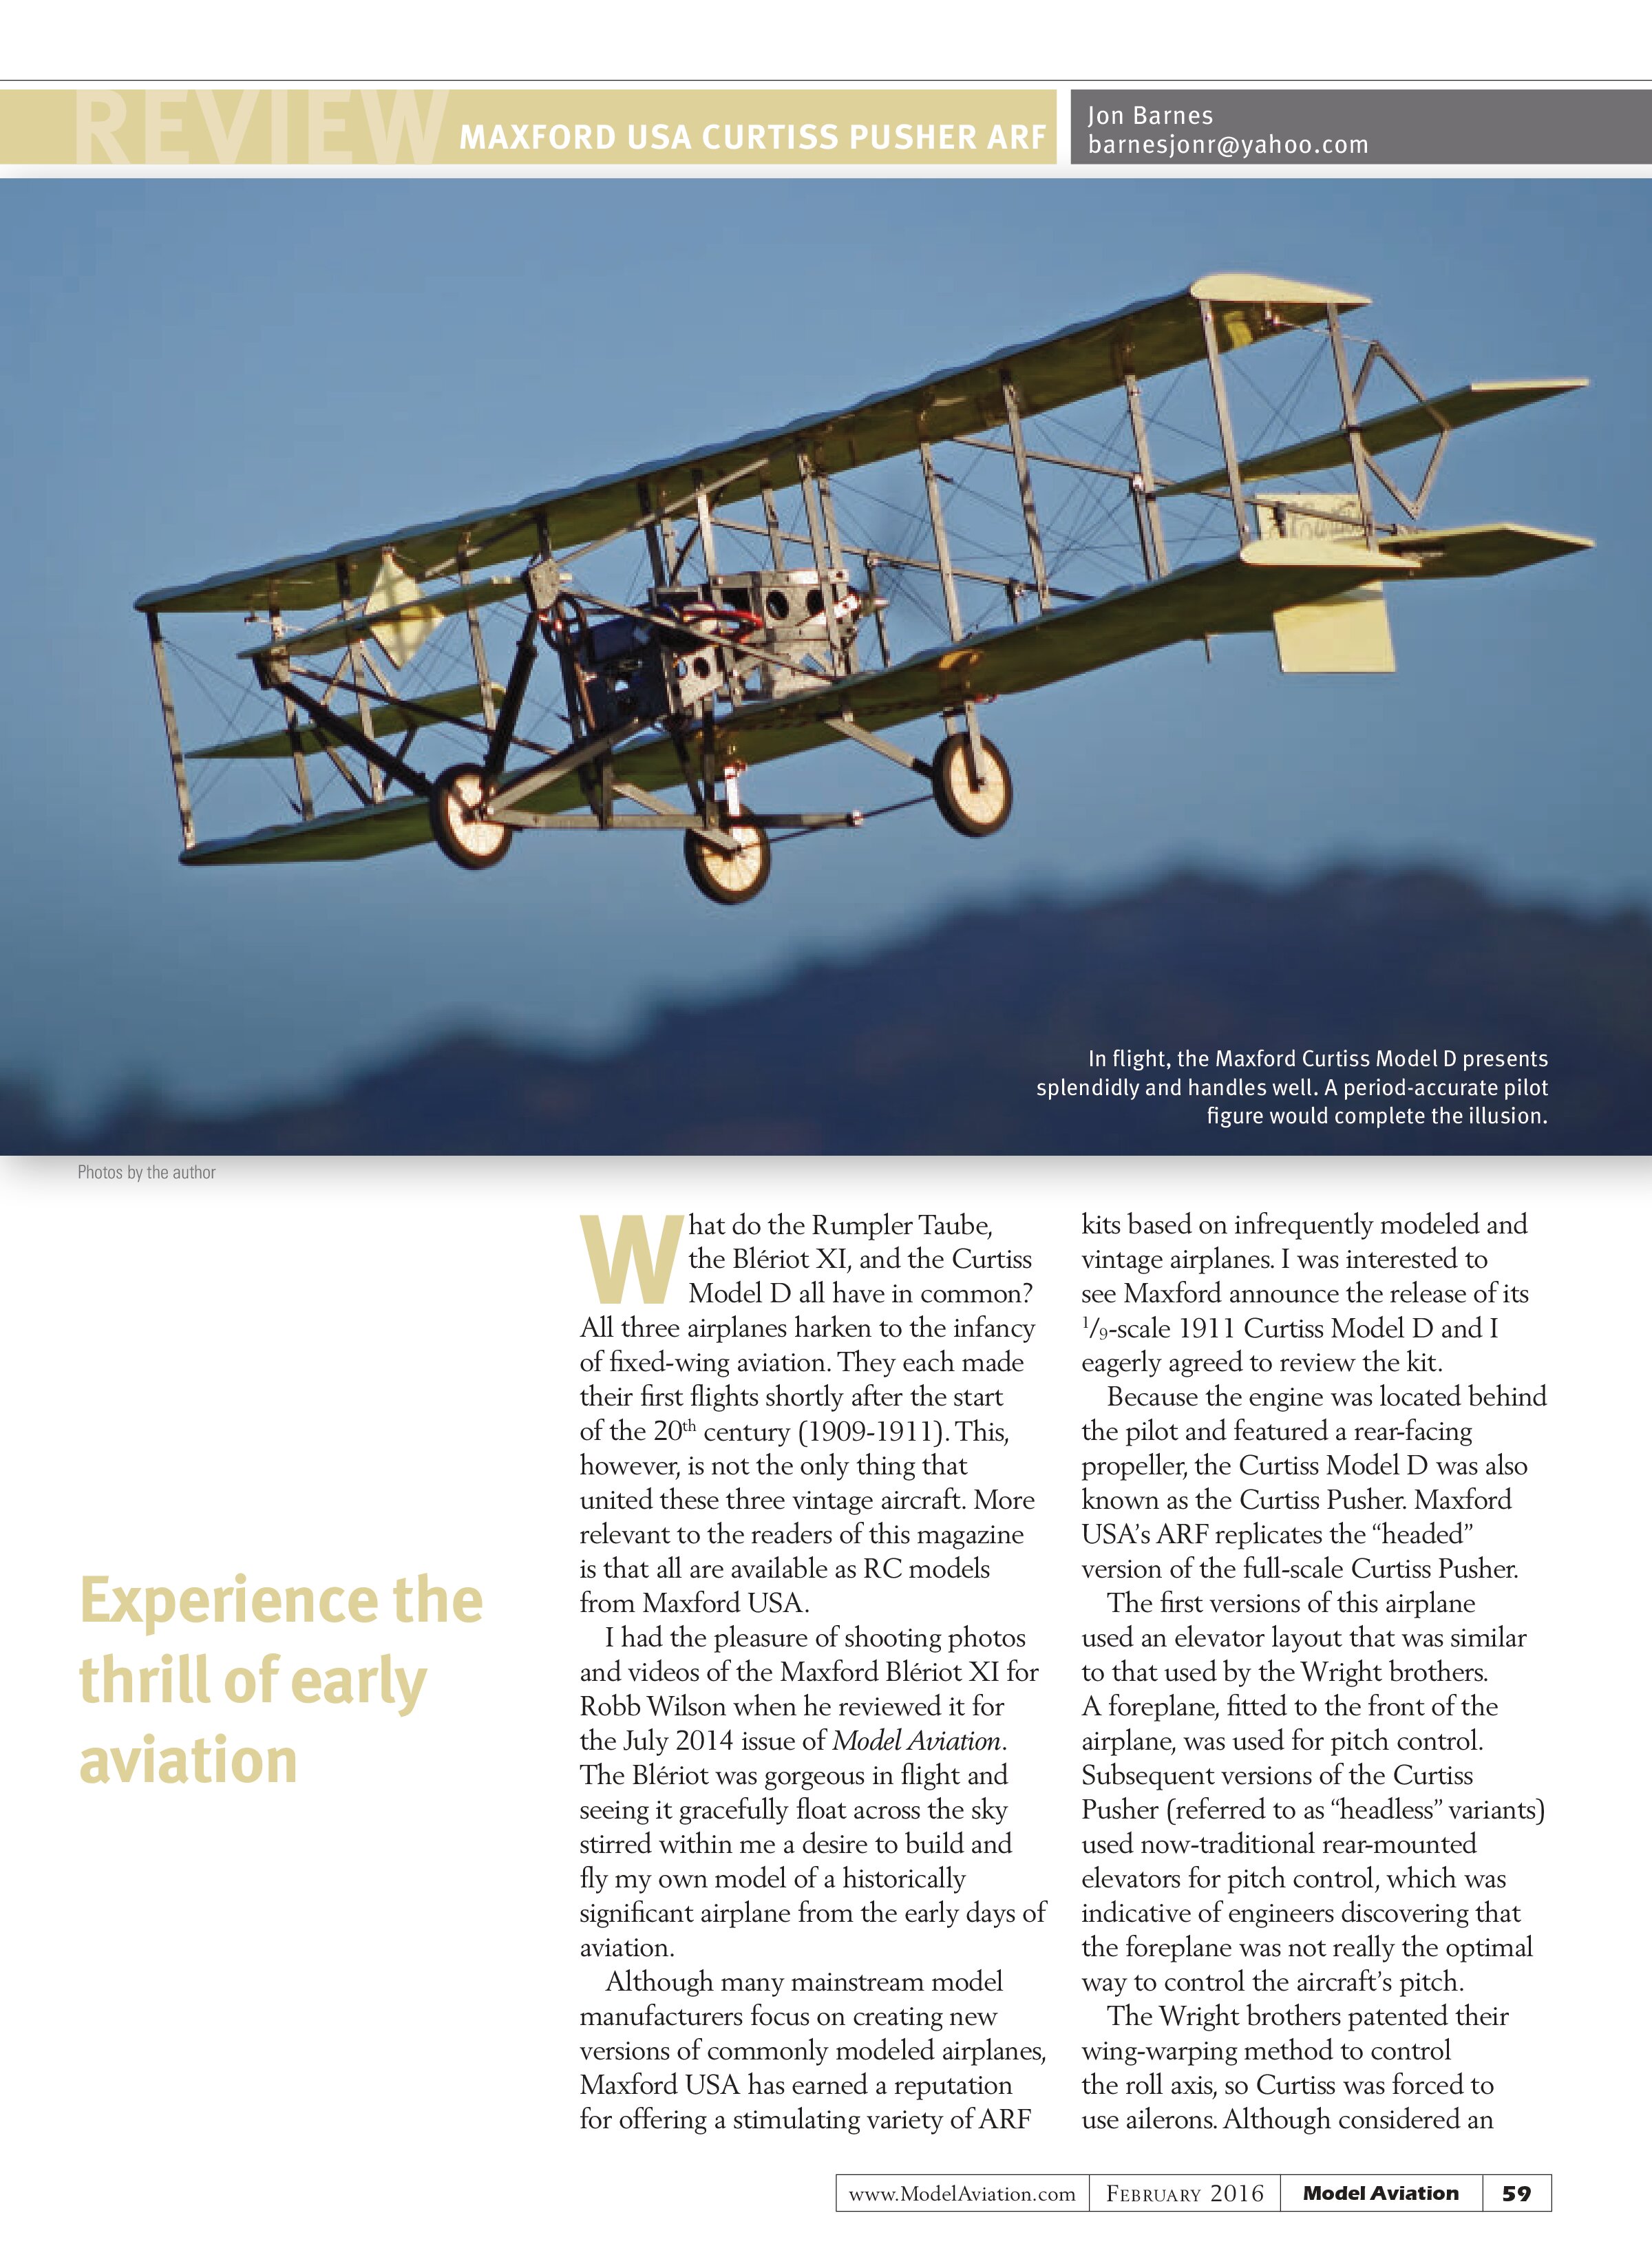
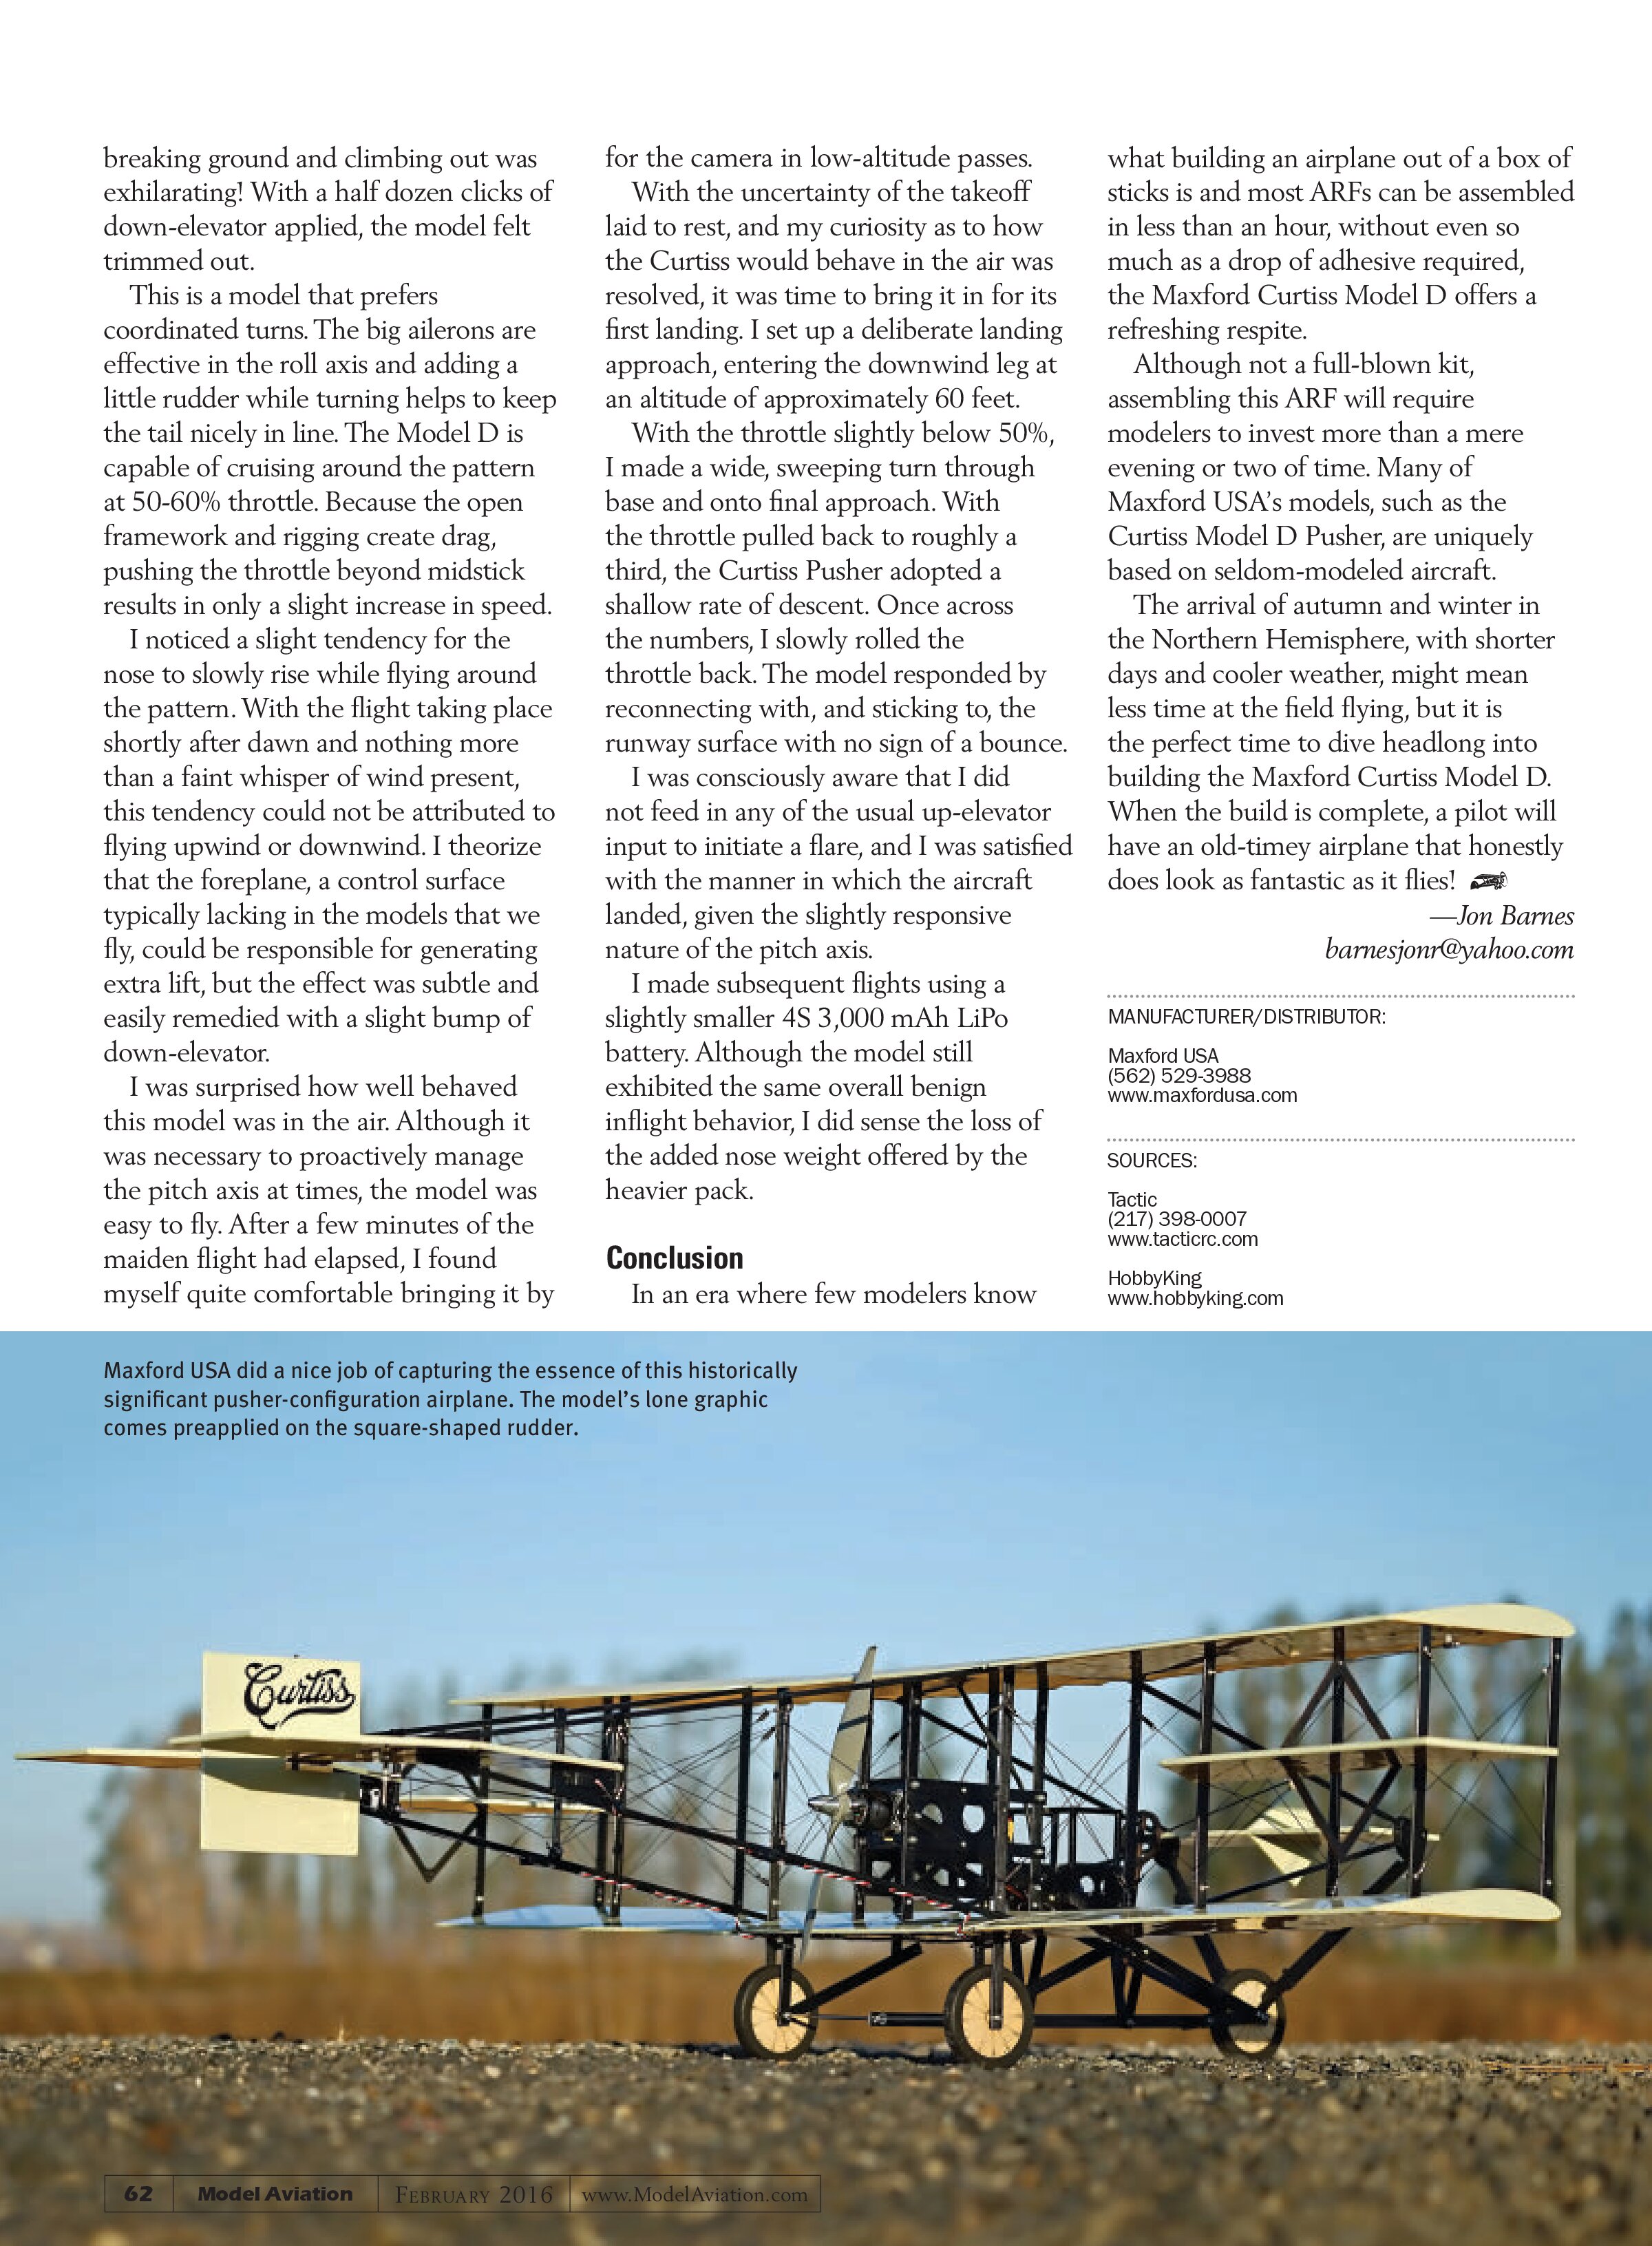
Because the engine was located behind the pilot and featured a rear-facing propeller, the Curtiss Model D was also known as the Curtiss Pusher. Maxford USA’s ARF replicates the “headed” version of the full-scale Curtiss Pusher.
The first versions of this airplane used an elevator layout that was similar to that used by the Wright brothers. A foreplane, fitted to the front of the airplane, was used for pitch control. Subsequent versions of the Curtiss Pusher (referred to as “headless” variants) used now-traditional rear-mounted elevators for pitch control, which was indicative of engineers discovering that the foreplane was not really the optimal way to control the aircraft’s pitch.
The Wright brothers patented their wing-warping method to control the roll axis, so Curtiss was forced to use ailerons. Although considered an
alternate approach, the Model D’s use of ailerons proved to be a superior control method and endures to this day.
The Curtiss Model D was the first airplane to be built in any quantity and was also the first airplane to successfully conduct flight operations from a ship’s deck.
The full-scale Curtiss Model D was manufactured using spruce, ash, and bamboo; the Maxford ARF features traditional balsa, light plywood, and composite kit components.
The prebuilt airframe components are covered in a two-tone Mylar covering scheme. The upper side of the airplane is covered in a cream color, while the bottom side has a translucent yellow covering that shows off the airframe’s wooden skeleton and attempts to replicate the look of the full-scale airplane’s undercambered wings.
Maxford offers an appropriate size electric power system, along with several optional components that can enhance the aircraft’s scalelike appearance.
Construction
I could not have asked for a better time of year to take on a Maxford USA kit than October. With after-work daylight seriously on the wane, my evenings were primed and ready for assembling the Curtiss. The included black and white, photo-illustrated assembly manual is 22 pages in length and Maxford offers a color version on its website. The color and perceived higher resolution of the online PDF was a valuable resource during assembly. Many details became clearer after seeing them in color.
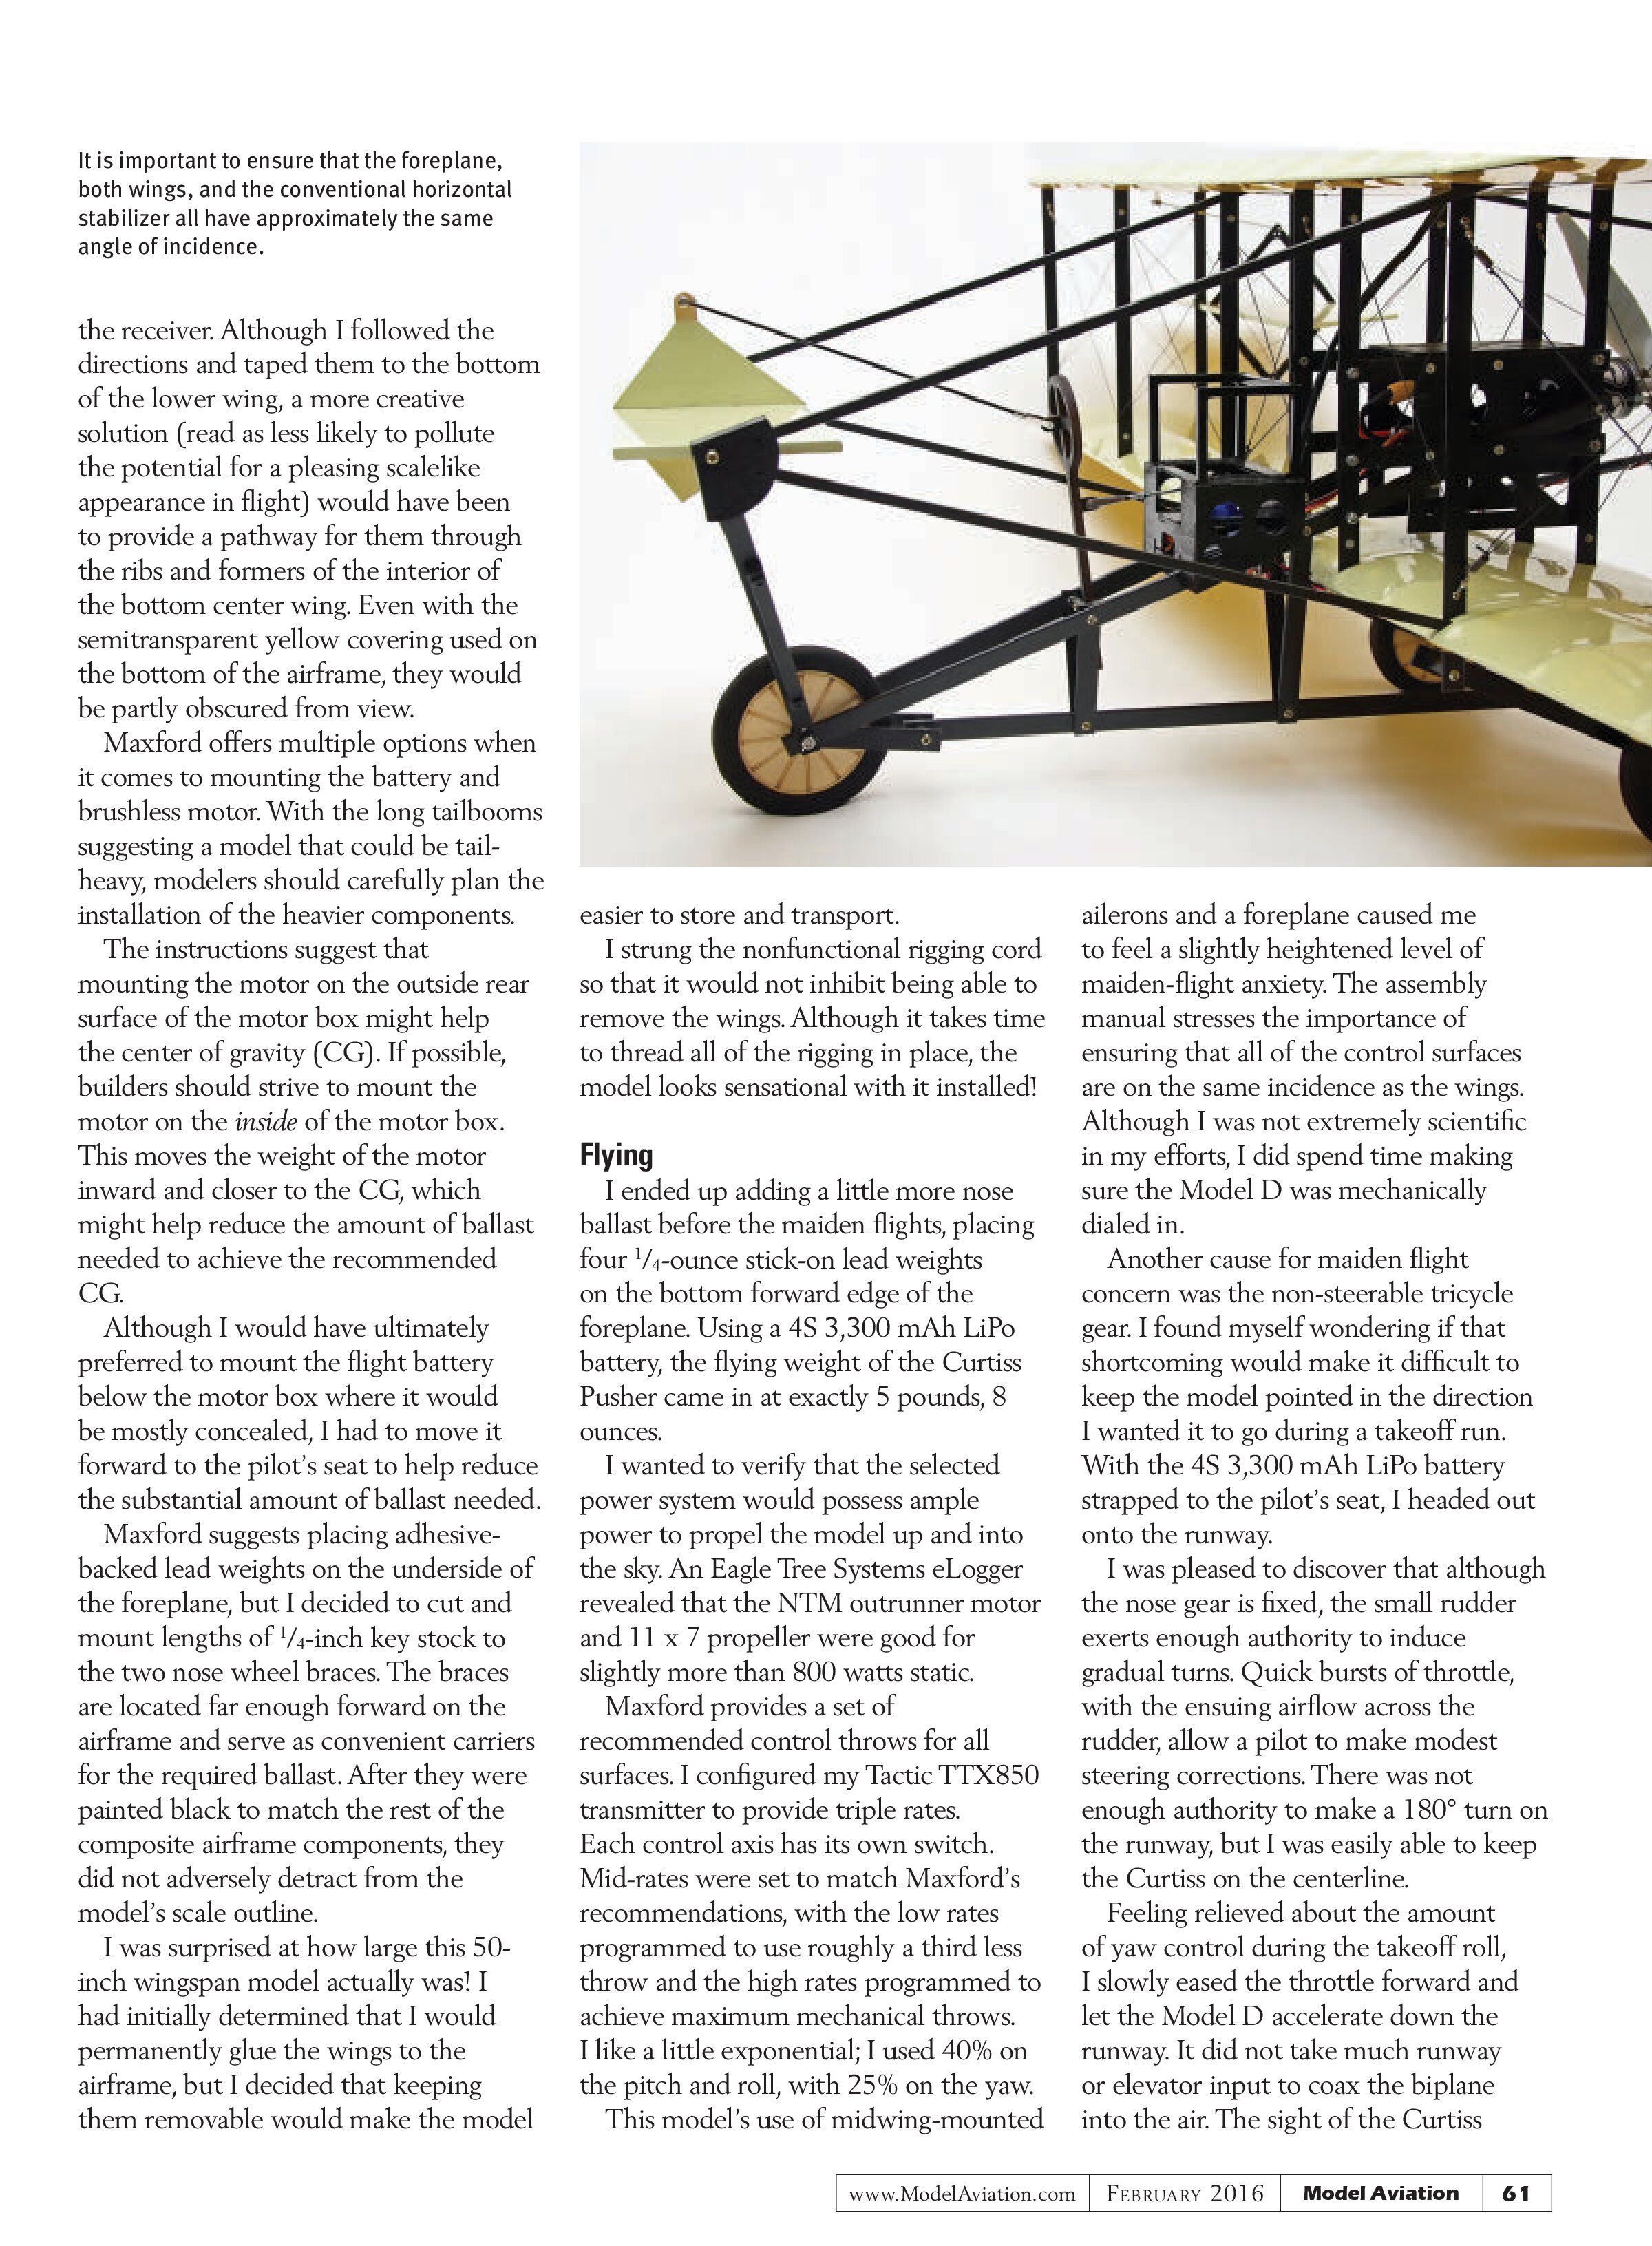
This vintage model involves a slightly more complex level of assembly than most ARF kits, partly because of the open framework design of the airframe and the need to ensure that the two wings and the twin horizontal stabilizers are built with the same incidence.
Anyone who possesses a little patience and is willing to take the extra time to check thrice and glue once should be able to successfully assemble this model.
Maxford includes a comprehensive set of fasteners and hardware in the kit. I often find myself digging through bowls and bins in search of a missing screw

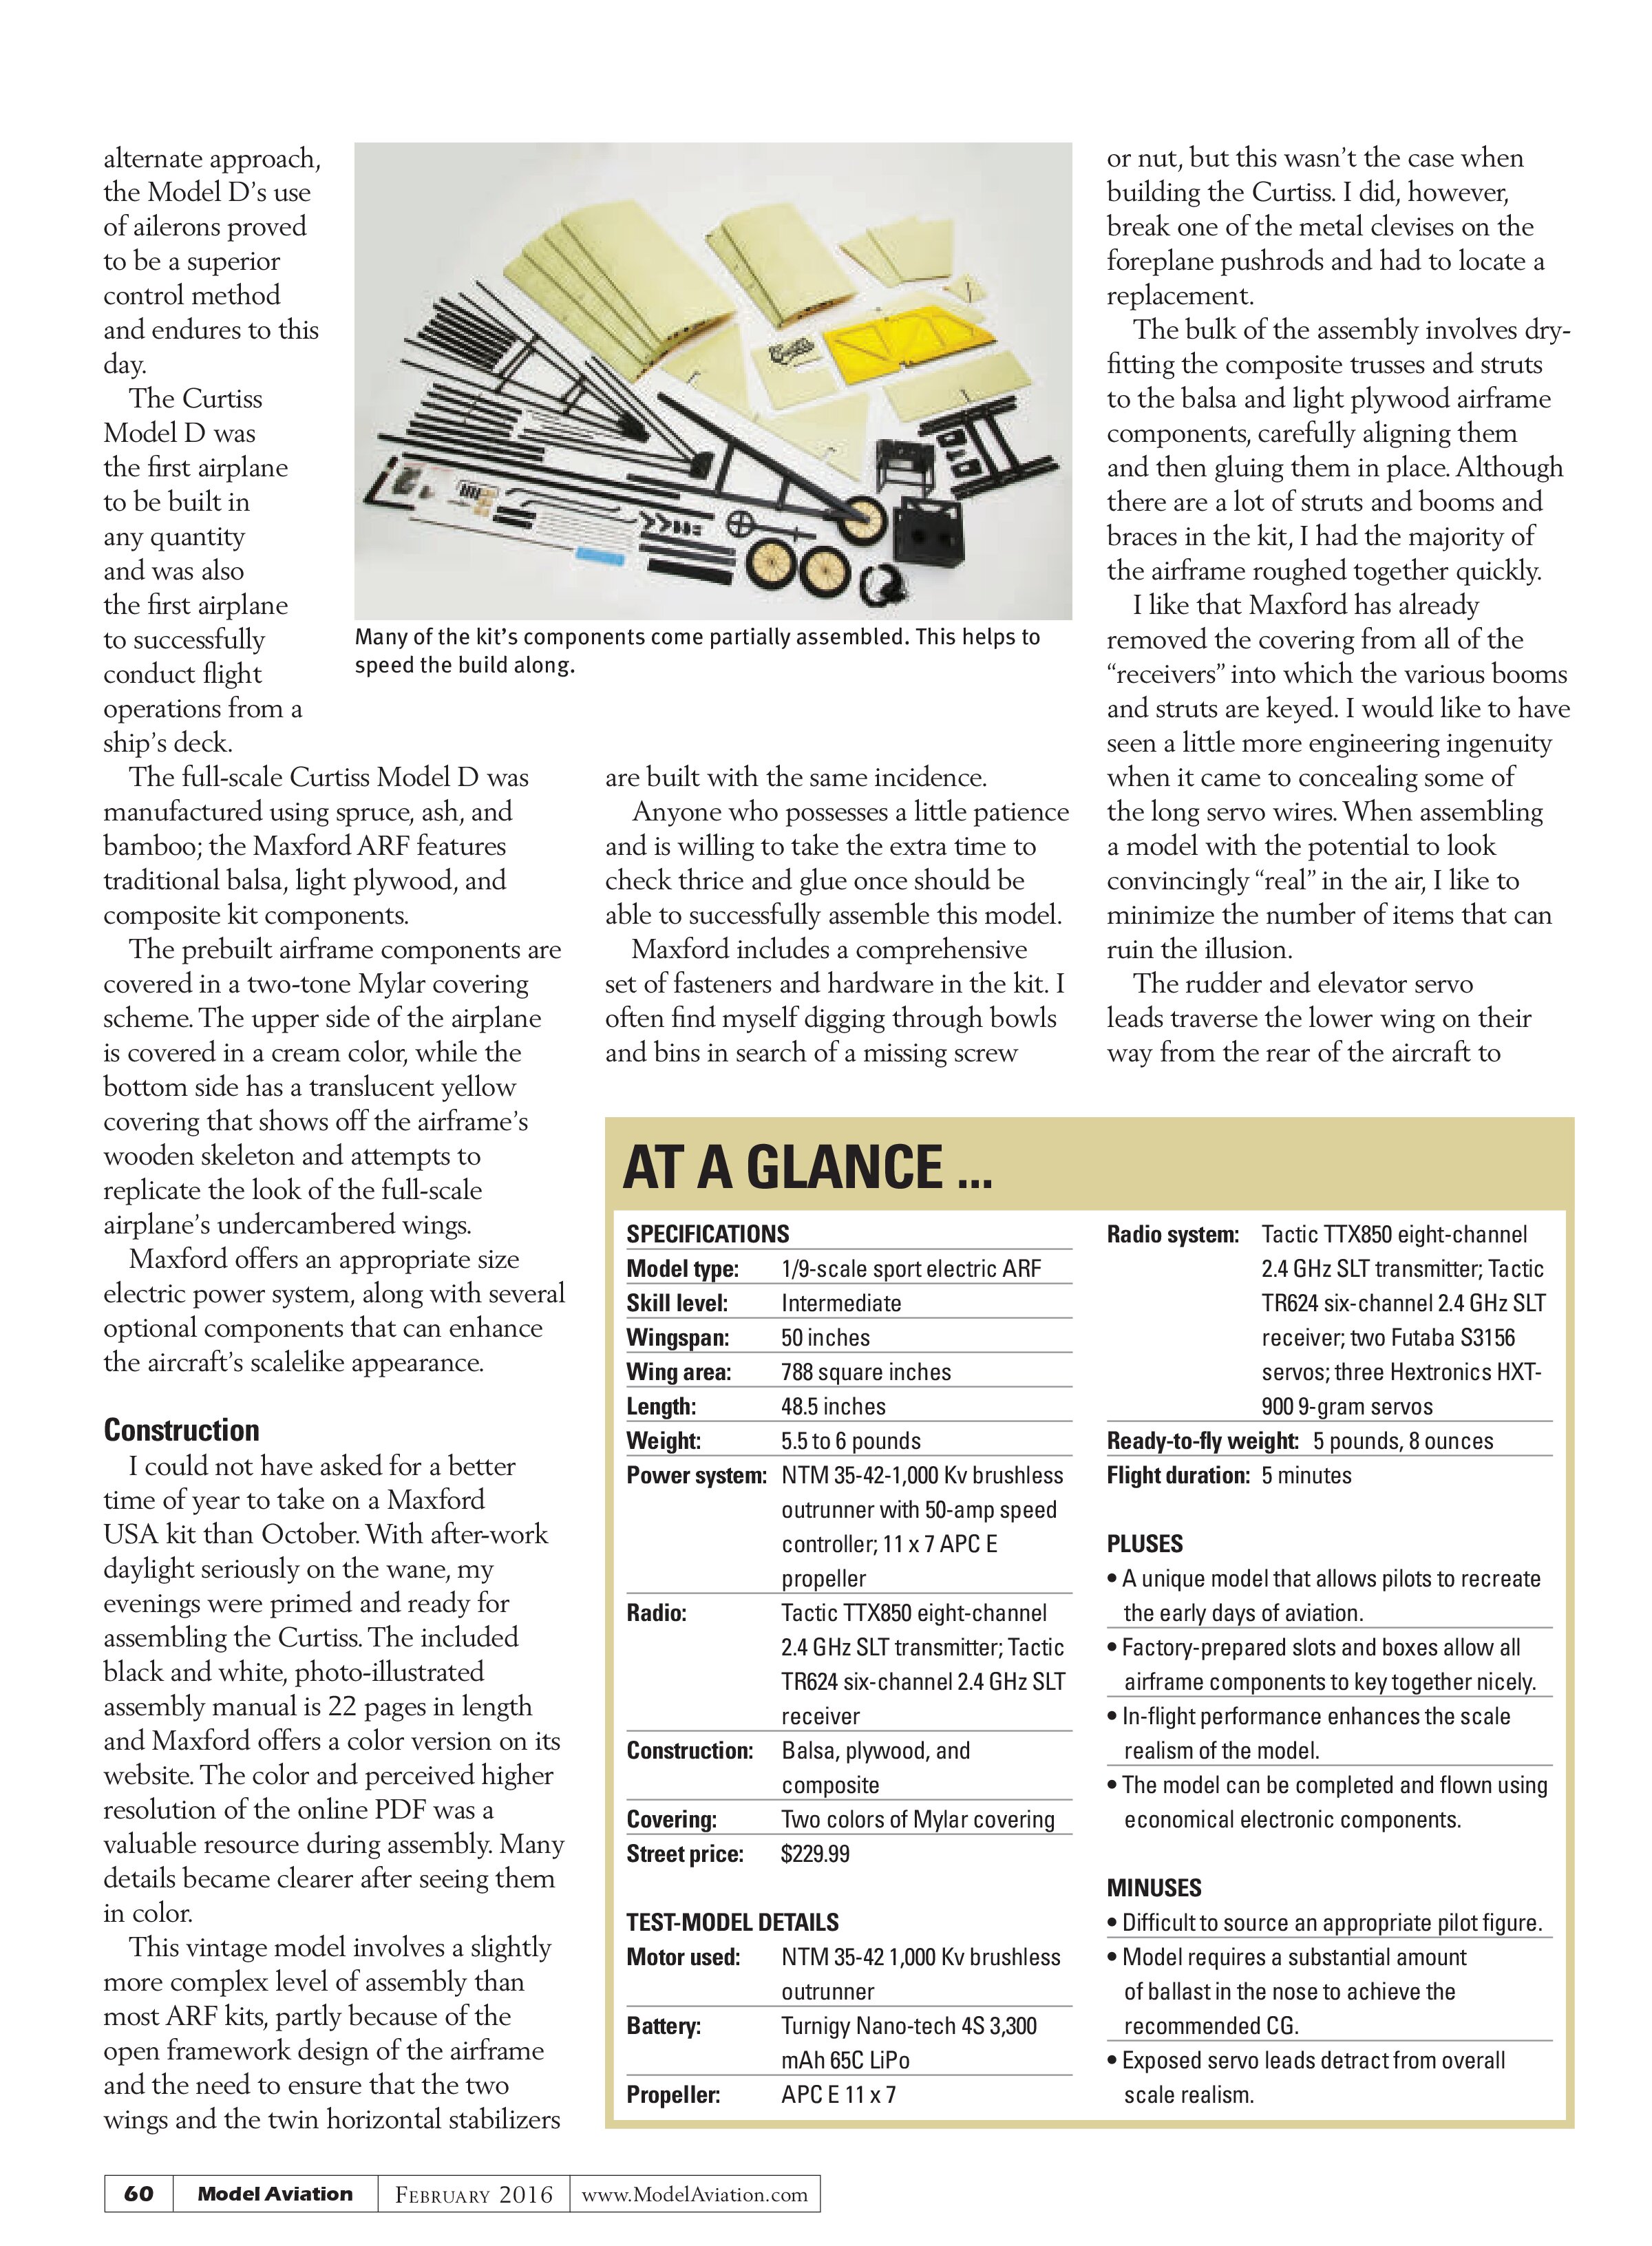
Many of the kit’s components come partially assembled. This helps to speed the build along.
or nut, but this wasn’t the case when building the Curtiss. I did, however, break one of the metal clevises on the foreplane pushrods and had to locate a replacement.
The bulk of the assembly involves dry-fitting the composite trusses and struts to the balsa and light plywood airframe components, carefully aligning them and then gluing them in place. Although there are a lot of struts and booms and braces in the kit, I had the majority of the airframe roughed together quickly.
I like that Maxford has already removed the covering from all of the “receivers” into which the various booms and struts are keyed. I would like to have seen a little more engineering ingenuity when it came to concealing some of the long servo wires. When assembling a model with the potential to look convincingly “real” in the air, I like to minimize the number of items that can ruin the illusion.
The rudder and elevator servo leads traverse the lower wing on their way from the rear of the aircraft to
AT A GLANCE ...
SPECIFICATIONS
Model type: 1/9-scale sport electric ARF
Skill level: Intermediate
Wingspan: 50 inches
Wing area: 788 square inches
Length: 48.5 inches
Weight: 5.5 to 6 pounds
Power system: NTM 35-42-1,000 Kv brushless outrunner with 50-amp speed controller; 11 x 7 APC E propeller
Radio: Tactic TTX850 eight-channel 2.4 GHz SLT transmitter; Tactic TR624 six-channel 2.4 GHz SLT receiver
Construction: Balsa, plywood, and composite
Covering: Two colors of Mylar covering
Street price: $229.99
TEST-MODEL DETAILS
Motor used: NTM 35-42 1,000 Kv brushless outrunner
Battery: Turnigy Nano-tech 4S 3,300 mAh 65C LiPo
Propeller: APC E 11 x 7
Radio system: Tactic TTX850 eight-channel 2.4 GHz SLT transmitter; Tactic TR624 six-channel 2.4 GHz SLT receiver; two Futaba S3156 servos; three Hextronics HXT-900 9-gram servos
Ready-to-fly weight: 5 pounds, 8 ounces
Flight duration: 5 minutes
PLUSES
- A unique model that allows pilots to recreate the early days of aviation.
- Factory-prepared slots and boxes allow all airframe components to key together nicely.
- In-flight performance enhances the scale realism of the model.
- The model can be completed and flown using economical electronic components.
MINUSES
- Difficult to source an appropriate pilot figure.
- Model requires a substantial amount of ballast in the nose to achieve the recommended CG.
- Exposed servo leads detract from overall scale realism.
It is important to ensure that the foreplane, both wings, and the conventional horizontal stabilizer all have approximately the same angle of incidence.

the receiver. Although I followed the directions and taped them to the bottom of the lower wing, a more creative solution (read as less likely to pollute the potential for a pleasing scalelike appearance in flight) would have been to provide a pathway for them through the ribs and formers of the interior of the bottom center wing. Even with the semitransparent yellow covering used on the bottom of the airframe, they would be partly obscured from view.
Maxford offers multiple options when it comes to mounting the battery and brushless motor. With the long tailbooms suggesting a model that could be tail-heavy, modelers should carefully plan the installation of the heavier components.
The instructions suggest that mounting the motor on the outside rear surface of the motor box might help the center of gravity (CG). If possible, builders should strive to mount the motor on the inside of the motor box. This moves the weight of the motor inward and closer to the CG, which might help reduce the amount of ballast needed to achieve the recommended CG.
Although I would have ultimately preferred to mount the flight battery below the motor box where it would be mostly concealed, I had to move it forward to the pilot’s seat to help reduce the substantial amount of ballast needed.
Maxford suggests placing adhesive-backed lead weights on the underside of the foreplane, but I decided to cut and mount lengths of 1/4-inch key stock to the two nose wheel braces. The braces are located far enough forward on the airframe and serve as convenient carriers for the required ballast. After they were painted black to match the rest of the composite airframe components, they did not adversely detract from the model’s scale outline.
I was surprised at how large this 50-inch wingspan model actually was! I had initially determined that I would permanently glue the wings to the airframe, but I decided that keeping them removable would make the model easier to store and transport.
I strung the nonfunctional rigging cord so that it would not inhibit being able to remove the wings. Although it takes time to thread all of the rigging in place, the model looks sensational with it installed!
Flying
I ended up adding a little more nose ballast before the maiden flights, placing four 1/4-ounce stick-on lead weights on the bottom forward edge of the foreplane. Using a 4S 3,300 mAh LiPo battery, the flying weight of the Curtiss Pusher came in at exactly 5 pounds, 8 ounces.
I wanted to verify that the selected power system would possess ample power to propel the model up and into the sky. An Eagle Tree Systems eLogger revealed that the NTM outrunner motor and 11 x 7 propeller were good for slightly more than 800 watts static.
Maxford provides a set of recommended control throws for all surfaces. I configured my Tactic TTX850 transmitter to provide triple rates. Each control axis has its own switch. Mid-rates were set to match Maxford’s recommendations, with the low rates programmed to use roughly a third less throw and the high rates programmed to achieve maximum mechanical throws. I like a little exponential; I used 40% on the pitch and roll, with 25% on the yaw.
This model’s use of midwing-mounted ailerons and a foreplane caused me to feel a slightly heightened level of maiden-flight anxiety. The assembly manual stresses the importance of ensuring that all of the control surfaces are on the same incidence as the wings. Although I was not extremely scientific in my efforts, I did spend time making sure the Model D was mechanically dialed in.
Another cause for maiden flight concern was the non-steerable tricycle gear. I found myself wondering if that shortcoming would make it difficult to keep the model pointed in the direction I wanted it to go during a takeoff run. With the 4S 3,300 mAh LiPo battery strapped to the pilot’s seat, I headed out onto the runway.
I was pleased to discover that although the nose gear is fixed, the small rudder exerts enough authority to induce gradual turns. Quick bursts of throttle, with the ensuing airflow across the rudder, allow a pilot to make modest steering corrections. There was not enough authority to make a 180° turn on the runway, but I was easily able to keep the Curtiss on the centerline.
Feeling relieved about the amount of yaw control during the takeoff roll, I slowly eased the throttle forward and let the Model D accelerate down the runway. It did not take much runway or elevator input to coax the biplane into the air. The sight of the Curtiss
breaking ground and climbing out was exhilarating! With a half dozen clicks of down-elevator applied, the model felt trimmed out.
This is a model that prefers coordinated turns. The big ailerons are effective in the roll axis and adding a little rudder while turning helps to keep the tail nicely in line. The Model D is capable of cruising around the pattern at 50-60% throttle. Because the open framework and rigging create drag, pushing the throttle beyond midstick results in only a slight increase in speed.
I noticed a slight tendency for the nose to slowly rise while flying around the pattern. With the flight taking place shortly after dawn and nothing more than a faint whisper of wind present, this tendency could not be attributed to flying upwind or downwind. I theorize that the foreplane, a control surface typically lacking in the models that we fly, could be responsible for generating extra lift, but the effect was subtle and easily remedied with a slight bump of down-elevator.
I was surprised how well behaved this model was in the air. Although it was necessary to proactively manage the pitch axis at times, the model was easy to fly. After a few minutes of the maiden flight had elapsed, I found myself quite comfortable bringing it by
for the camera in low-altitude passes.
With the uncertainty of the takeoff laid to rest, and my curiosity as to how the Curtiss would behave in the air was resolved, it was time to bring it in for its first landing. I set up a deliberate landing approach, entering the downwind leg at an altitude of approximately 60 feet.
With the throttle slightly below 50%, I made a wide, sweeping turn through base and onto final approach. With the throttle pulled back to roughly a third, the Curtiss Pusher adopted a shallow rate of descent. Once across the numbers, I slowly rolled the throttle back. The model responded by reconnecting with, and sticking to, the runway surface with no sign of a bounce.
I was consciously aware that I did not feed in any of the usual up-elevator input to initiate a flare, and I was satisfied with the manner in which the aircraft landed, given the slightly responsive nature of the pitch axis.
I made subsequent flights using a slightly smaller 4S 3,000 mAh LiPo battery. Although the model still exhibited the same overall benign inflight behavior, I did sense the loss of the added nose weight offered by the heavier pack.
Conclusion
In an era where few modelers know what building an airplane out of a box of sticks is and most ARFs can be assembled in less than an hour, without even so much as a drop of adhesive required, the Maxford Curtiss Model D offers a refreshing respite.
Although not a full-blown kit, assembling this ARF will require modelers to invest more than a mere evening or two of time. Many of Maxford USA’s models, such as the Curtiss Model D Pusher, are uniquely based on seldom-modeled aircraft.
The arrival of autumn and winter in the Northern Hemisphere, with shorter days and cooler weather, might mean less time at the field flying, but it is the perfect time to dive headlong into building the Maxford Curtiss Model D. When the build is complete, a pilot will have an old-timey airplane that honestly does look as fantastic as it flies!
—Jon Barnes
barnesjonr@yahoo.com
MANUFACTURER/DISTRIBUTOR:
Maxford USA
(562) 529-3988
www.maxfordusa.com
SOURCES:
Tactic
(217) 398-0007
www.tacticrc.com
HobbyKing
www.hobbyking.com