Adding an airfoil to your stabilizer
Q624: In one of your recent park flyer construction articles, you mentioned a simple way to add an airfoil shape to your stabilizer. You indicated in the article that you would expand on that idea in your regular Model Aviation “Frequently Asked Questions” column. Okay, Bob, let’s hear it!


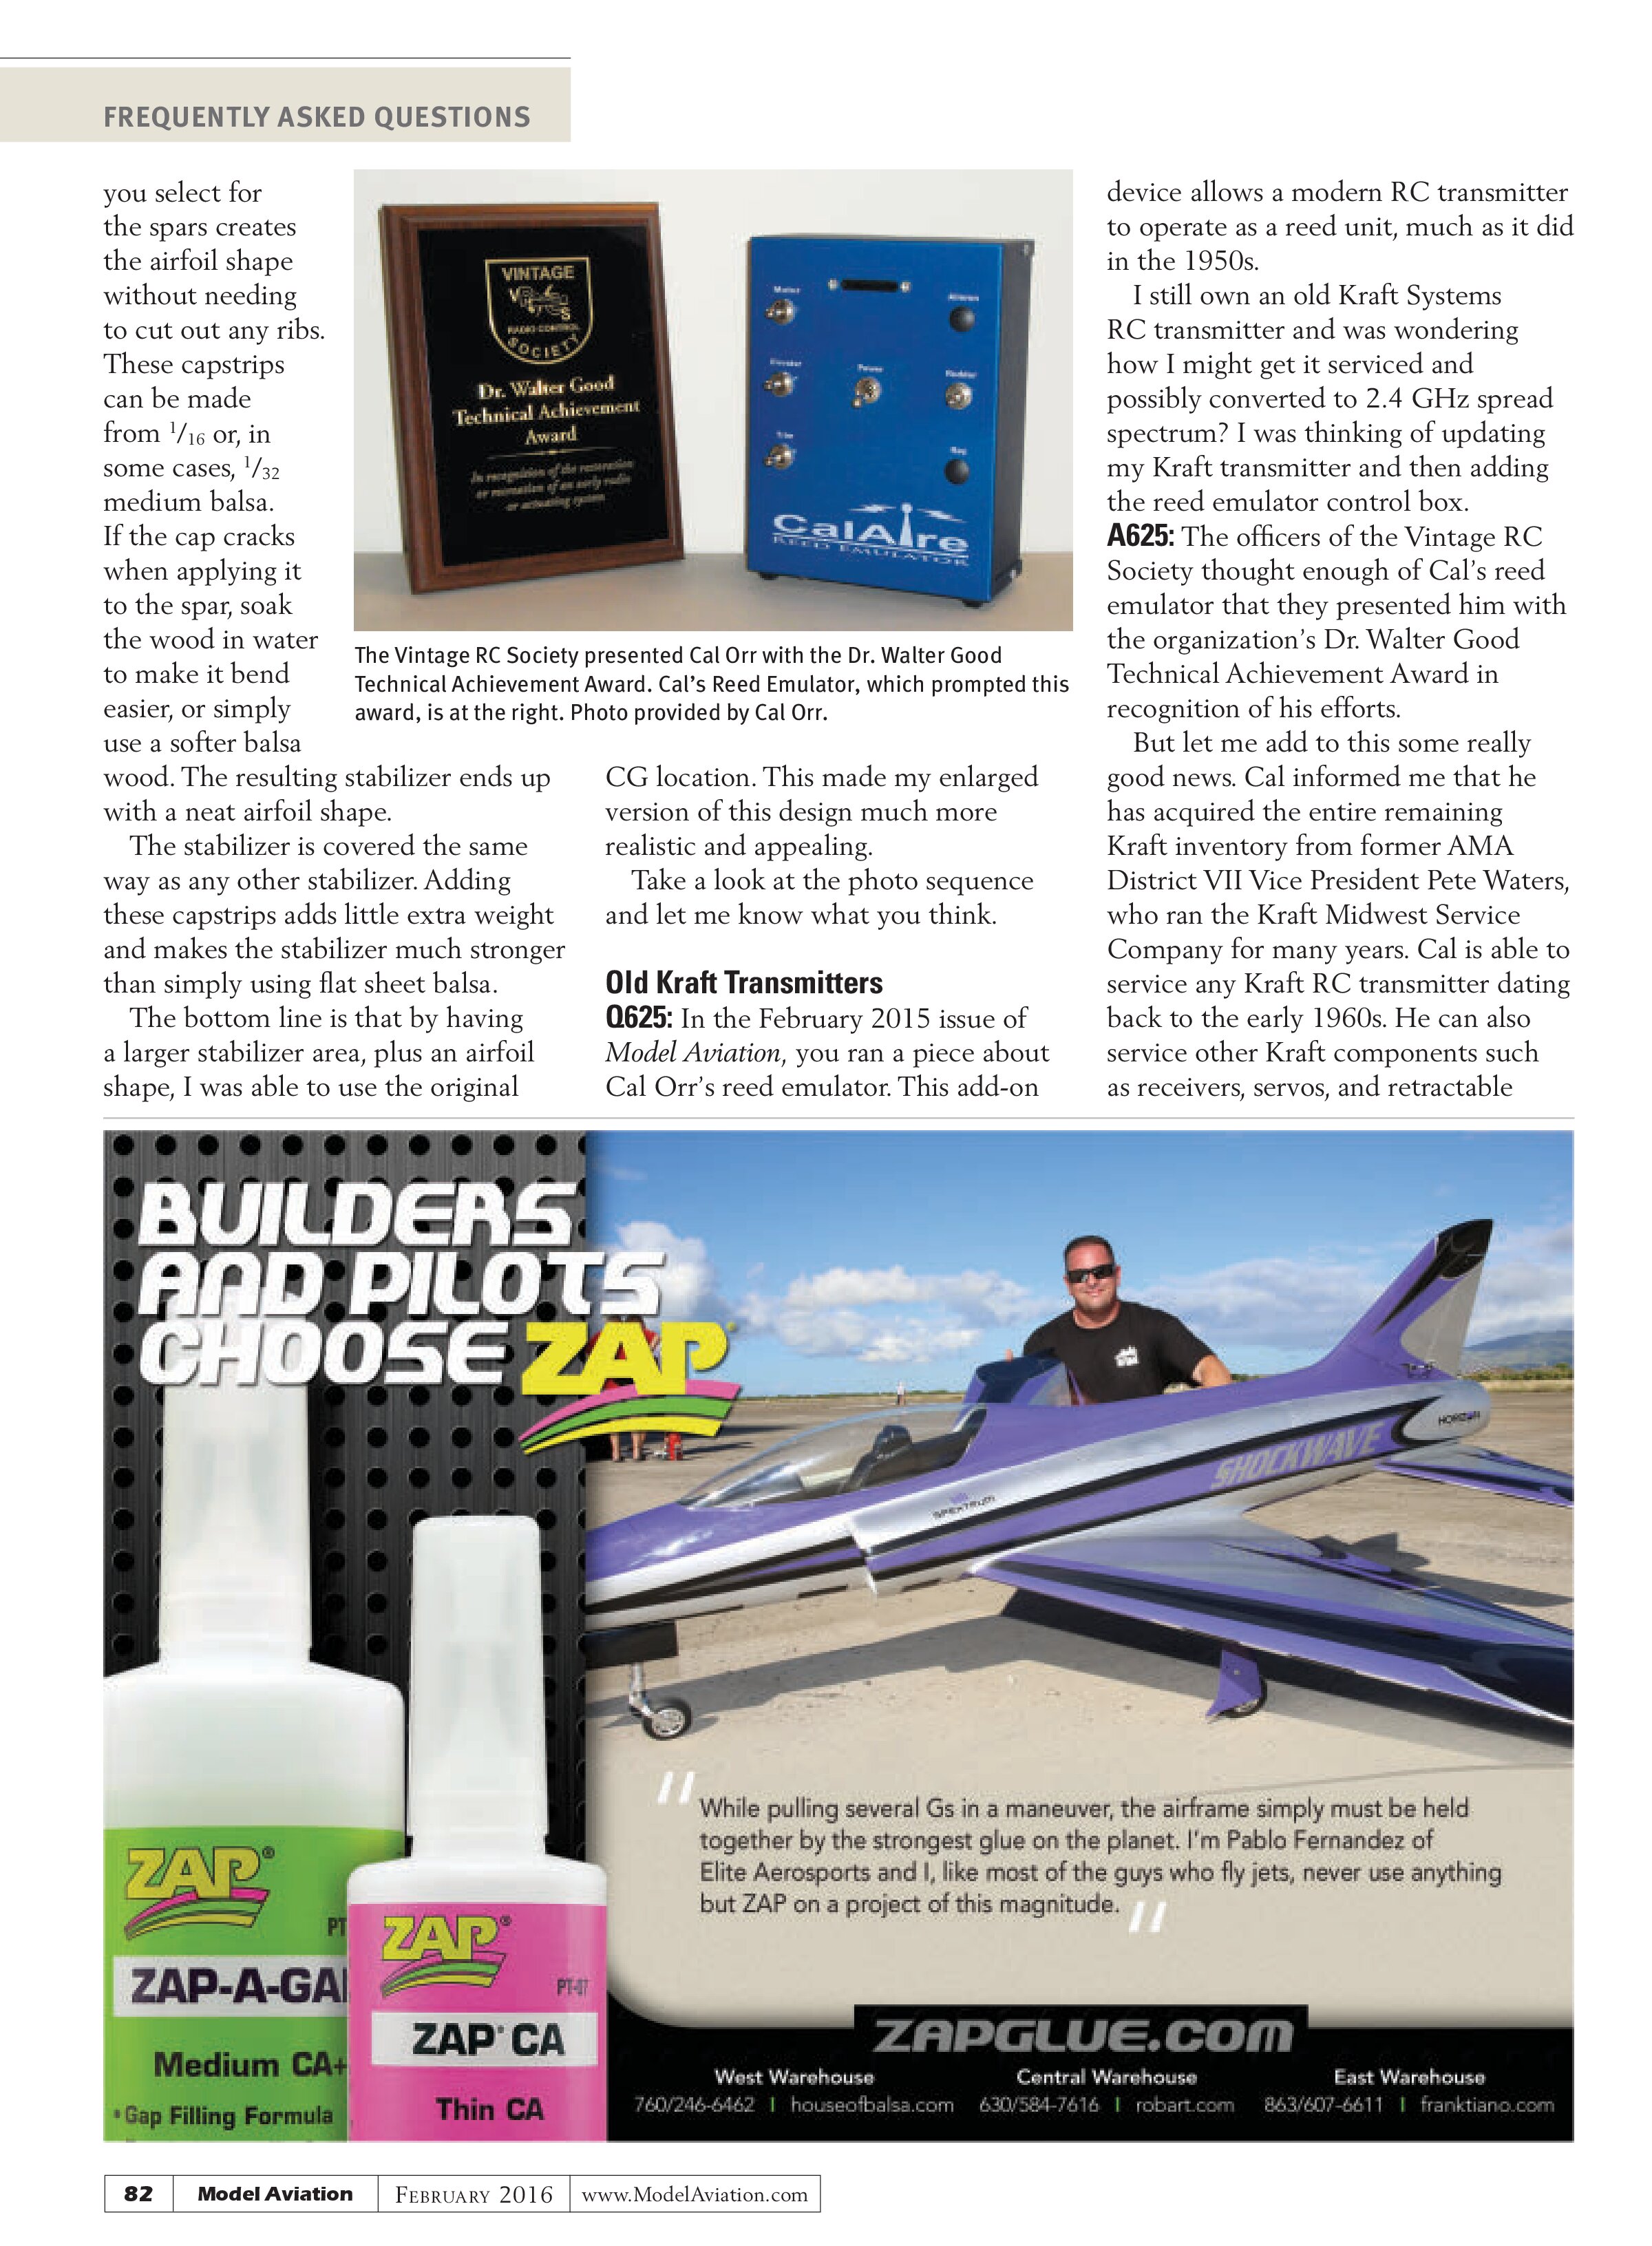
The second step is to add a 1/8-inch balsa leading edge, trailing edge, and tips. Next, lay down the spars. The maximum height of the spar is at the center of the stabilizer. It tapers down approaching the tip. Finally, the capstrips are bent over the spars.
A624: I knew some of my readers would pick up on this idea. The specific airplane this reader is referring to appeared in the October 2015 issue of RC Micro World.
It was a CO₂-powered vintage Free Flight model called the Fizz-Wizz. Many of my small park flyer or micro designs would end up tail-heavy unless I lengthened the nose. But in some cases, the nose had to be lengthened so much to achieve the proper balance that the resulting model looked simply awful.
On many of these designs I can move the center of gravity (CG) location toward the rear by increasing the stabilizer area. Some of the aircraft might have had a stabilizer that was as little as 20% of the wing area. In that situation, I increased the stabilizer area to as much as 30% of the wing area, allowing me to keep the nose length closer to that of the original design.
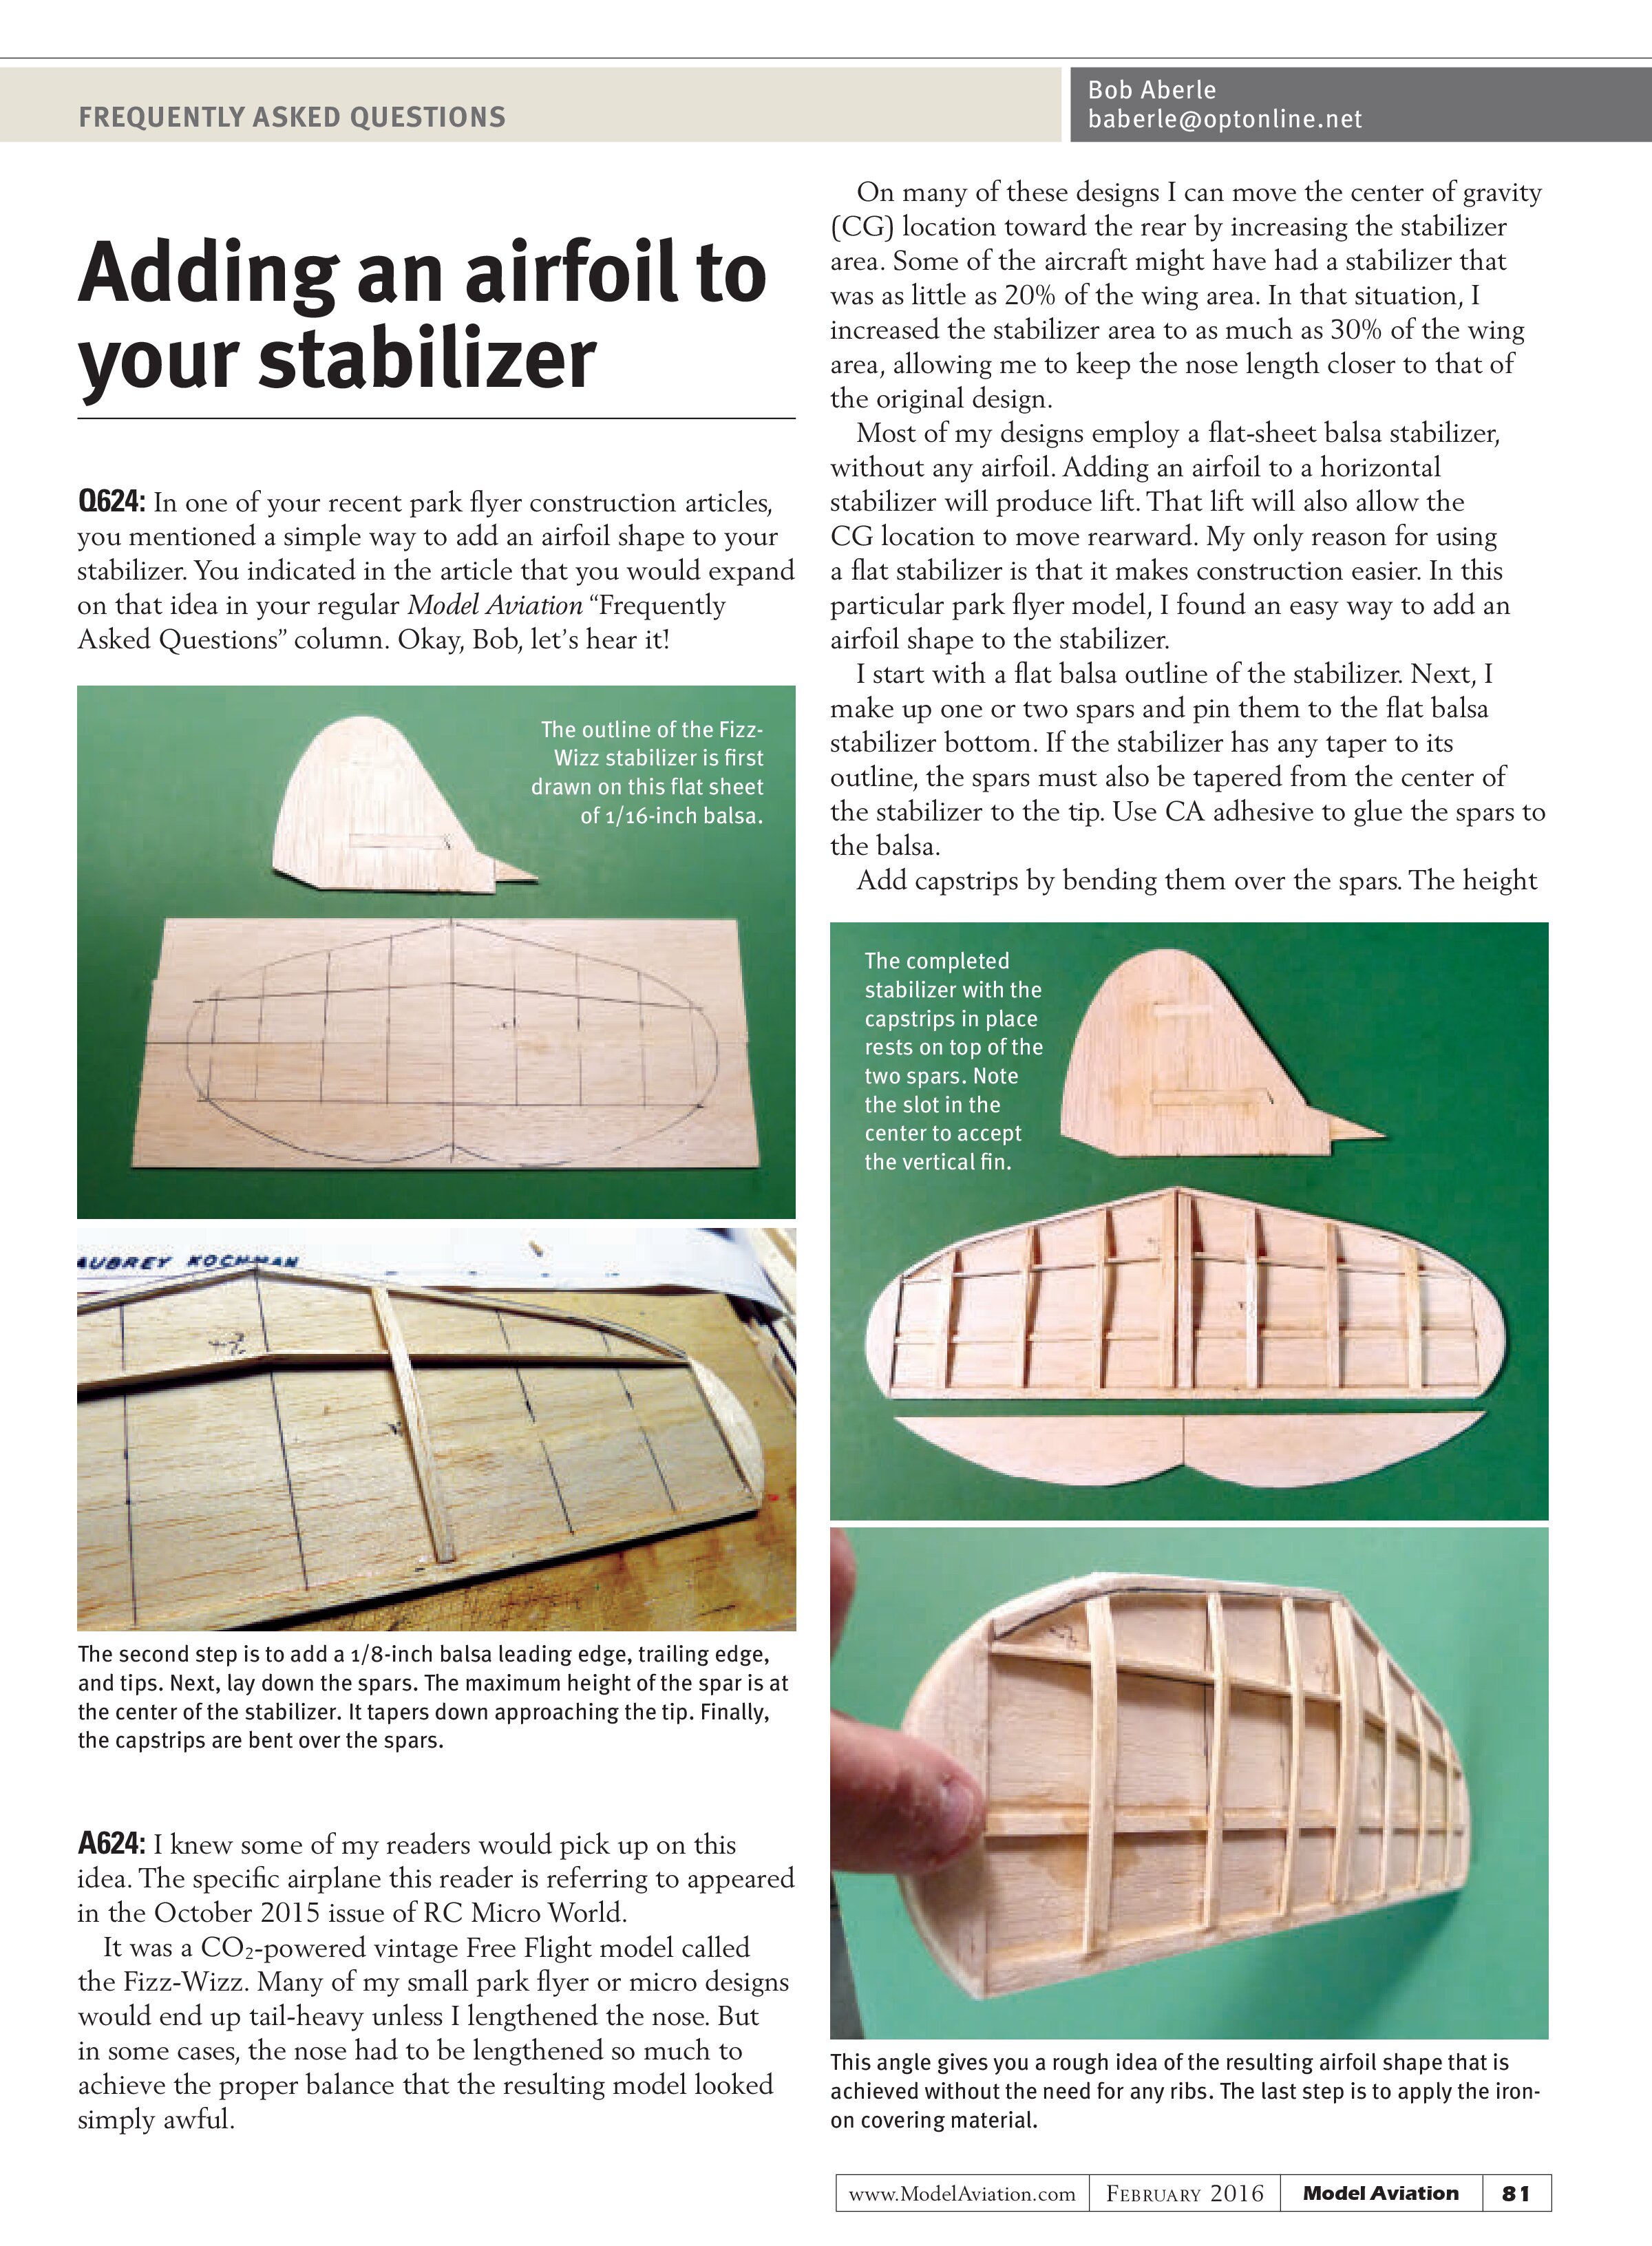
Most of my designs employ a flat-sheet balsa stabilizer, without any airfoil. Adding an airfoil to a horizontal stabilizer will produce lift. That lift will also allow the CG location to move rearward. My only reason for using a flat stabilizer is that it makes construction easier. In this particular park flyer model, I found an easy way to add an airfoil shape to the stabilizer.
I start with a flat balsa outline of the stabilizer. Next, I make up one or two spars and pin them to the flat balsa stabilizer bottom. If the stabilizer has any taper to its outline, the spars must also be tapered from the center of the stabilizer to the tip. Use CA adhesive to glue the spars to the balsa.
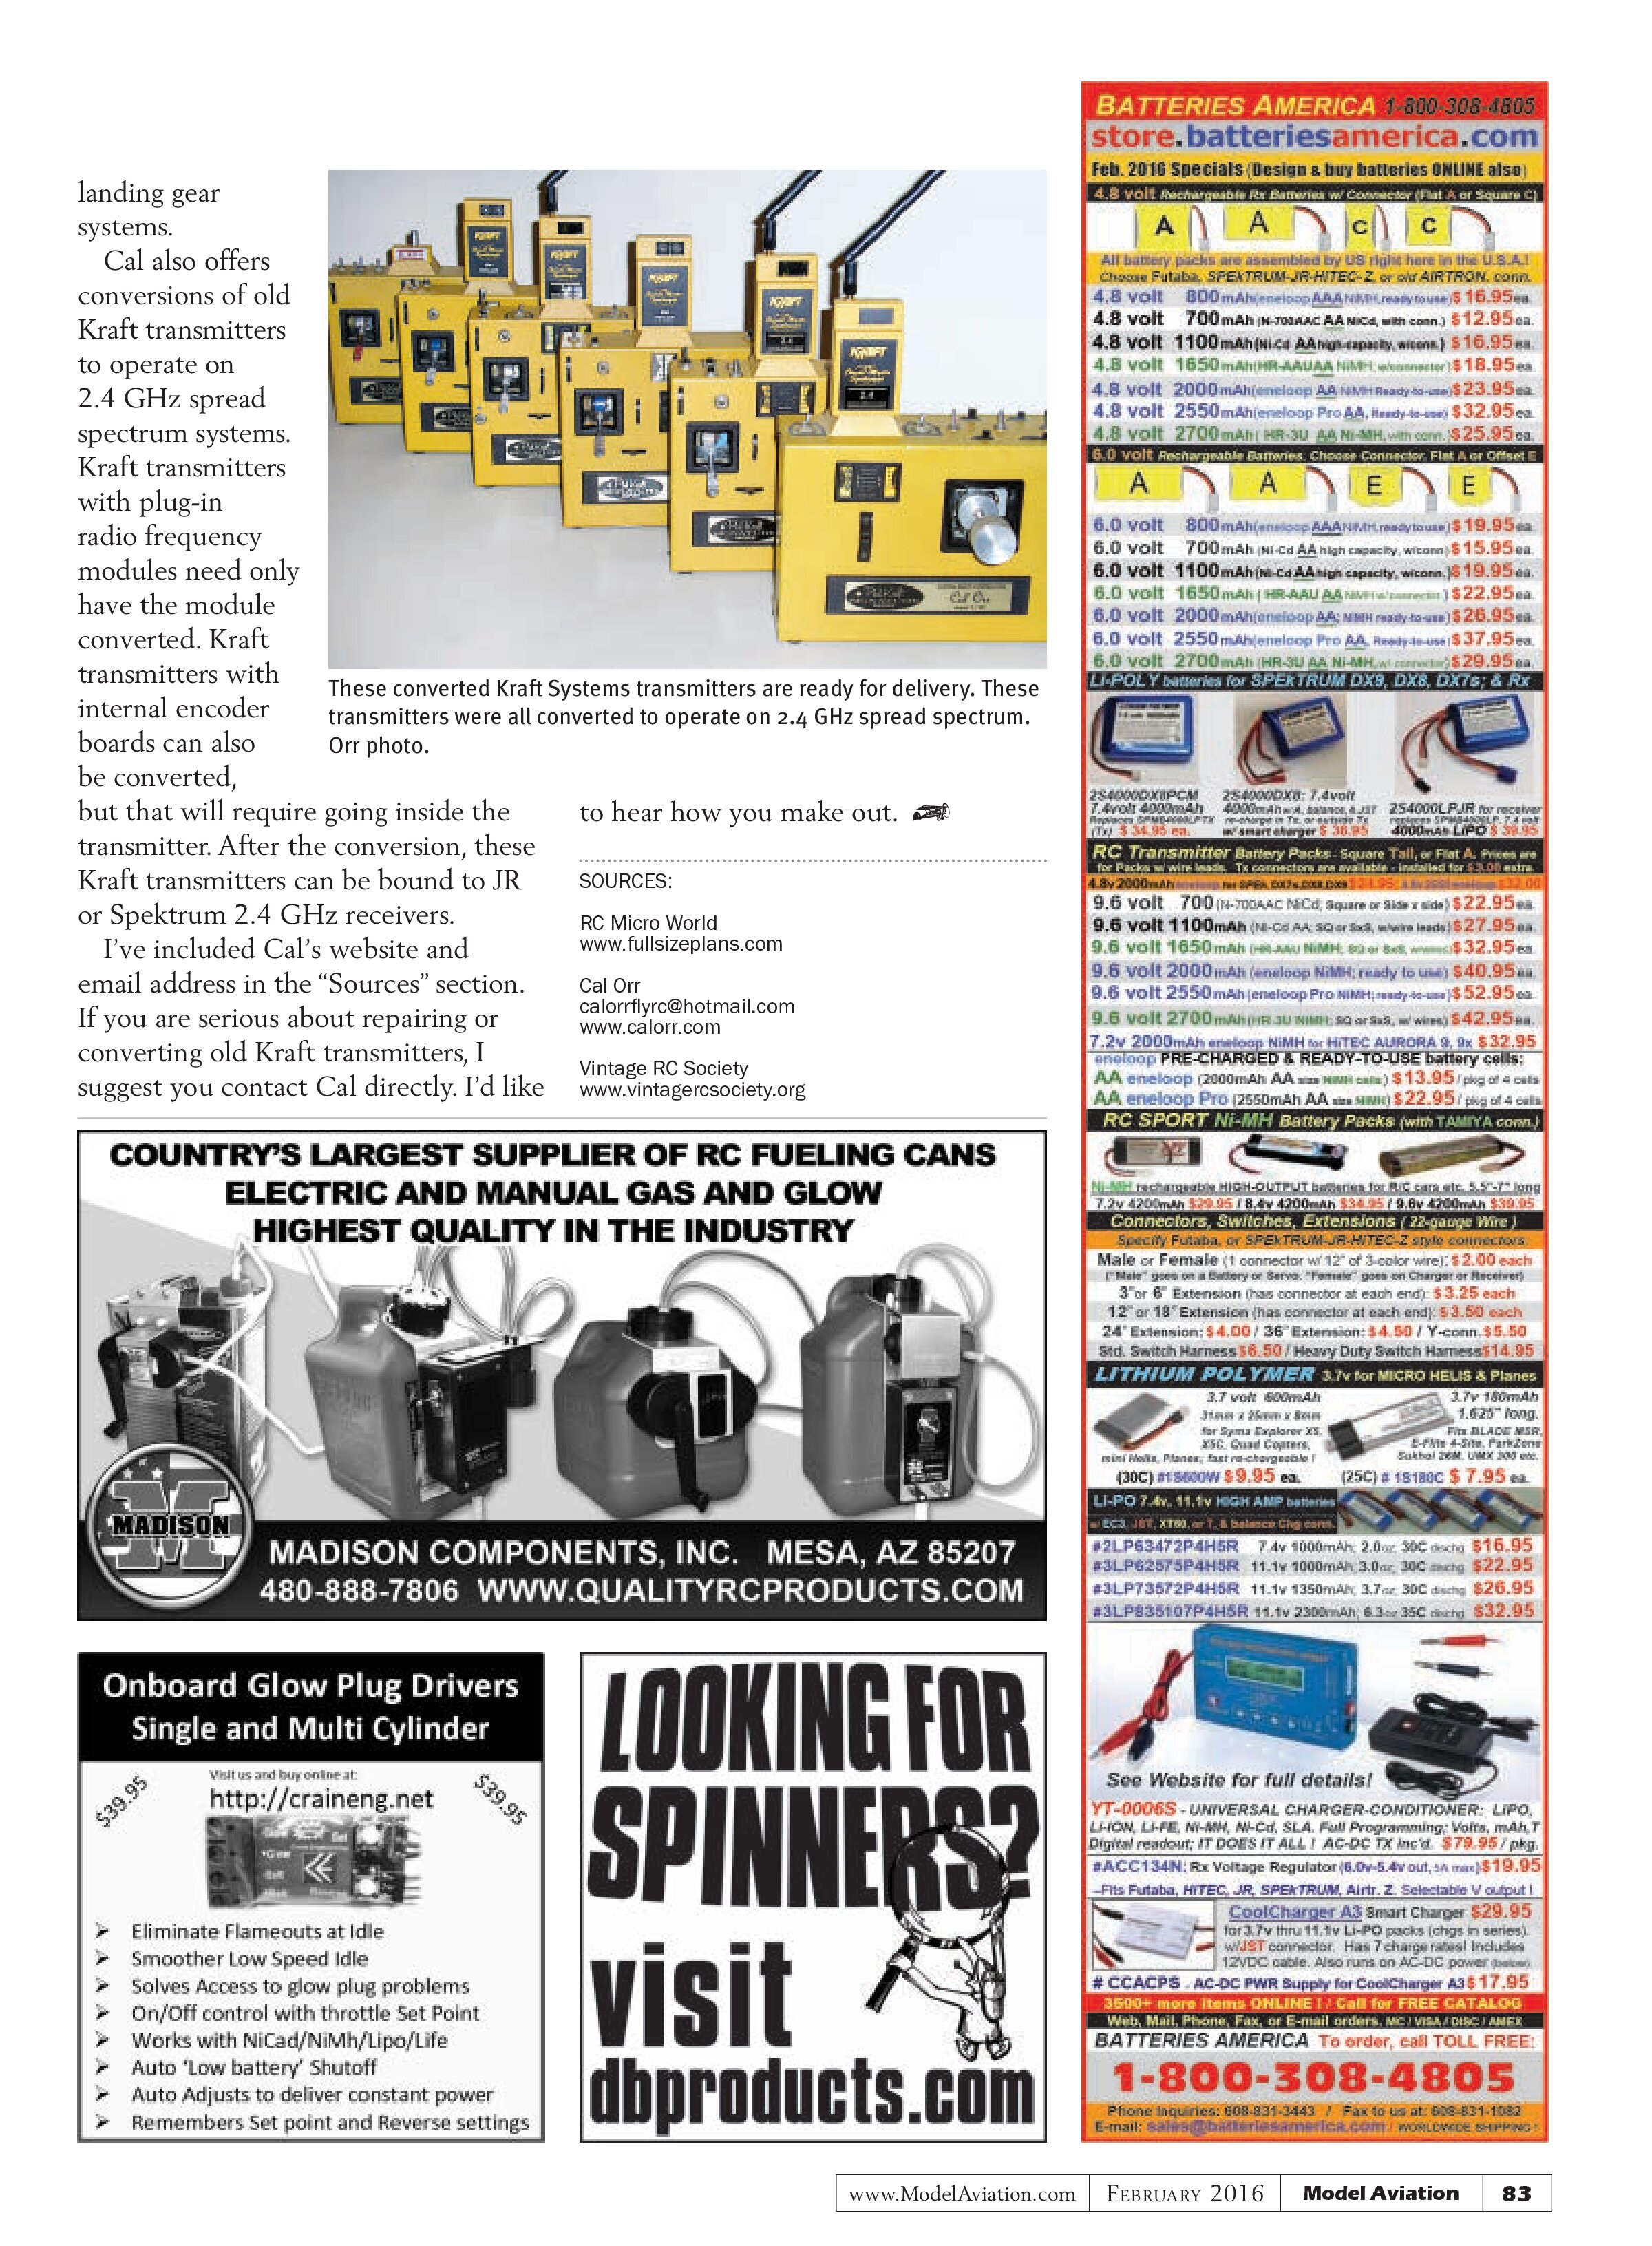
Add capstrips by bending them over the spars. The height


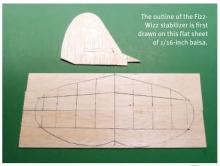
This angle gives you a rough idea of the resulting airfoil shape that is achieved without the need for any ribs. The last step is to apply the iron-on covering material.
you select for the spars creates the airfoil shape without needing to cut out any ribs. These capstrips can be made from 1/16 or, in some cases, 1/32 medium balsa. If the cap cracks when applying it to the spar, soak the wood in water to make it bend easier, or simply use a softer balsa wood. The resulting stabilizer ends up with a neat airfoil shape.
The stabilizer is covered the same way as any other stabilizer. Adding these capstrips adds little extra weight and makes the stabilizer much stronger than simply using flat sheet balsa.
The bottom line is that by having a larger stabilizer area, plus an airfoil shape, I was able to use the original

CG location. This made my enlarged version of this design much more realistic and appealing.
Take a look at the photo sequence and let me know what you think.
Old Kraft Transmitters
Q625: In the February 2015 issue of Model Aviation, you ran a piece about Cal Orr’s reed emulator. This add-on device allows a modern RC transmitter to operate as a reed unit, much as it did in the 1950s.
I still own an old Kraft Systems RC transmitter and was wondering how I might get it serviced and possibly converted to 2.4 GHz spread spectrum? I was thinking of updating my Kraft transmitter and then adding the reed emulator control box.
A625: The officers of the Vintage RC Society thought enough of Cal’s reed emulator that they presented him with the organization’s Dr. Walter Good Technical Achievement Award in recognition of his efforts.
But let me add to this some really good news. Cal informed me that he has acquired the entire remaining Kraft inventory from former AMA District VII Vice President Pete Waters, who ran the Kraft Midwest Service Company for many years. Cal is able to service any Kraft RC transmitter dating back to the early 1960s. He can also service other Kraft components such as receivers, servos, and retractable
landing gear systems.
Cal also offers conversions of old Kraft transmitters to operate on 2.4 GHz spread spectrum systems. Kraft transmitters with plug-in radio frequency modules need only have the module converted. Kraft transmitters with internal encoder boards can also be converted, but that will require going inside the transmitter. After the conversion, these Kraft transmitters can be bound to JR or Spektrum 2.4 GHz receivers.
I’ve included Cal’s website and email address in the “Sources” section. If you are serious about repairing or converting old Kraft transmitters, I suggest you contact Cal directly. I’d like

to hear how you make out.
SOURCES:
RC Micro World
www.fullsizeplans.com
Cal Orr
calorrflyrc@hotmail.com
www.calorr.com
Vintage RC Society
www.vintagercsociety.org