SebArt RC Robin S 50E ARF and L-13 Blanik 3.3M Glider
Andrew Griffith
andy@customcutgraphix.com

Two solid-performing models come together for aerotowing
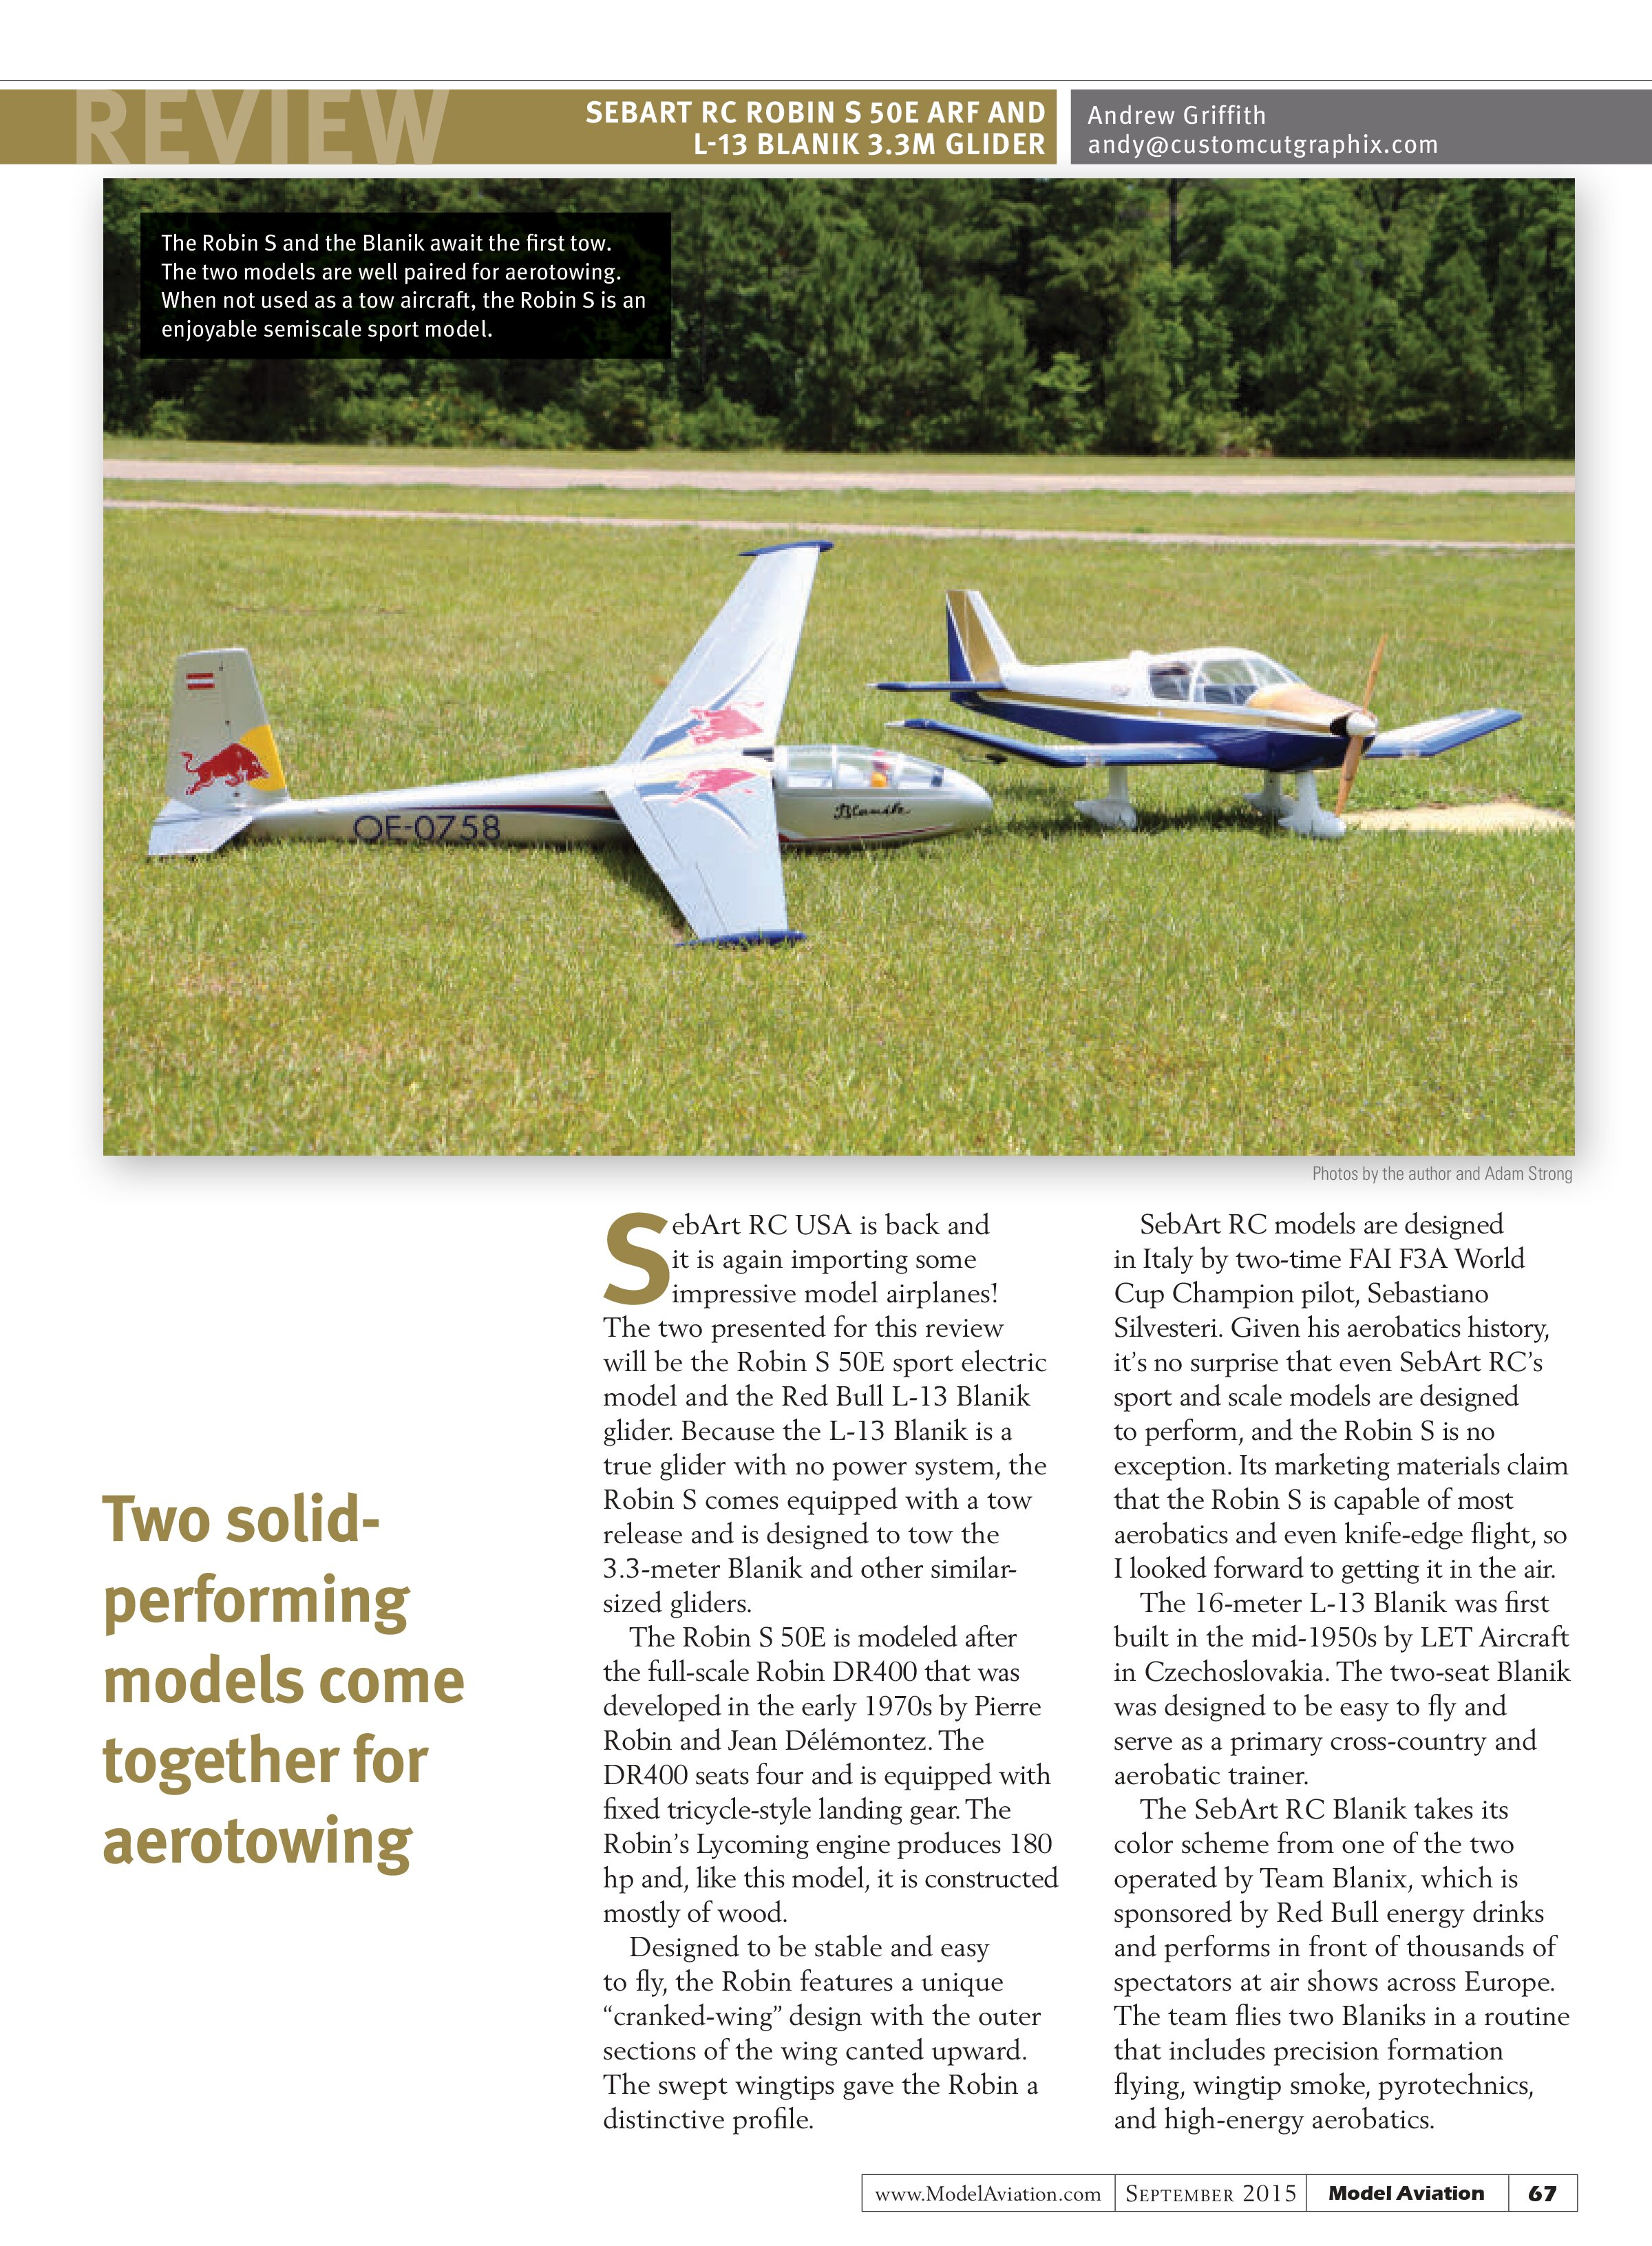
SebArt RC USA is back and it is again importing some impressive model airplanes! The two presented for this review will be the Robin S 50E sport electric model and the Red Bull L-13 Blanik glider. Because the L-13 Blanik is a true glider with no power system, the Robin S comes equipped with a tow release and is designed to tow the 3.3-meter Blanik and other similar-sized gliders.
The Robin S 50E is modeled after the full-scale Robin DR400 that was developed in the early 1970s by Pierre Robin and Jean Délémontez. The DR400 seats four and is equipped with fixed tricycle-style landing gear. The Robin’s Lycoming engine produces 180 hp and, like this model, it is constructed mostly of wood.
Designed to be stable and easy to fly, the Robin features a unique “cranked-wing” design with the outer sections of the wing canted upward. The swept wingtips gave the Robin a distinctive profile.
SebArt RC models are designed in Italy by two-time FAI F3A World Cup Champion pilot, Sebastiano Silvestri. Given his aerobatics history, it’s no surprise that even SebArt RC’s sport and scale models are designed to perform, and the Robin S is no exception. Its marketing materials claim that the Robin S is capable of most aerobatics and even knife-edge flight, so I looked forward to getting it in the air.
The 16-meter L-13 Blanik was first built in the mid-1950s by LET Aircraft in Czechoslovakia. The two-seat Blanik was designed to be easy to fly and serve as a primary cross-country and aerobatic trainer.
The SebArt RC Blanik takes its color scheme from one of the two operated by Team Blanix, which is sponsored by Red Bull energy drinks and performs in front of thousands of spectators at air shows across Europe. The team flies two Blaniks in a routine that includes precision formation flying, wingtip smoke, pyrotechnics, and high-energy aerobatics.
Construction: Robin S 50E
The Robin S arrived nicely packed with bagged parts secured to prevent shipping damage. The hardware appears to be of excellent quality and comprises several bags, each labeled according to the assembly area it’s destined for.
The instructions are mostly photo illustrations with a few pages of printed specifications and control throws. The 190 photographic steps appear more daunting than they really are. This airplane isn’t a trainer and anyone with a few ARF builds under his or her belt shouldn’t have a problem.
Other than the hatch, cowl, and wheel pants, the model is completely built-up using laser-cut balsa and plywood. The Oracover base and trim were expertly applied and there were no wrinkles, sags, or loose edges, earning an A+ for the covering job.

The fiberglass cowl and wheel pants are painted to match and appear to be lightweight, but sturdy. A molded cabin tray that attaches to the hatch includes the windows. The cockpit detail is good, but no pilot figures are included.
The Robin S was assembled using Zap brand thin and medium CA glue, Z-Poxy 15- and 30-minute epoxy, RC-56 canopy glue, and Z-42 blue threadlocker. These products are available from Frank Tiano Enterprises.
Taildragger RC provided the heavy-duty 20-gauge twisted servo extensions. The front end will be getting a new Hacker A50-16S V3 motor. The V3 is lighter and more powerful than previous editions, and the product is once again available in the US from Hacker Motor USA.
Turning the V3 will be a Hacker X-70 SB 70-amp speed controller spinning a Xoar 16 x 8 wood propeller. Former Model Aviation Soaring columnist and electric expert, Lee Estingoy, is handling the Hacker distribution in the US, so the Hacker line should be in good hands. AGA Power USA provided a 6S 5,200 mAh 35C LiPo battery for the review.
The elevator, rudder, and ailerons are hinged using CA hinges and thin Zap. The instructions show using kicker on the hinges, but I prefer to allow the CA adhesive to wick completely and cure by itself. The flaps are hinged using point-style hinges that were installed using 30-minute Z-Poxy.
The manual recommends JR servos, so using Hitec servos required some minor trimming. I used RTL Fasteners hex-head servo screws to mount the servos. In each case, the screw was fitted and removed and the threads hardened with thin CA before installing the servos.
Aside from the rudder, all of the controls use a direct servo connection. All of the hardware is ball-link style for a slop-free control system installation. The rudder uses a pull-pull cable and the hardware is of excellent quality.
Building a lot of models means I have a few custom-fabricated tools. One was made by grinding the sharp edges away from an old pair of dinged-up wire cutters. This makes crimping a snap. If you botch any brass crimps or ever need spares, they can be purchased in bulk from any well-stocked fishing store.
The G-10 fiberglass control horns round out the control installation. After trimming them to the required shape and scuffing the gluing surfaces, I installed them with epoxy.
The landing gear installation is straightforward. SebArt RC supplied what appears to be black neoprene tubing that is split on one side with a hobby knife to create a combing. The result is a flexible gasket between the wheel pant and the wing that looks very realistic.
The Robin S includes a lighting system with impressively bright landing lights. Much of the wiring is in place, but some final connections have to be made. The landing lights were secured in place and the covers were installed using canopy glue.
The LED lights need to be trimmed to fit and the final connections made. Test the lights before heat shrinking the wires and gluing in the lights because they only work when connected one way! The navigation lights are always on and the landing lights were switched using the flaps because the Robin S has fixed gear. Extending the flaps turns on the lights and fully retracting them turns them off. Use care when working with these because the landing lights will illuminate a dark room and they had me seeing spots for a while.
Installing the motor was easy because everything lined up perfectly. The motor box was attached using the supplied hardware and Z-42 threadlocker. The Hacker motor likewise fit without any modification.
The optional tow hitch installs by removing the covering and mounting it as shown. A servo-operated release is important on the tow airplane in case of an emergency or if the glider fails to release. SebArt RC even supplies a nice fairing to cover the tow point, which was scuffed and glued in place with canopy glue.
The cabin consists of a vacuum-formed floor, instrument panel, and the plastic cabin top and windows. Decals are provided for the instrument panel and seat backs. With those in place, the hatch is assembled using canopy glue and left to dry. When that was done, I installed the cowl, which aligned nicely with the covering trim. When the assembly was done, the peel-and-stick decals were applied to dress up the Robin S.
A Spektrum AR9020 receiver was installed and the radio programmed with the throws recommended in the manual.
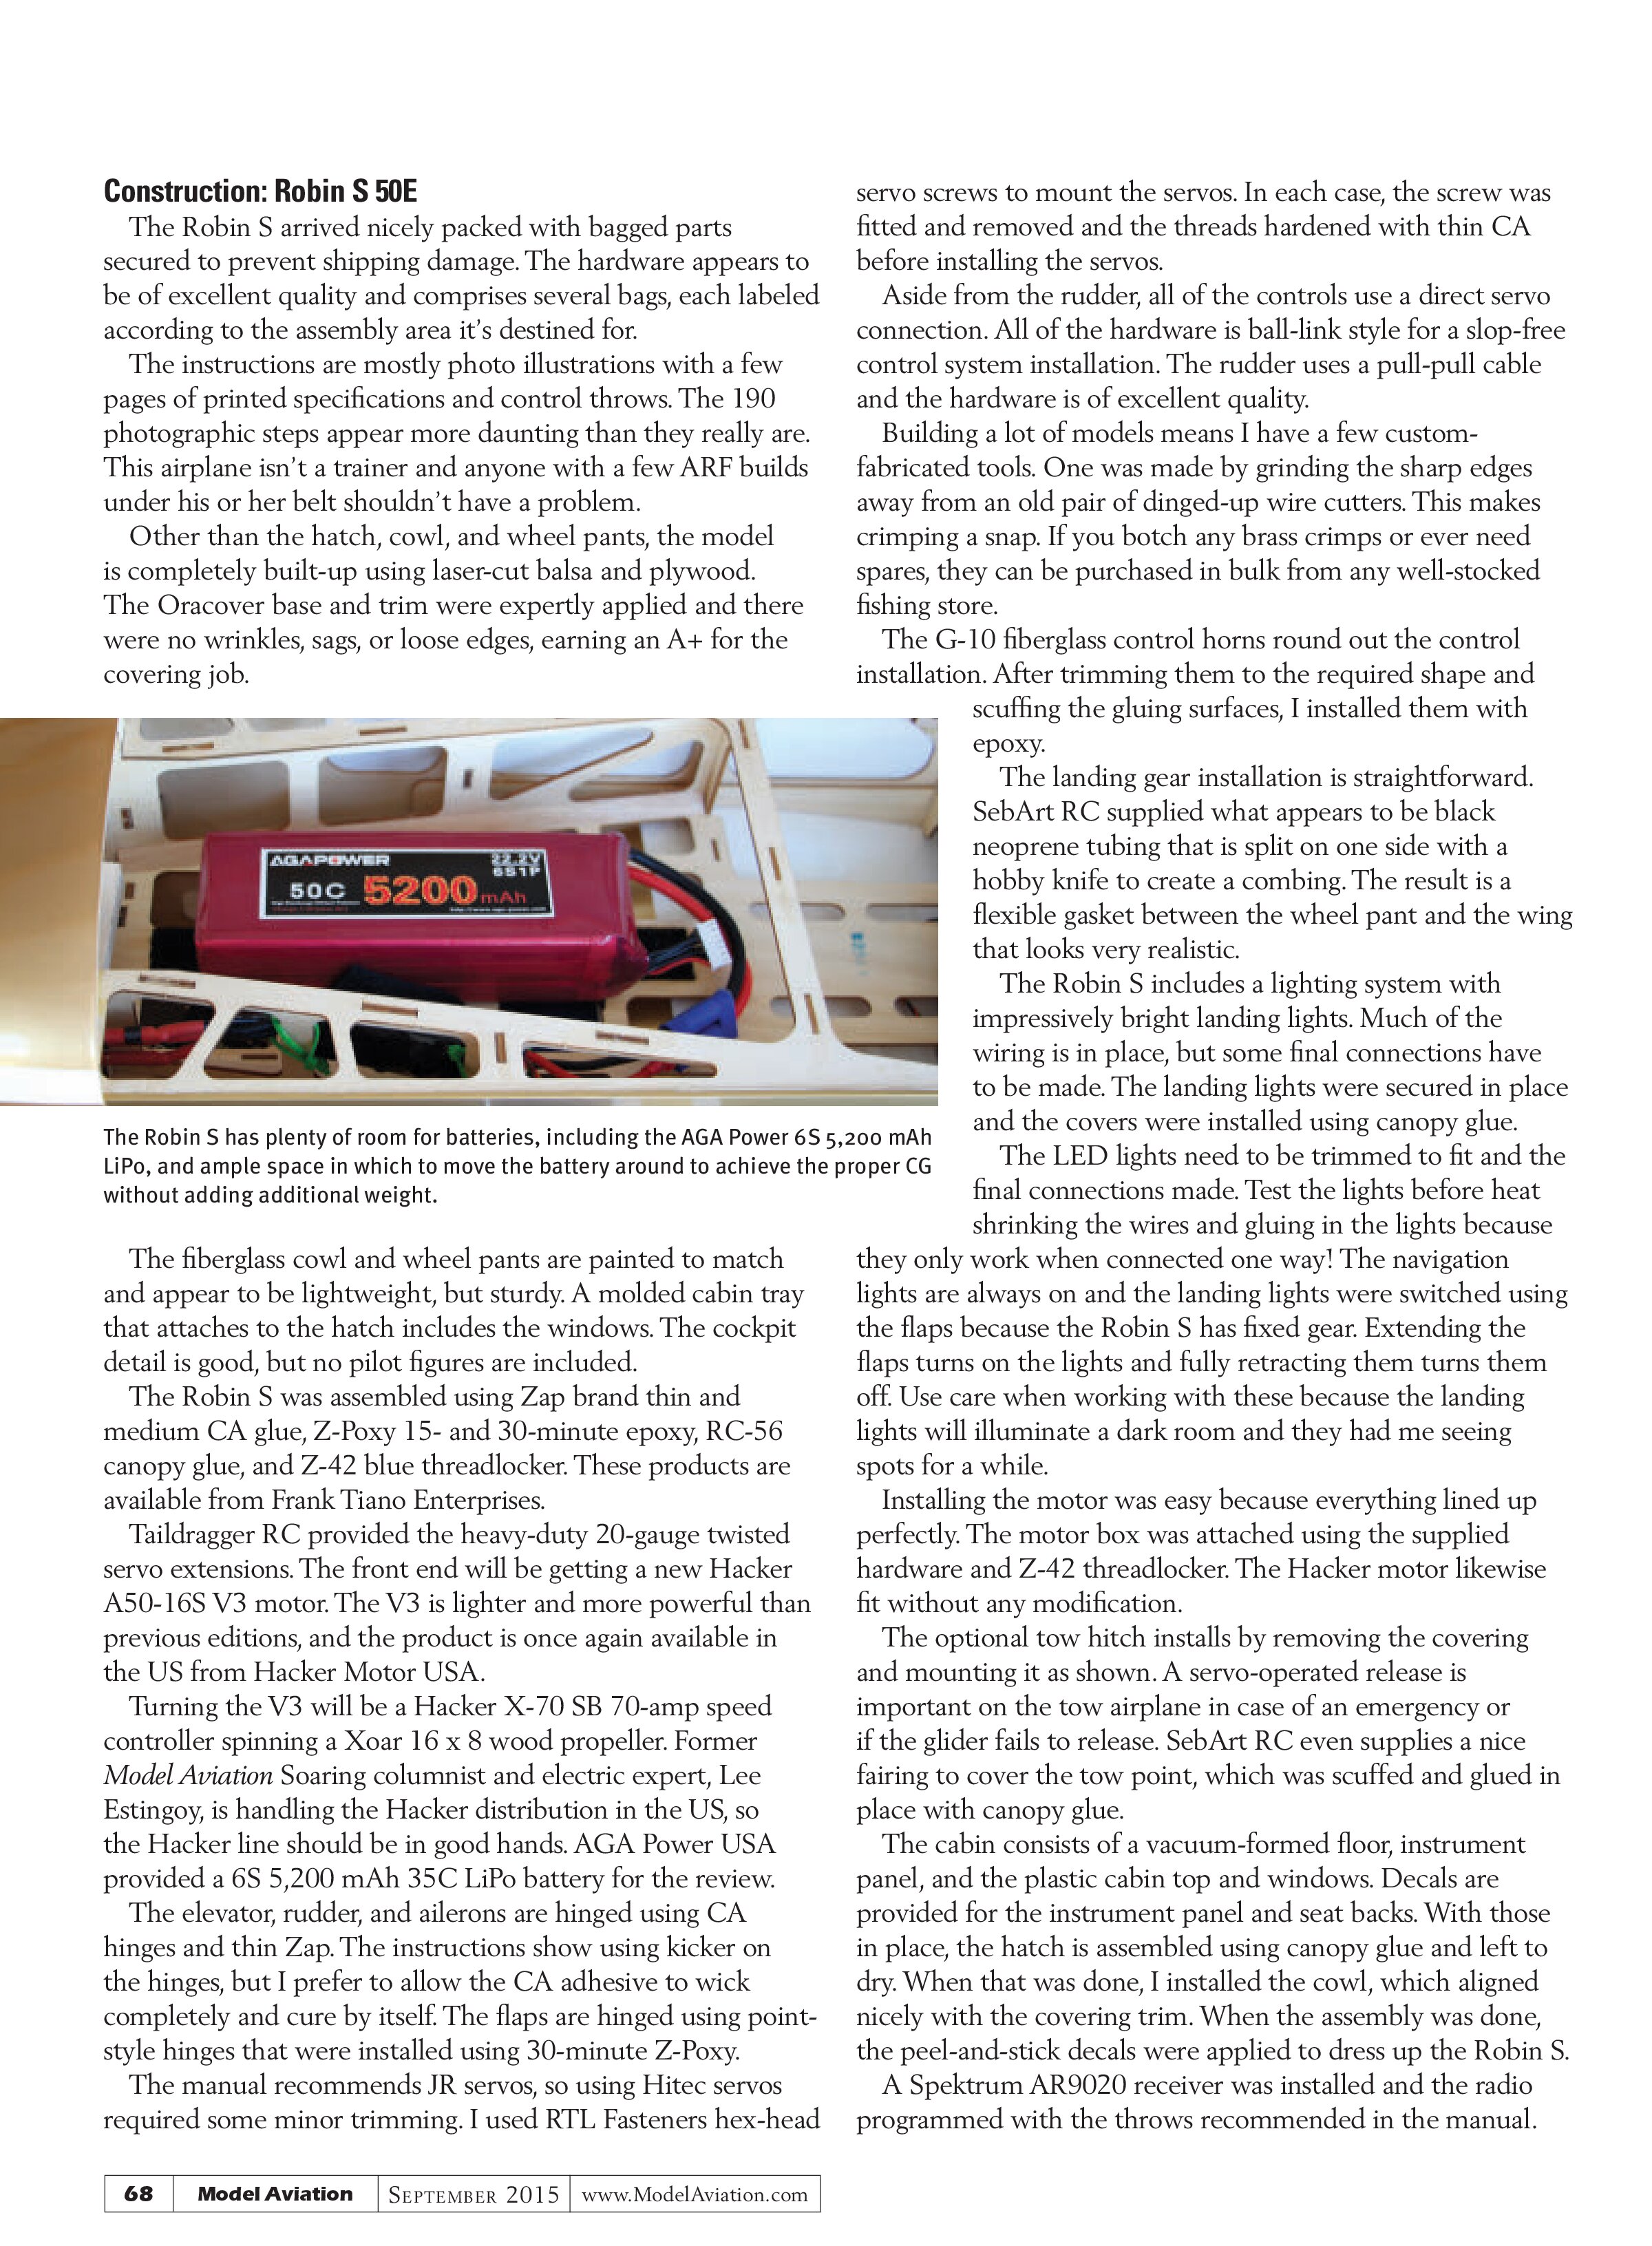
There is ample room to install the AGA Power 6S battery where needed to achieve the recommended center of gravity (CG). My wattmeter indicated 1,310 watts and 55 amps, allowing plenty of overhead for the speed controller to operate.
The canopy is installed using two provided thumb screws. With a top-mounted battery hatch that has lots of room and is easy to remove, the Robin S rates an A for ease of battery changing. Total build time is approximately 12 hours.
Construction: L-13 Blanik Glider
The Blanik arrived in a large box. The parts were bagged and secured to prevent damage, and everything was present and accounted for.
The Blanik’s wing and tail surfaces are built-up balsa and light plywood. Everything is fully sheeted and appears to be stout without being too heavy. The fiberglass fuselage is painted to match the nice-quality covering. I expected a carbon-fiber wing tube, but the solid, 15mm carbon rod should be sufficient for aerobatics.
Just as on the Robin S, Zap CA glue, Z-Poxy, and RC-56 canopy glue were used on the Blanik. RTL Fasteners

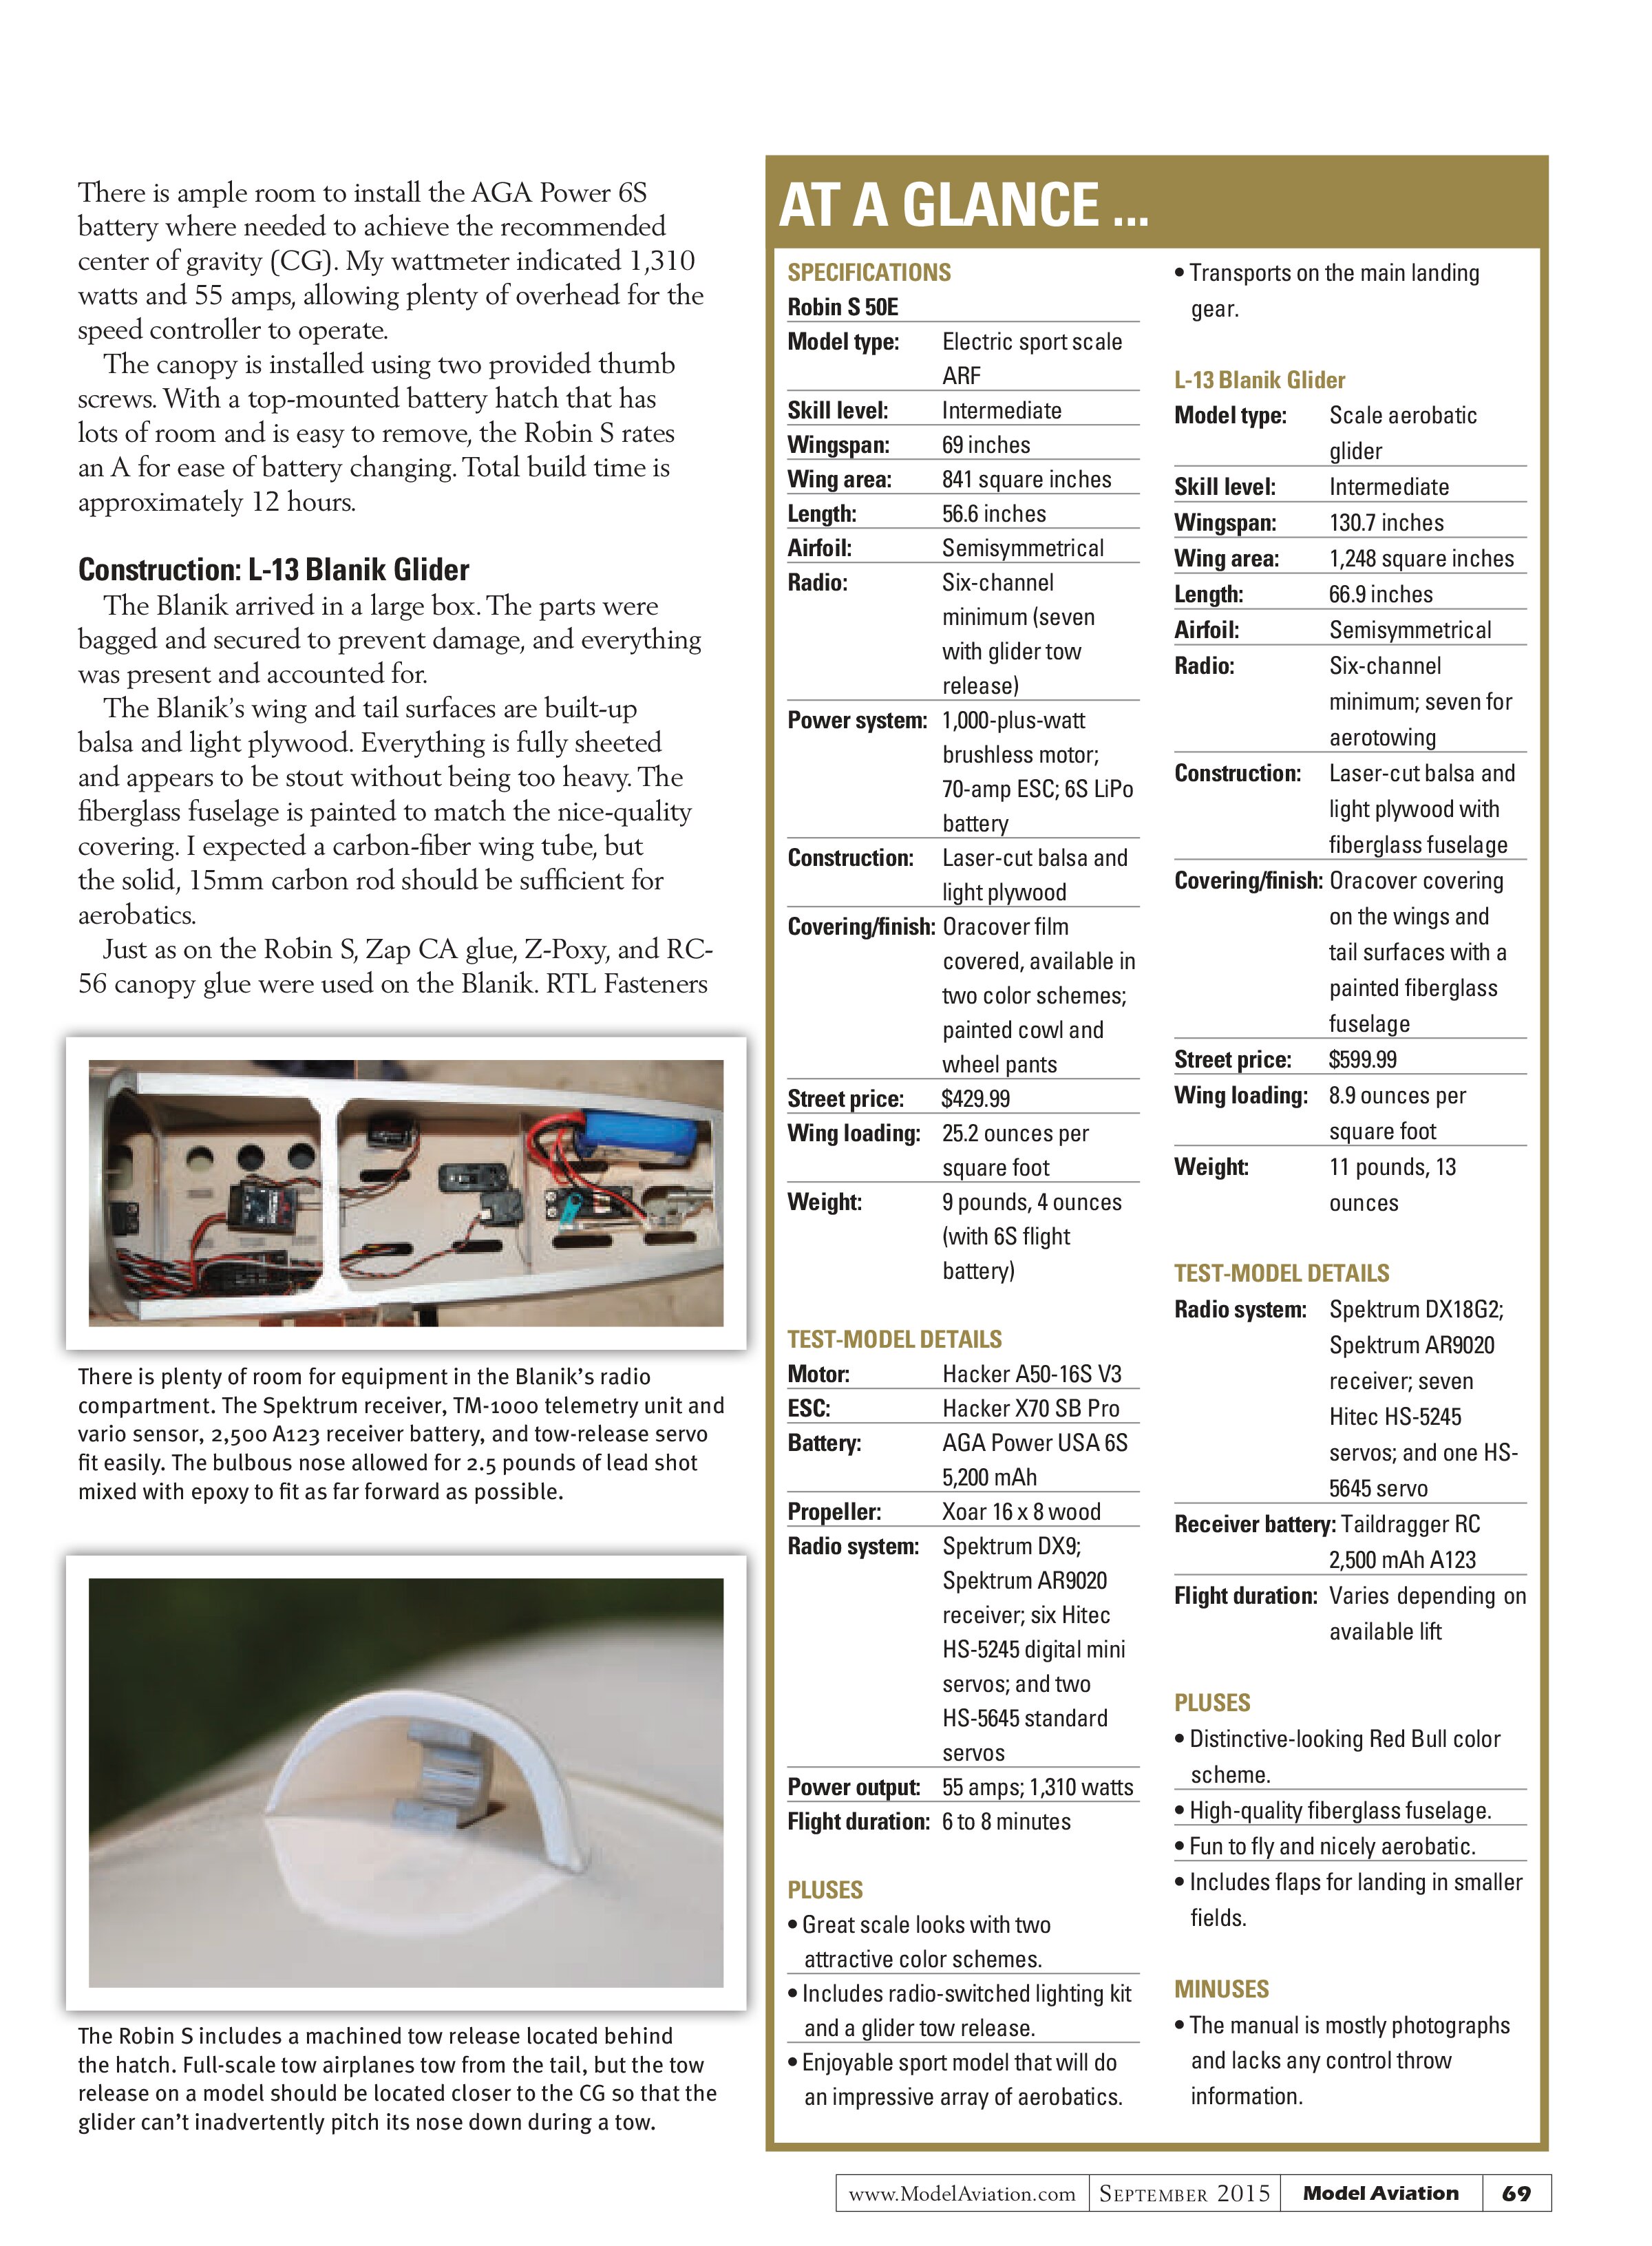
There is plenty of room for equipment in the Blanik’s radio compartment. The Spektrum receiver, TM-1000 telemetry unit and vario sensor, 2,500 A123 receiver battery, and tow-release servo fit easily. The bulbous nose allowed for 2.5 pounds of lead shot mixed with epoxy to fit as far forward as possible.

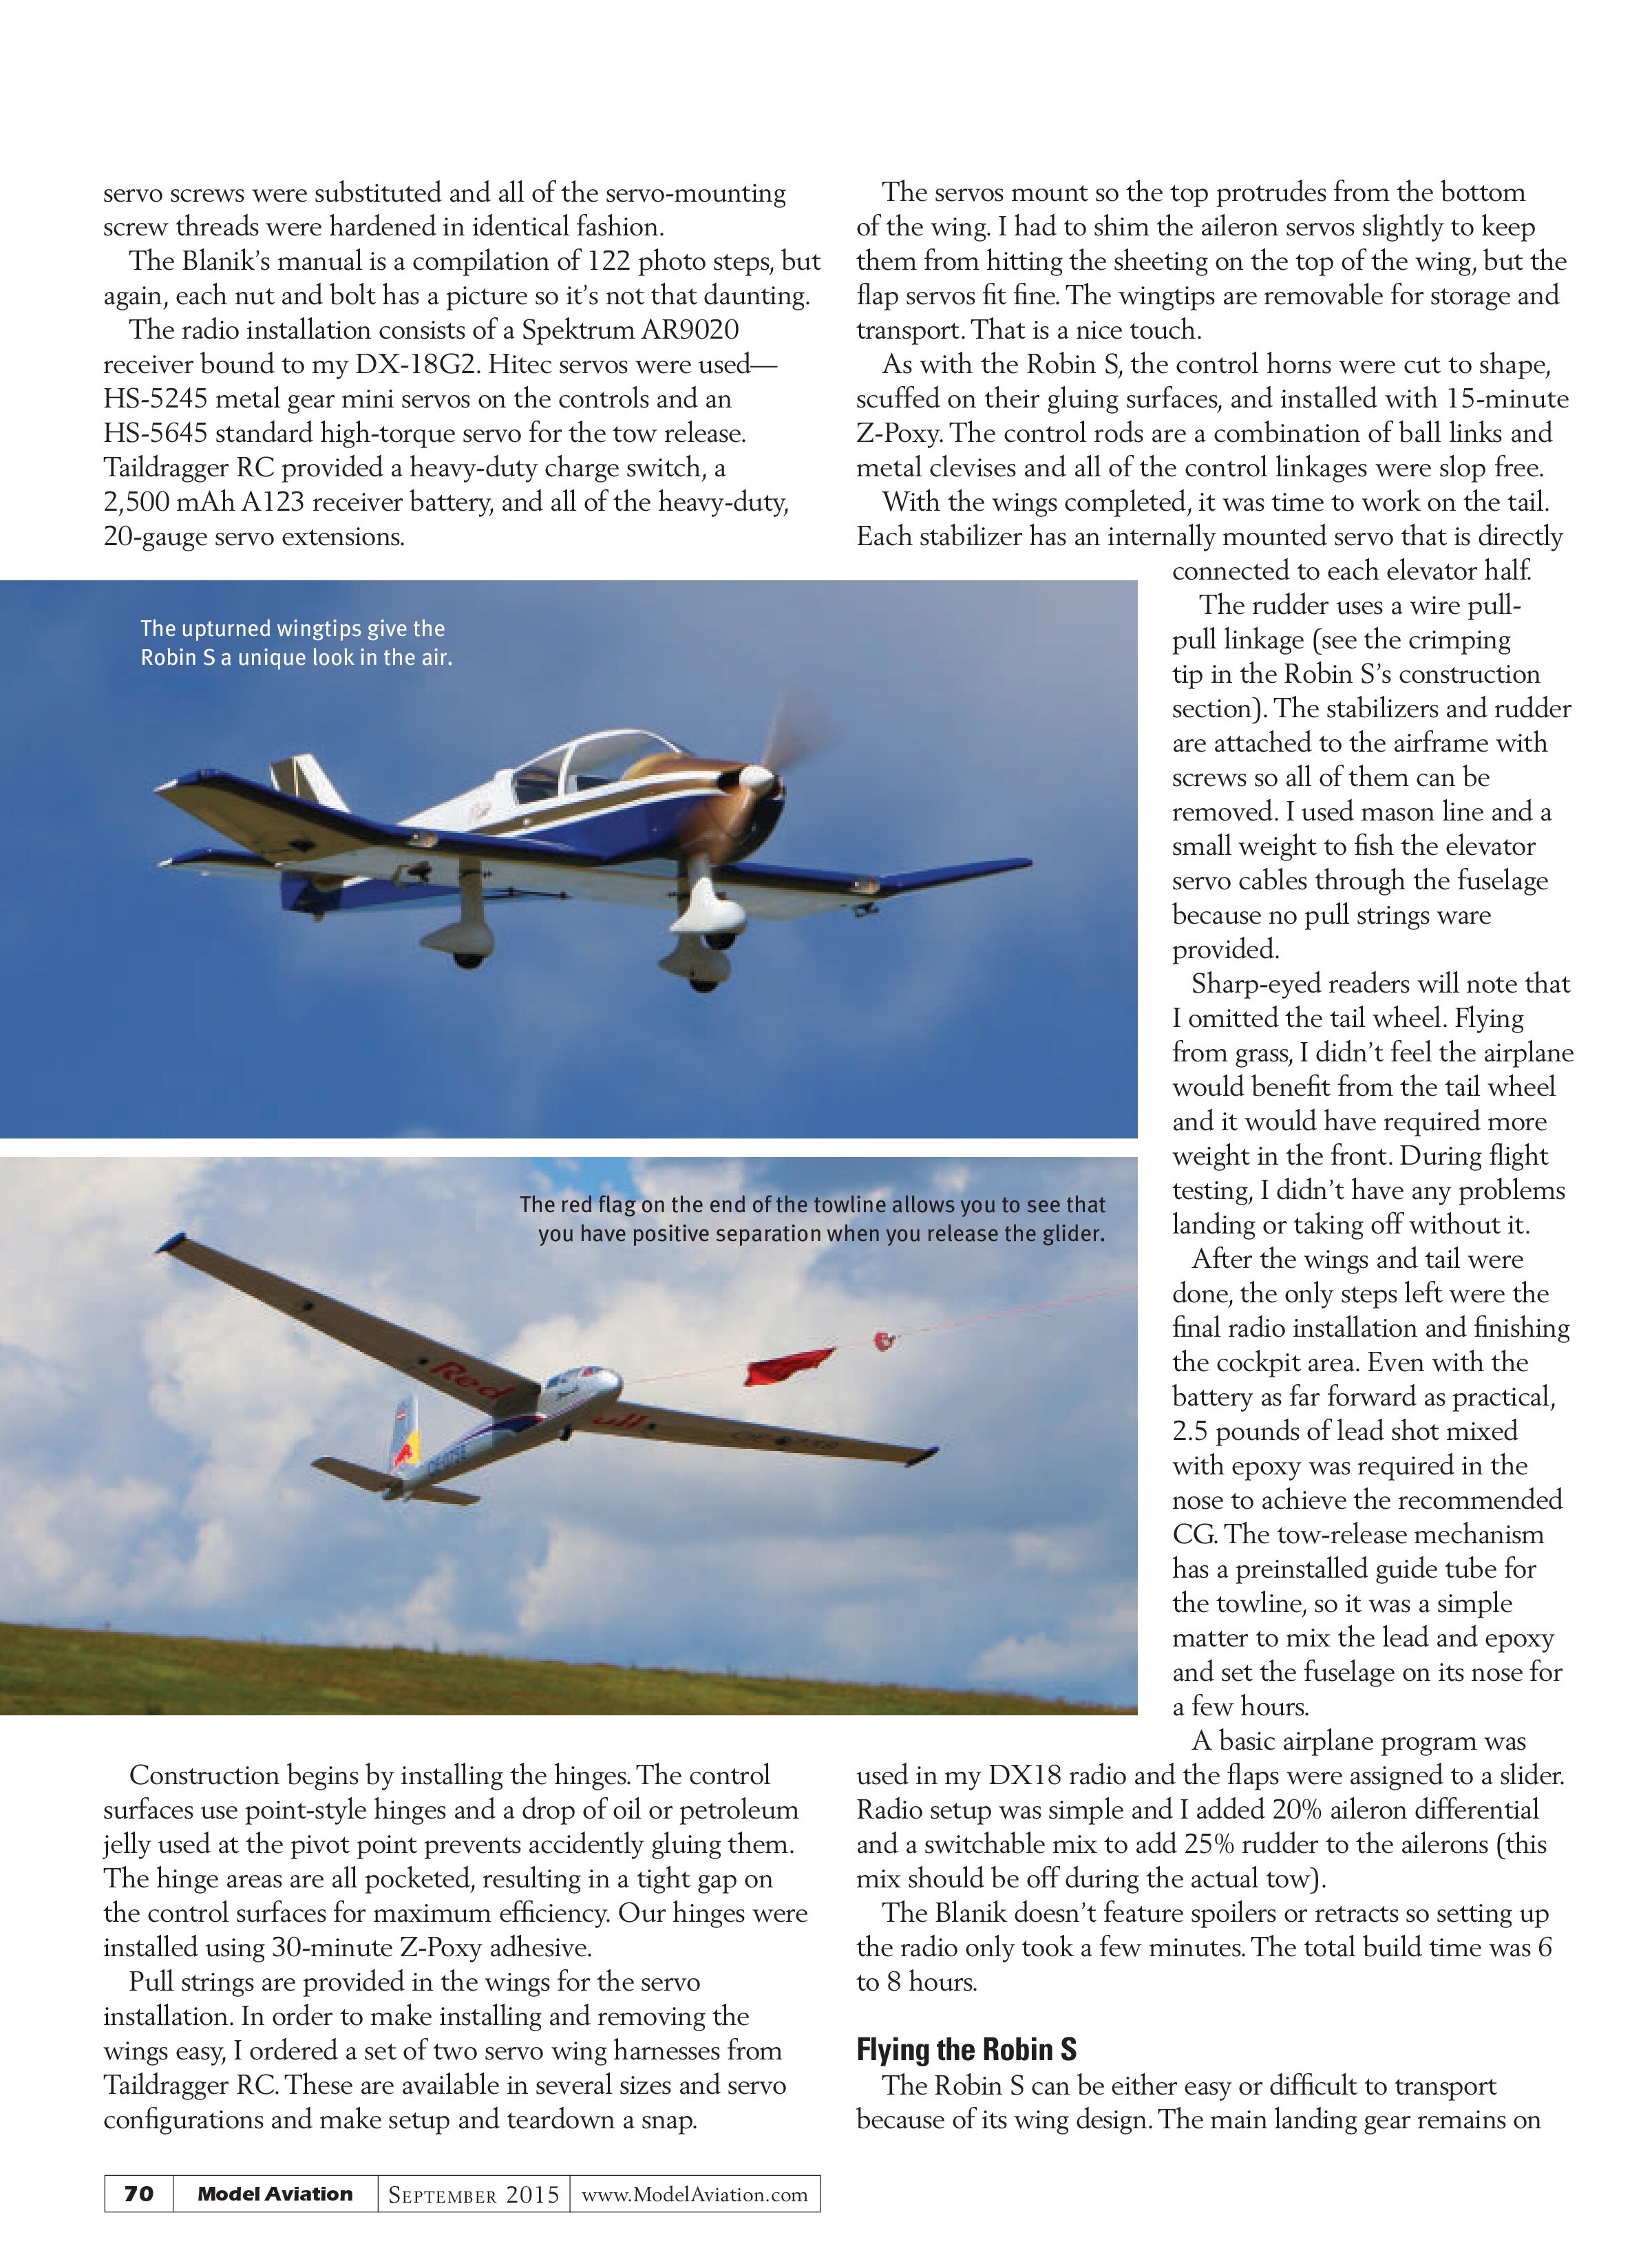
The Robin S includes a machined tow release located behind the hatch. Full-scale tow airplanes tow from the tail, but the tow release on a model should be located closer to the CG so that the glider can’t inadvertently pitch its nose down during a tow.
AT A GLANCE ...
SPECIFICATIONS
Robin S 50E
Model type: Electric sport scale ARF
Skill level: Intermediate
Wingspan: 69 inches
Wing area: 841 square inches
Length: 56.6 inches
Airfoil: Semisymmetrical
Radio: Six-channel minimum (seven with glider tow release)
Power system: 1,000-plus-watt brushless motor; 70-amp ESC; 6S LiPo battery
Construction: Laser-cut balsa and light plywood
Covering/finish: Oracover film covered, available in two color schemes; painted cowl and wheel pants
Street price: $429.99
Wing loading: 25.2 ounces per square foot
Weight: 9 pounds, 4 ounces (with 6S flight battery)
TEST-MODEL DETAILS
Motor: Hacker A50-16S V3
ESC: Hacker X70 SB Pro
Battery: AGA Power USA 6S 5,200 mAh
Propeller: Xoar 16 x 8 wood
Radio system: Spektrum DX9; Spektrum AR9020 receiver; six Hitec HS-5245 digital mini servos; and two HS-5645 standard servos
Power output: 55 amps; 1,310 watts
Flight duration: 6 to 8 minutes
PLUSES
- Great scale looks with two attractive color schemes.
- Includes radio-switched lighting kit and a glider tow release.
- Enjoyable sport model that will do an impressive array of aerobatics.
L-13 Blanik Glider
Model type: Scale aerobatic glider
Skill level: Intermediate
Wingspan: 130.7 inches
Wing area: 1,248 square inches
Length: 66.9 inches
Airfoil: Semisymmetrical
Radio: Six-channel minimum; seven for aerotowing
Construction: Laser-cut balsa and light plywood with fiberglass fuselage
Covering/finish: Oracover covering on the wings and tail surfaces with a painted fiberglass fuselage
Street price: $599.99
Wing loading: 8.9 ounces per square foot
Weight: 11 pounds, 13 ounces
TEST-MODEL DETAILS
Radio system: Spektrum DX18G2; Spektrum AR9020 receiver; seven Hitec HS-5245 servos; and one HS-5645 servo
Receiver battery: Taildragger RC 2,500 mAh A123
Flight duration: Varies depending on available lift
PLUSES
- Distinctive-looking Red Bull color scheme.
- High-quality fiberglass fuselage.
- Fun to fly and nicely aerobatic.
- Includes flaps for landing in smaller fields.
MINUSES
- The manual is mostly photographs and lacks any control throw information.
servo screws were substituted and all of the servo-mounting screw threads were hardened in identical fashion.
The Blanik’s manual is a compilation of 122 photo steps, but again, each nut and bolt has a picture so it’s not that daunting.
The radio installation consists of a Spektrum AR9020 receiver bound to my DX-18G2. Hitec servos were used—HS-5245 metal gear mini servos on the controls and an HS-5645 standard high-torque servo for the tow release. Taildragger RC provided a heavy-duty charge switch, a 2,500 mAh A123 receiver battery, and all of the heavy-duty, 20-gauge servo extensions.


Construction begins by installing the hinges. The control surfaces use point-style hinges and a drop of oil or petroleum jelly used at the pivot point prevents accidently gluing them. The hinge areas are all pocketed, resulting in a tight gap on the control surfaces for maximum efficiency. Our hinges were installed using 30-minute Z-Poxy adhesive.
Pull strings are provided in the wings for the servo installation. In order to make installing and removing the wings easy, I ordered a set of two servo wing harnesses from Taildragger RC. These are available in several sizes and servo configurations and make setup and teardown a snap.
The servos mount so the top protrudes from the bottom of the wing. I had to shim the aileron servos slightly to keep them from hitting the sheeting on the top of the wing, but the flap servos fit fine. The wingtips are removable for storage and transport. That is a nice touch.
As with the Robin S, the control horns were cut to shape, scuffed on their gluing surfaces, and installed with 15-minute Z-Poxy. The control rods are a combination of ball links and metal clevises and all of the control linkages were slop free.
With the wings completed, it was time to work on the tail. Each stabilizer has an internally mounted servo that is directly connected to each elevator half.
The rudder uses a wire pull-pull linkage (see the crimping tip in the Robin S’s construction section). The stabilizers and rudder are attached to the airframe with screws so all of them can be removed. I used mason line and a small weight to fish the elevator servo cables through the fuselage because no pull strings ware provided.
Sharp-eyed readers will note that I omitted the tail wheel. Flying from grass, I didn’t feel the airplane would benefit from the tail wheel and it would have required more weight in the front. During flight testing, I didn’t have any problems landing or taking off without it.
After the wings and tail were done, the only steps left were the final radio installation and finishing the cockpit area. Even with the battery as far forward as practical, 2.5 pounds of lead shot mixed with epoxy was required in the nose to achieve the recommended CG. The tow-release mechanism has a preinstalled guide tube for the towline, so it was a simple matter to mix the lead and epoxy and set the fuselage on its nose for a few hours.
A basic airplane program was used in my DX18 radio and the flaps were assigned to a slider. Radio setup was simple and I added 20% aileron differential and a switchable mix to add 25% rudder to the ailerons (this mix should be off during the actual tow).
The Blanik doesn’t feature spoilers or retracts so setting up the radio only took a few minutes. The total build time was 6 to 8 hours.
Flying the Robin S
The Robin S can be either easy or difficult to transport because of its wing design. The main landing gear remains on the model when it’s broken down for transport. This means the airplane can sit on its wheels, whereas many models with the main gear on the wing require a cradle because the nose gear remains on the fuselage and the main landing gear are removed.
Even without the wingtips installed, the airplane takes a lot of space. This might be a problem for smaller vehicles.
Field assembly is easy. The aileron servos and wingtip lights plug in, then the wingtip slides into place over the carbon-fiber wing tubes. It is secured by a hex-head screw. Two thumb screws secure the hatch, and when the battery is in place, you’re ready to go.
The power loading works out to roughly 145 watts per pound. This should be plenty of zip for sport flying and light towing duties.
I wanted to be thoroughly familiar with the flying characteristics of the Robin S before trying any towing with it so my flying buddy, Adam Strong, and I headed to the field with several charged battery packs. The plan was to give Adam several flights as well because he would be piloting the Robin S during our aerotowing flights.
Taxiing on both a paved and a grass runway was easy. The main landing gear’s wide track offers stability on the ground. A few minor radio adjustments to the nose wheel servo had the Robin S tracking nice and straight.
Slowly adding power, the Robin S accelerated nicely and was airborne in 100 feet. Two clicks of up-elevator trim had it flying hands off! Up high and into the wind, I performed a stall test by reducing the power to idle and adding elevator to try to keep it level.
I found that the forgiving stall characteristics of the full-scale aircraft were passed down to the model. Even without using the flaps, when the Robin S stalls, it simply drops the nose slightly and although the sink rate increases, the airplane doesn’t show any tendency to drop a wing or snap. Relax the elevator and it resumes flying as though nothing happened.
In normal flight, you need to add a little rudder in turns or the Robin S will drag its tail. Some aileron differential helped, but to make good-looking turns, you need to add some rudder.
The Robin S is designed to be an extremely stable airplane when upright, but it also holds its own in inverted flight. The wing design requires some down-elevator, but I was surprised at how easy it was to fly inverted. The roll rate is plenty for a sport model and both the rudder and elevator are effective.
Knife-edge flight needs some correction for roll coupling and some up-elevator, but with some speed it will fly a knife-edge pass the length of the runway without feeling as though it’s going to snap out.
Forced into a spin, the Robin S will stop almost as soon as you release the sticks. With 25% exponential, it has a good balance of responsiveness without being twitchy. All of our flying was done at high rate.
My first real surprise came when I dropped the flaps to land and the Robin S didn’t balloon at all, so no elevator compensation was required. The model locked into a nice approach at ⅓ power with full flaps.
Airplanes with tricycle gear normally roll on the mains a little way before settling on the nose wheel. In the 10 flights we made that day and on all of the subsequent towing flights, as soon as the main gear touched down the Robin S immediately rotated so the nose gear was down. It was not a problem, but it was not something I’ve seen before.
The Robin S flew equally well on a 5S battery pack as it did on 6S power, with no visible drop-off in performance. I wouldn’t tow gliders on 5S power, but otherwise the difference was indistinguishable.
On the second day out, it was time to try some glider towing. With the towline set on both ends and a control check completed on both airplanes, Adam advanced the power on the Robin S and off we went. The Robin S towed the nearly 12-pound Blanik aloft with a nice, scalelike climb. Three full-power tows to approximately 800 feet are possible on one 5,200 mAh 6S pack.
The Robin S is generally stable during a tow, but the upturned wingtips can subject the model to problems if you have much crosswind (8 mph or more), so try to minimize your time spent in a crosswind. If there are obstructions such as trees or fences on the approach path at your field, be sure to keep the towline clear when you land. If you use a birdie as we do, the towline will remain nearly straight.
Flying the Blanik
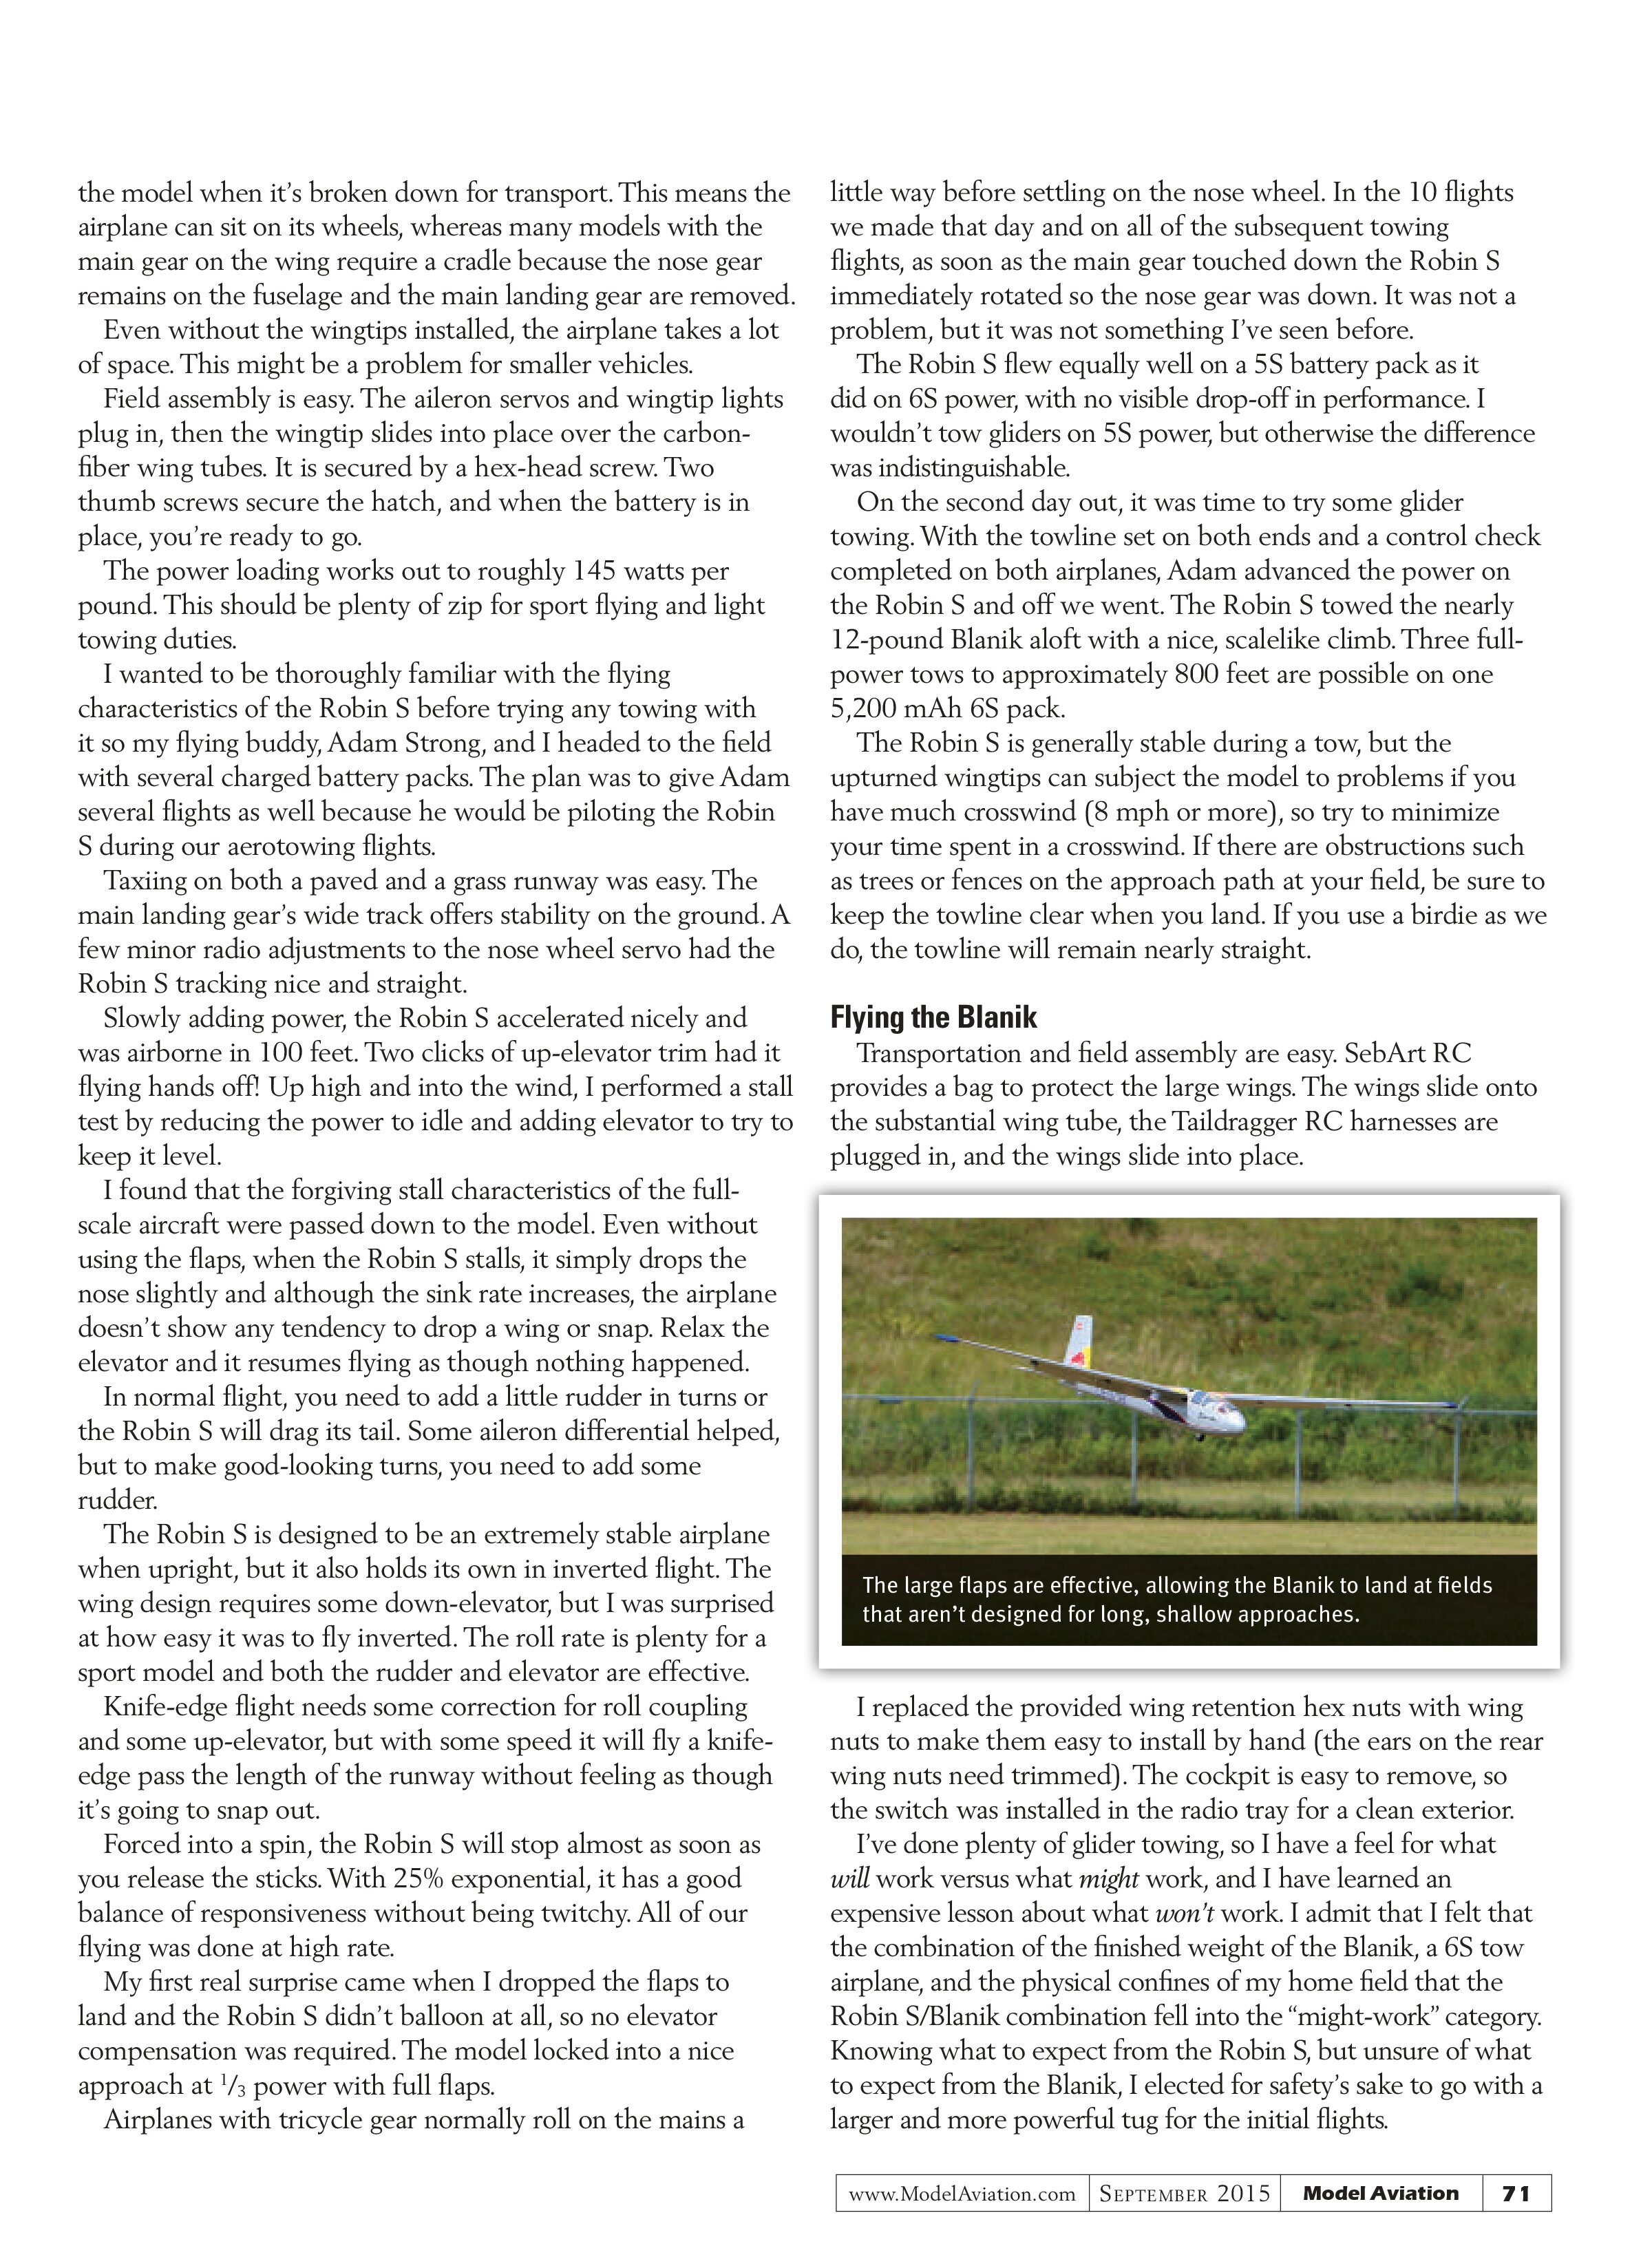
Transportation and field assembly are easy. SebArt RC provides a bag to protect the large wings. The wings slide onto the substantial wing tube, the Taildragger RC harnesses are plugged in, and the wings slide into place.

I replaced the provided wing retention hex nuts with wing nuts to make them easy to install by hand (the ears on the rear wing nuts need trimmed). The cockpit is easy to remove, so the switch was installed in the radio tray for a clean exterior.
I’ve done plenty of glider towing, so I have a feel for what will work versus what might work, and I have learned an expensive lesson about what won’t work. I admit that I felt that the combination of the finished weight of the Blanik, a 6S tow airplane, and the physical confines of my home field that the Robin S/Blanik combination fell into the “might-work” category. Knowing what to expect from the Robin S, but unsure of what to expect from the Blanik, I elected for safety’s sake to go with a larger and more powerful tug for the initial flights.

Locking the Blanik’s tow loop in place is a bit of a pain. Success happened when I took a bamboo skewer and notched the end with a cutting wheel and used that to insert the tow loop. When the skewer bottoms out, you can hold the tow loop in place, remove the skewer, and flip the switch to capture the line.
With everything set, the tug eased into full power and the Blanik was airborne almost immediately. The aircraft settled in nicely behind the tow airplane and all I had to do was keep the wings level until I released it at 800 feet. A few clicks of down-elevator trim were needed, but the aileron and rudder trim were perfect.
I eased in some up-elevator until it stalled and the Blanik dropped a wing and needed approximately 30 feet to recover. That might sound bad, but it’s a characteristic of a scale glider with a long, thin wing, and it came as no surprise. You have to experiment and become familiar with when it will happen and avoid putting yourself in that position when flying low.
I dropped the flaps to roughly half and the Blanik slowed down, but ballooned a bit. Full flap needs approximately 10% down-elevator to maintain level flight. The flaps are effective and the stall speed is slower, but just as abrupt when the flaps are down. I made a mental note to keep the nose pointed down and the speed up when entering the landing pattern. After a smooth touchdown, I adjusted the elevator compensation for the flaps and went back up into the air.
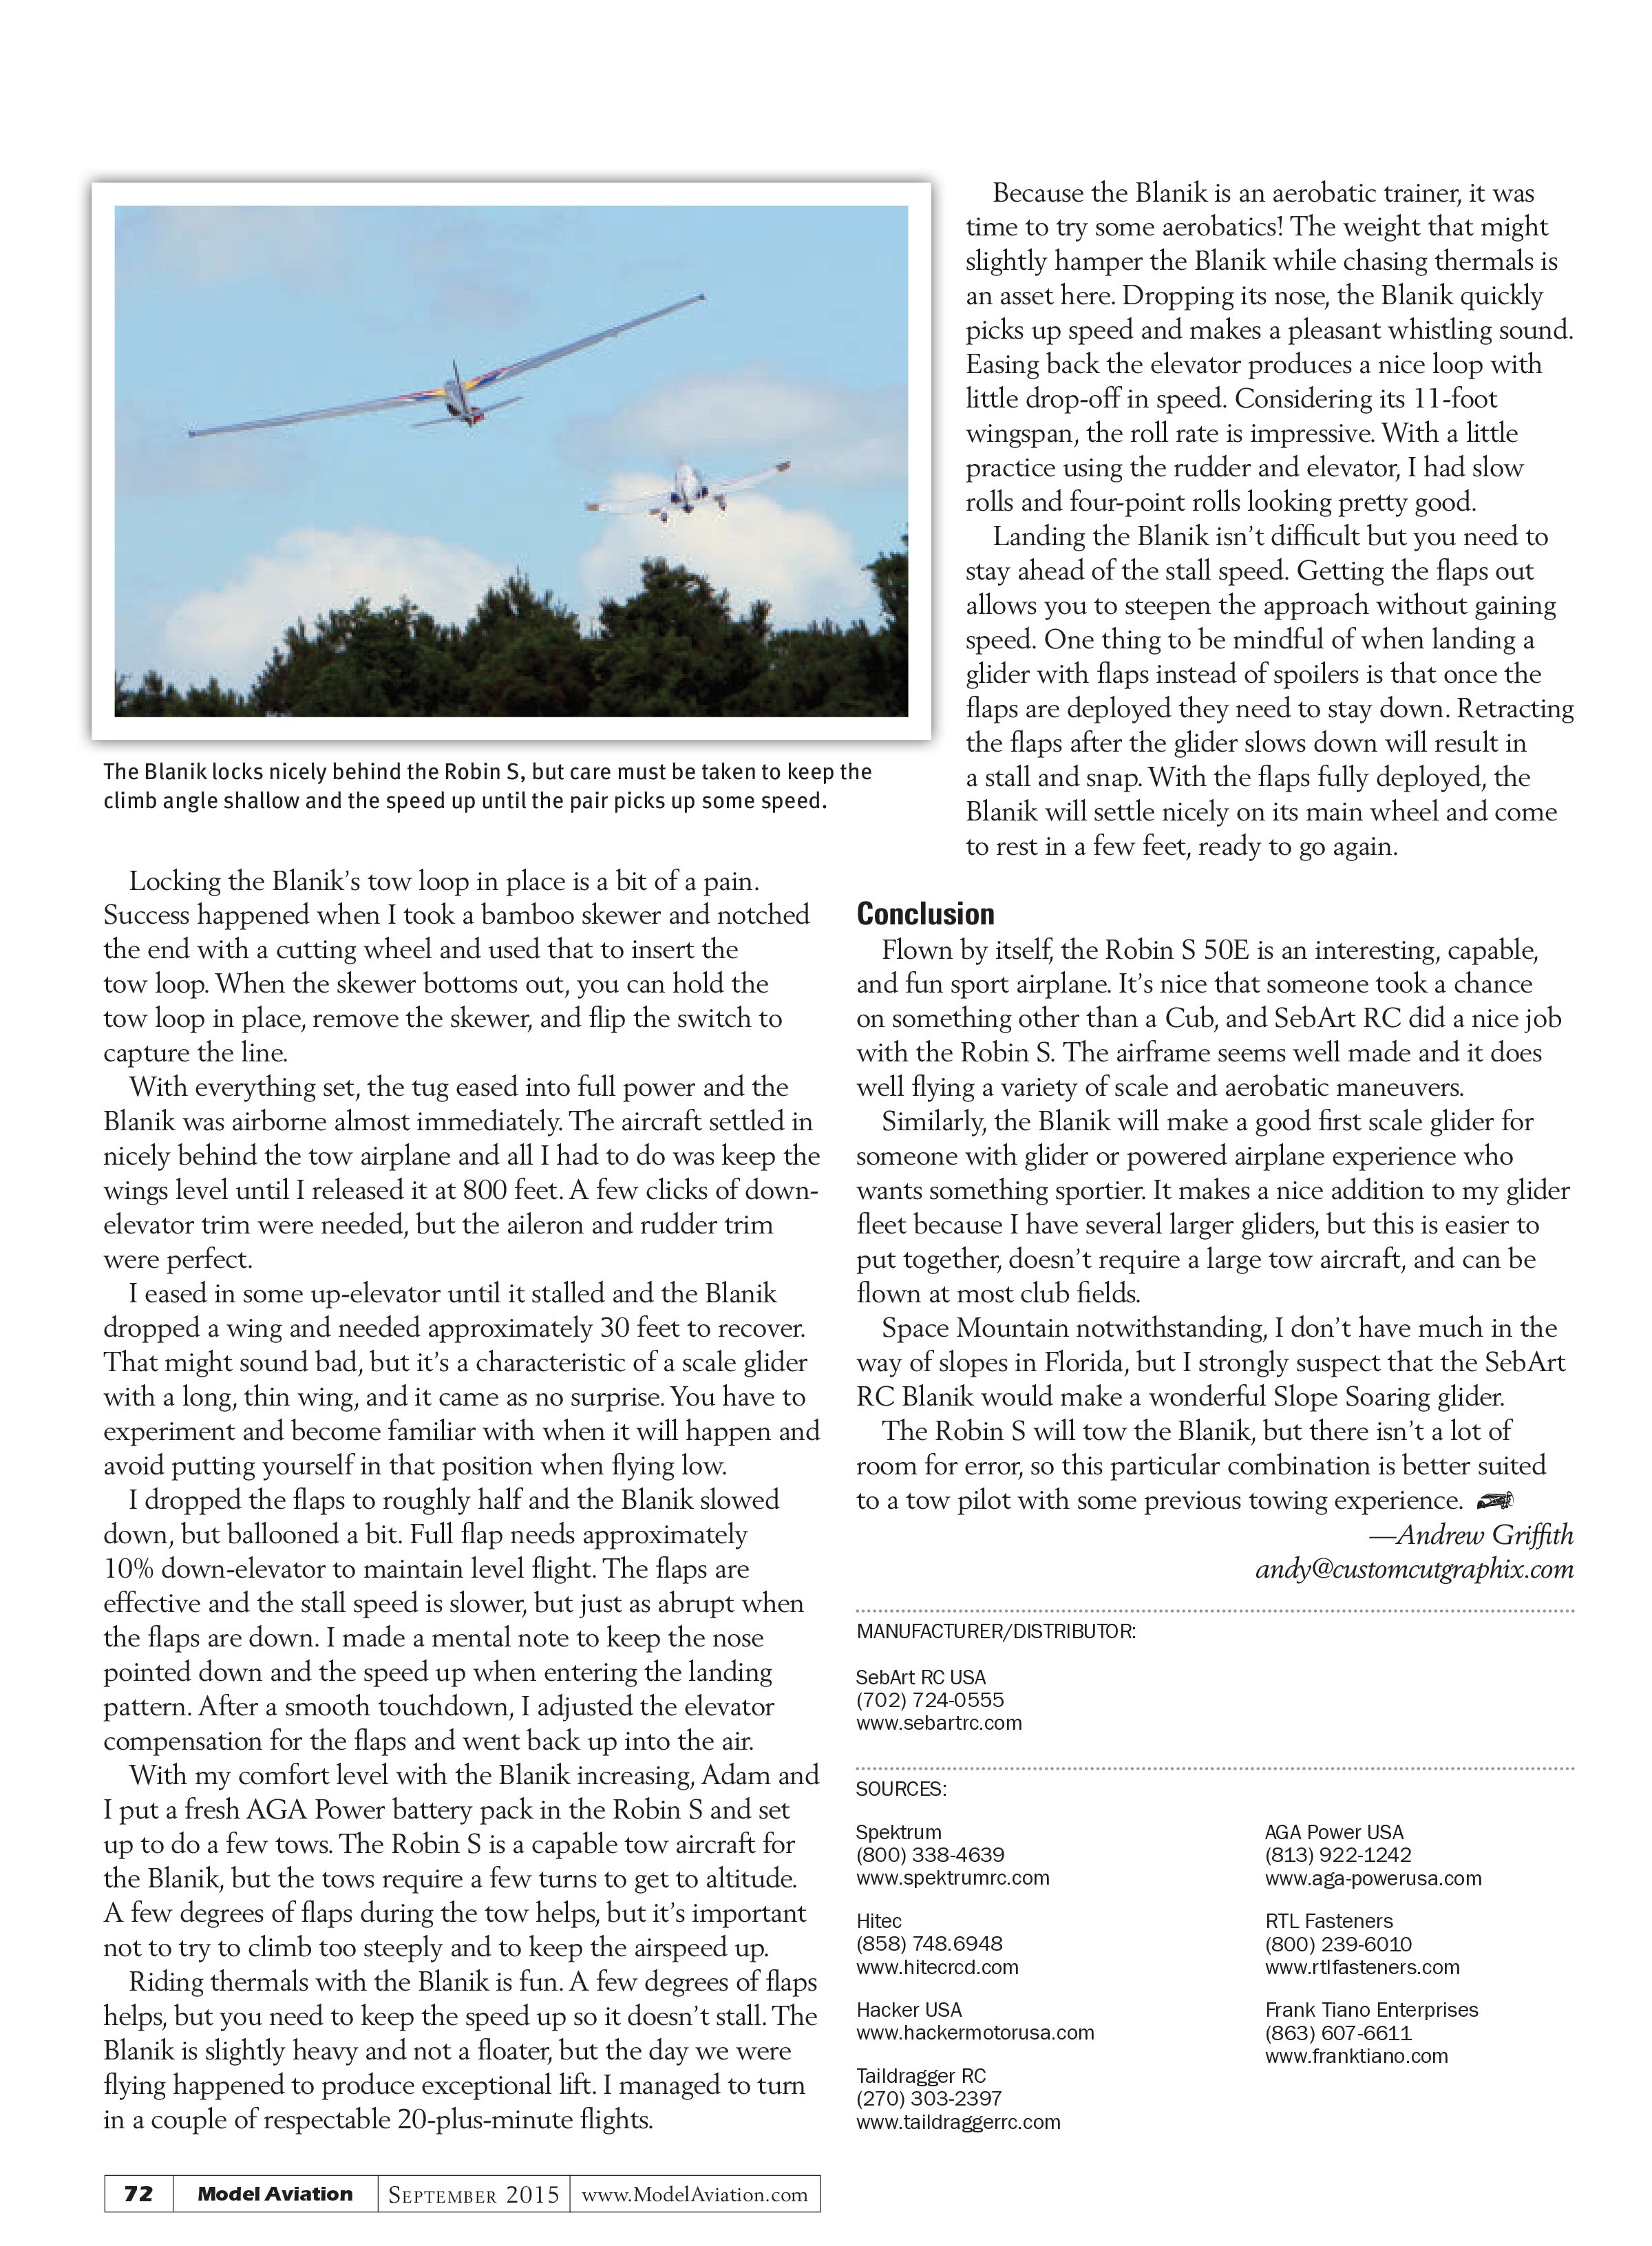
With my comfort level with the Blanik increasing, Adam and I put a fresh AGA Power battery pack in the Robin S and set up to do a few tows. The Robin S is a capable tow aircraft for the Blanik, but the tows require a few turns to get to altitude. A few degrees of flaps during the tow helps, but it’s important not to try to climb too steeply and to keep the airspeed up.
Riding thermals with the Blanik is fun. A few degrees of flaps helps, but you need to keep the speed up so it doesn’t stall. The Blanik is slightly heavy and not a floater, but the day we were flying happened to produce exceptional lift. I managed to turn in a couple of respectable 20-plus-minute flights.
The Blanik locks nicely behind the Robin S, but care must be taken to keep the climb angle shallow and the speed up until the pair picks up some speed.
Because the Blanik is an aerobatic trainer, it was time to try some aerobatics! The weight that might slightly hamper the Blanik while chasing thermals is an asset here. Dropping its nose, the Blanik quickly picks up speed and makes a pleasant whistling sound. Easing back the elevator produces a nice loop with little drop-off in speed. Considering its 11-foot wingspan, the roll rate is impressive. With a little practice using the rudder and elevator, I had slow rolls and four-point rolls looking pretty good.
Landing the Blanik isn’t difficult but you need to stay ahead of the stall speed. Getting the flaps out allows you to steepen the approach without gaining speed. One thing to be mindful of when landing a glider with flaps instead of spoilers is that once the flaps are deployed they need to stay down. Retracting the flaps after the glider slows down will result in a stall and snap. With the flaps fully deployed, the Blanik will settle nicely on its main wheel and come to rest in a few feet, ready to go again.
Conclusion
Flown by itself, the Robin S 50E is an interesting, capable, and fun sport airplane. It’s nice that someone took a chance on something other than a Cub, and SebArt RC did a nice job with the Robin S. The airframe seems well made and it does well flying a variety of scale and aerobatic maneuvers.
Similarly, the Blanik will make a good first scale glider for someone with glider or powered airplane experience who wants something sportier. It makes a nice addition to my glider fleet because I have several larger gliders, but this is easier to put together, doesn’t require a large tow aircraft, and can be flown at most club fields.
Space Mountain notwithstanding, I don’t have much in the way of slopes in Florida, but I strongly suspect that the SebArt RC Blanik would make a wonderful Slope Soaring glider.
The Robin S will tow the Blanik, but there isn’t a lot of room for error, so this particular combination is better suited to a tow pilot with some previous towing experience.
—Andrew Griffith
andy@customcutgraphix.com
MANUFACTURER/DISTRIBUTOR:
SebArt RC USA
(702) 724-0555
www.sebartrc.com
SOURCES:
Spektrum
(800) 338-4639
www.spektrumrc.com
Hitec
(858) 748.6948
www.hitecrcd.com
Hacker USA
www.hackermotorusa.com
Taildragger RC
(270) 303-2397
www.taildraggerrc.com
AGA Power USA
(813) 922-1242
www.aga-powerusa.com
RTL Fasteners
(800) 239-6010
www.rtlfasteners.com
Frank Tiano Enterprises
(863) 607-6611
www.franktiano.com