Setting up your first gyro
by Jim Hiller
jetmodeler@earthlink.net
Three-axis gyros for flight assistance in jet modeling have become popular. They are a wonderful addition to your airplanes, primarily because they dampen turbulence when flying on a windy day, but the advantages don’t end there. First, let’s discuss the myths.
Gyros will not make you a better pilot, and they will not fly the airplane for you. They will, however, improve the flying characteristics of many aircraft. After you start flying with a three-axis gyro, you will understand the many other benefits of installing one.
I have been using two three-axis gyros: a bavarianDEMON Cortex and a PowerBox Systems iGyro 3e. Both are good, proven, and popular gyros, and have performed exceptionally well. The Cortex gyro has been around for a while, earning a reputation as a high-quality unit, while the iGyro 3e is a second-generation unit also known for its quality.
The setup procedures for these two products differ greatly, so study your instructions carefully before installation and usage. Note that both units recommend first flying your model to establish control travel volumes before turning on the gyro. Failure to do this creates some unusual problems.
Keep in mind that normal flying travel volume is an important parameter for the gyro’s control equations. This becomes crucial as travel volumes for normal flight move away from 100% adjustable travel volume settings. With a servo arm that is too long, you will use only 30% to 50% of your travel volumes.
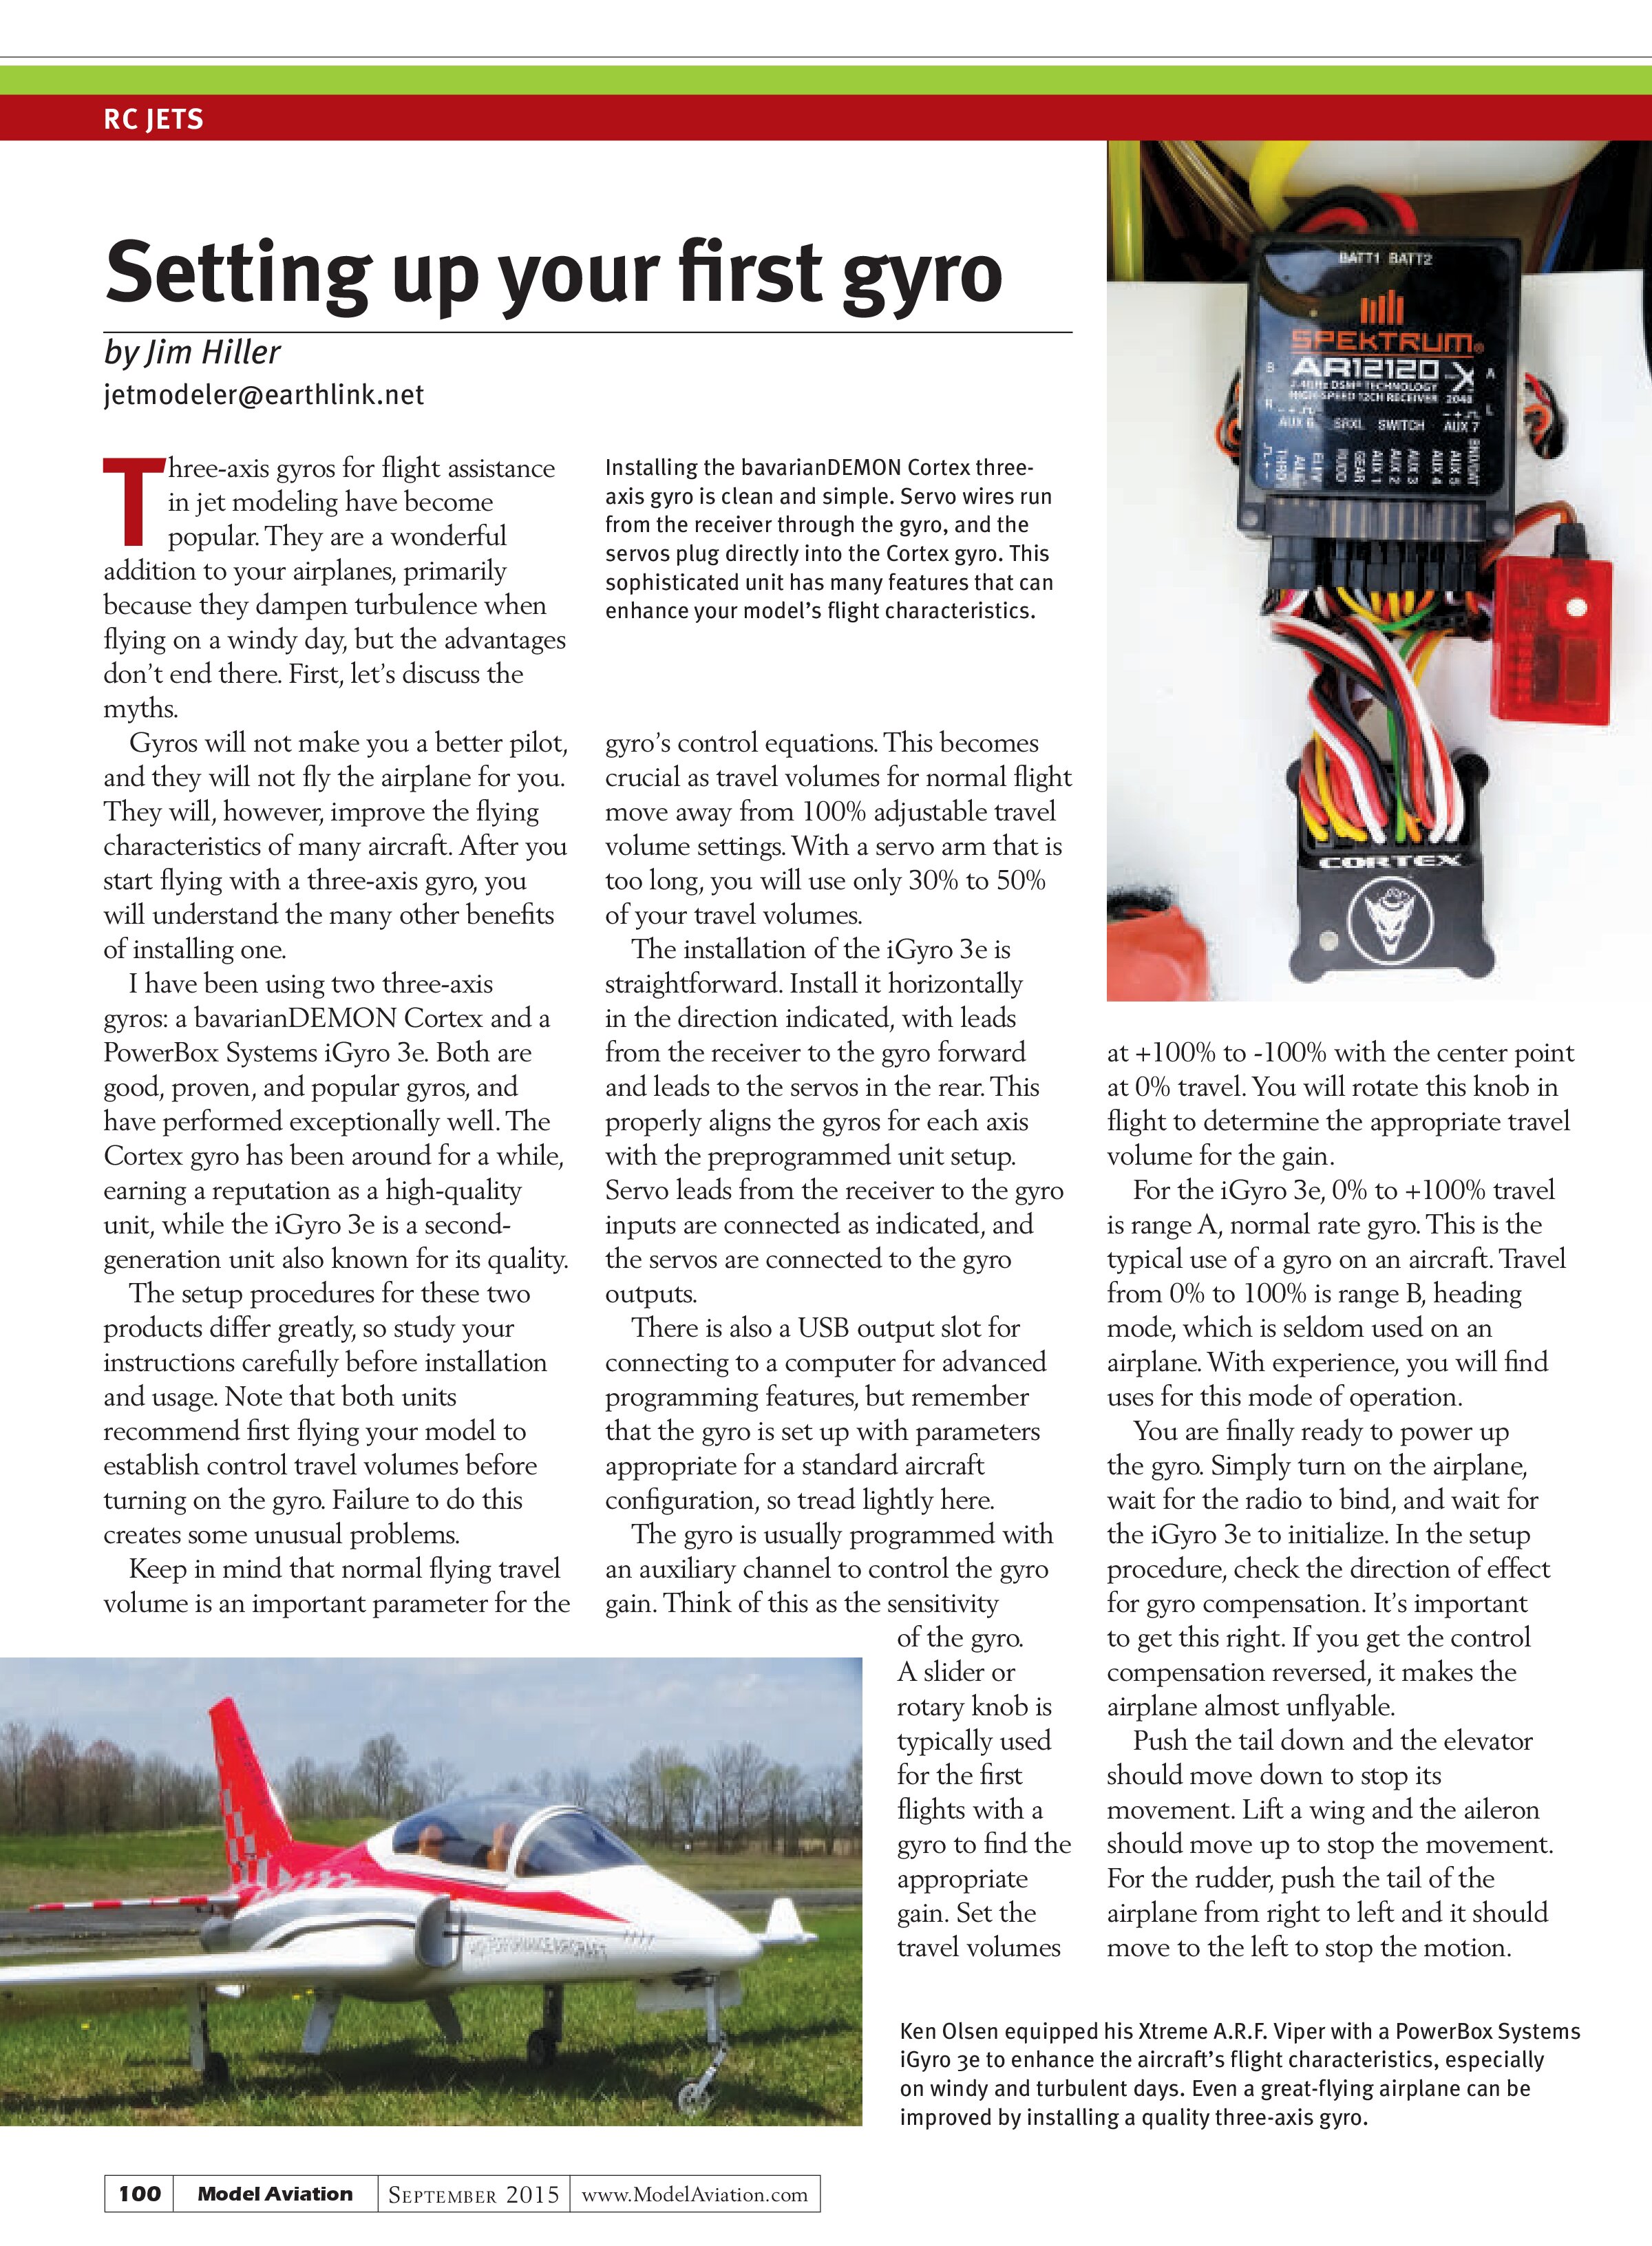
Installing the bavarianDEMON Cortex three-axis gyro is clean and simple. Servo wires run from the receiver through the gyro, and the servos plug directly into the Cortex gyro. This sophisticated unit has many features that can enhance your model’s flight characteristics.
The installation of the iGyro 3e is straightforward. Install it horizontally in the direction indicated, with leads from the receiver to the gyro forward and leads to the servos in the rear. This properly aligns the gyros for each axis with the preprogrammed unit setup. Servo leads from the receiver to the gyro inputs are connected as indicated, and the servos are connected to the gyro outputs.
There is also a USB output slot for connecting to a computer for advanced programming features, but remember that the gyro is set up with parameters appropriate for a standard aircraft configuration, so tread lightly here.
The gyro is usually programmed with an auxiliary channel to control the gyro gain. Think of this as the sensitivity of the gyro. A slider or rotary knob is typically used for the first flights with a gyro to find the appropriate gain. Set the travel volumes

at +100% to -100% with the center point at 0% travel. You will rotate this knob in flight to determine the appropriate travel volume for the gain.
For the iGyro 3e, 0% to +100% travel is range A, normal rate gyro. This is the typical use of a gyro on an aircraft. Travel from 0% to 100% is range B, heading mode, which is seldom used on an airplane. With experience, you will find uses for this mode of operation.
You are finally ready to power up the gyro. Simply turn on the airplane, wait for the radio to bind, and wait for the iGyro 3e to initialize. In the setup procedure, check the direction of effect for gyro compensation. It’s important to get this right. If you get the control compensation reversed, it makes the airplane almost unflyable.
Push the tail down and the elevator should move down to stop its movement. Lift a wing and the aileron should move up to stop the movement. For the rudder, push the tail of the airplane from right to left and it should move to the left to stop the motion.

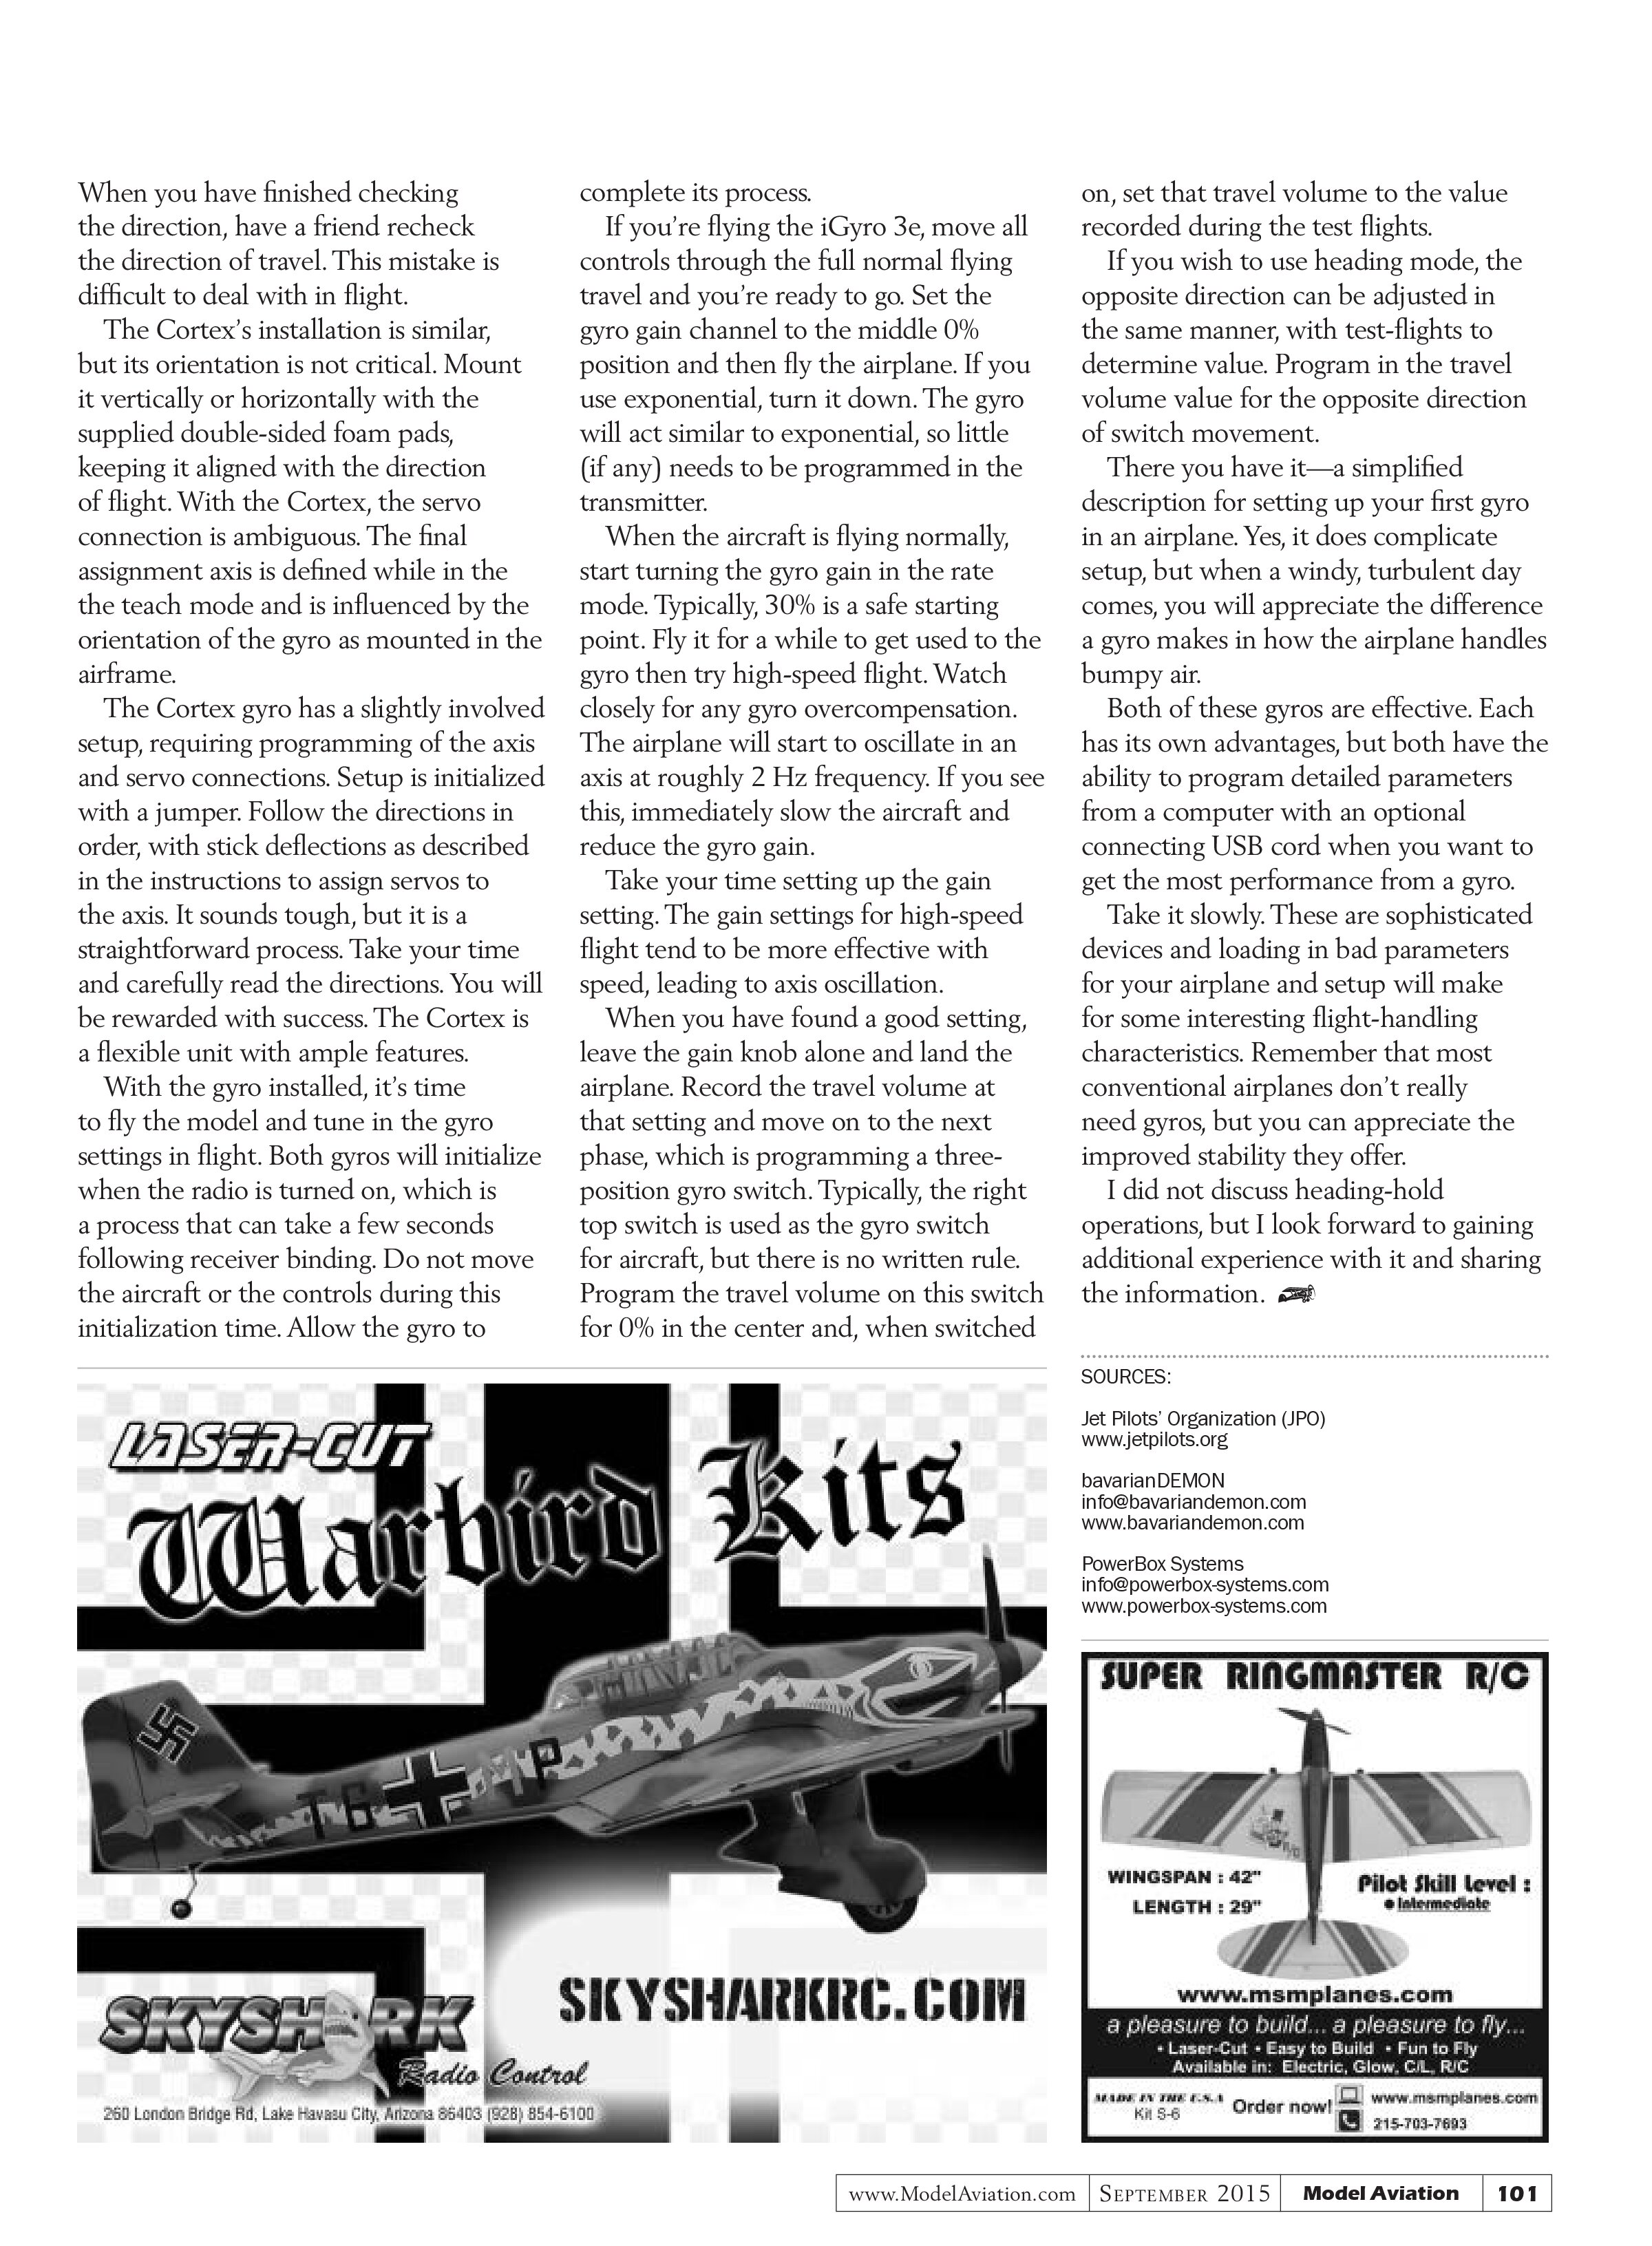
Ken Olsen equipped his Xtreme A.R.F. Viper with a PowerBox Systems iGyro 3e to enhance the aircraft’s flight characteristics, especially on windy and turbulent days. Even a great-flying airplane can be improved by installing a quality three-axis gyro.
When you have finished checking the direction, have a friend recheck the direction of travel. This mistake is difficult to deal with in flight.
The Cortex’s installation is similar, but its orientation is not critical. Mount it vertically or horizontally with the supplied double-sided foam pads, keeping it aligned with the direction of flight. With the Cortex, the servo connection is ambiguous. The final assignment axis is defined while in the teach mode and is influenced by the orientation of the gyro as mounted in the airframe.
The Cortex gyro has a slightly involved setup, requiring programming of the axis and servo connections. Setup is initialized with a jumper. Follow the directions in order, with stick deflections as described in the instructions to assign servos to the axis. It sounds tough, but it is a straightforward process. Take your time and carefully read the directions. You will be rewarded with success. The Cortex is a flexible unit with ample features.
With the gyro installed, it’s time to fly the model and tune in the gyro settings in flight. Both gyros will initialize when the radio is turned on, which is a process that can take a few seconds following receiver binding. Do not move the aircraft or the controls during this initialization time. Allow the gyro to complete its process.
If you’re flying the iGyro 3e, move all controls through the full normal flying travel and you’re ready to go. Set the gyro gain channel to the middle 0% position and then fly the airplane. If you use exponential, turn it down. The gyro will act similar to exponential, so little (if any) needs to be programmed in the transmitter.
When the aircraft is flying normally, start turning the gyro gain in the rate mode. Typically, 30% is a safe starting point. Fly it for a while to get used to the gyro then try high-speed flight. Watch closely for any gyro overcompensation. The airplane will start to oscillate in an axis at roughly 2 Hz frequency. If you see this, immediately slow the aircraft and reduce the gyro gain.
Take your time setting up the gain setting. The gain settings for high-speed flight tend to be more effective with speed, leading to axis oscillation.
When you have found a good setting, leave the gain knob alone and land the airplane. Record the travel volume at that setting and move on to the next phase, which is programming a three-position gyro switch. Typically, the right top switch is used as the gyro switch for aircraft, but there is no written rule. Program the travel volume on this switch for 0% in the center and, when switched on, set that travel volume to the value recorded during the test flights.
If you wish to use heading mode, the opposite direction can be adjusted in the same manner, with test-flights to determine value. Program in the travel volume value for the opposite direction of switch movement.
There you have it—a simplified description for setting up your first gyro in an airplane. Yes, it does complicate setup, but when a windy, turbulent day comes, you will appreciate the difference a gyro makes in how the airplane handles bumpy air.
Both of these gyros are effective. Each has its own advantages, but both have the ability to program detailed parameters from a computer with an optional connecting USB cord when you want to get the most performance from a gyro.
Take it slowly. These are sophisticated devices and loading in bad parameters for your airplane and setup will make for some interesting flight-handling characteristics. Remember that most conventional airplanes don’t really need gyros, but you can appreciate the improved stability they offer.
I did not discuss heading-hold operations, but I look forward to gaining additional experience with it and sharing the information.
SOURCES:
Jet Pilots’ Organization (JPO)
www.jetpilots.org
bavarianDEMON
info@bavariandemon.com
www.bavariandemon.com
PowerBox Systems
info@powerbox-systems.com
www.powerbox-systems.com