JR 28X TRANSMITTER
Mike Hurley
mhurley222@comcast.net
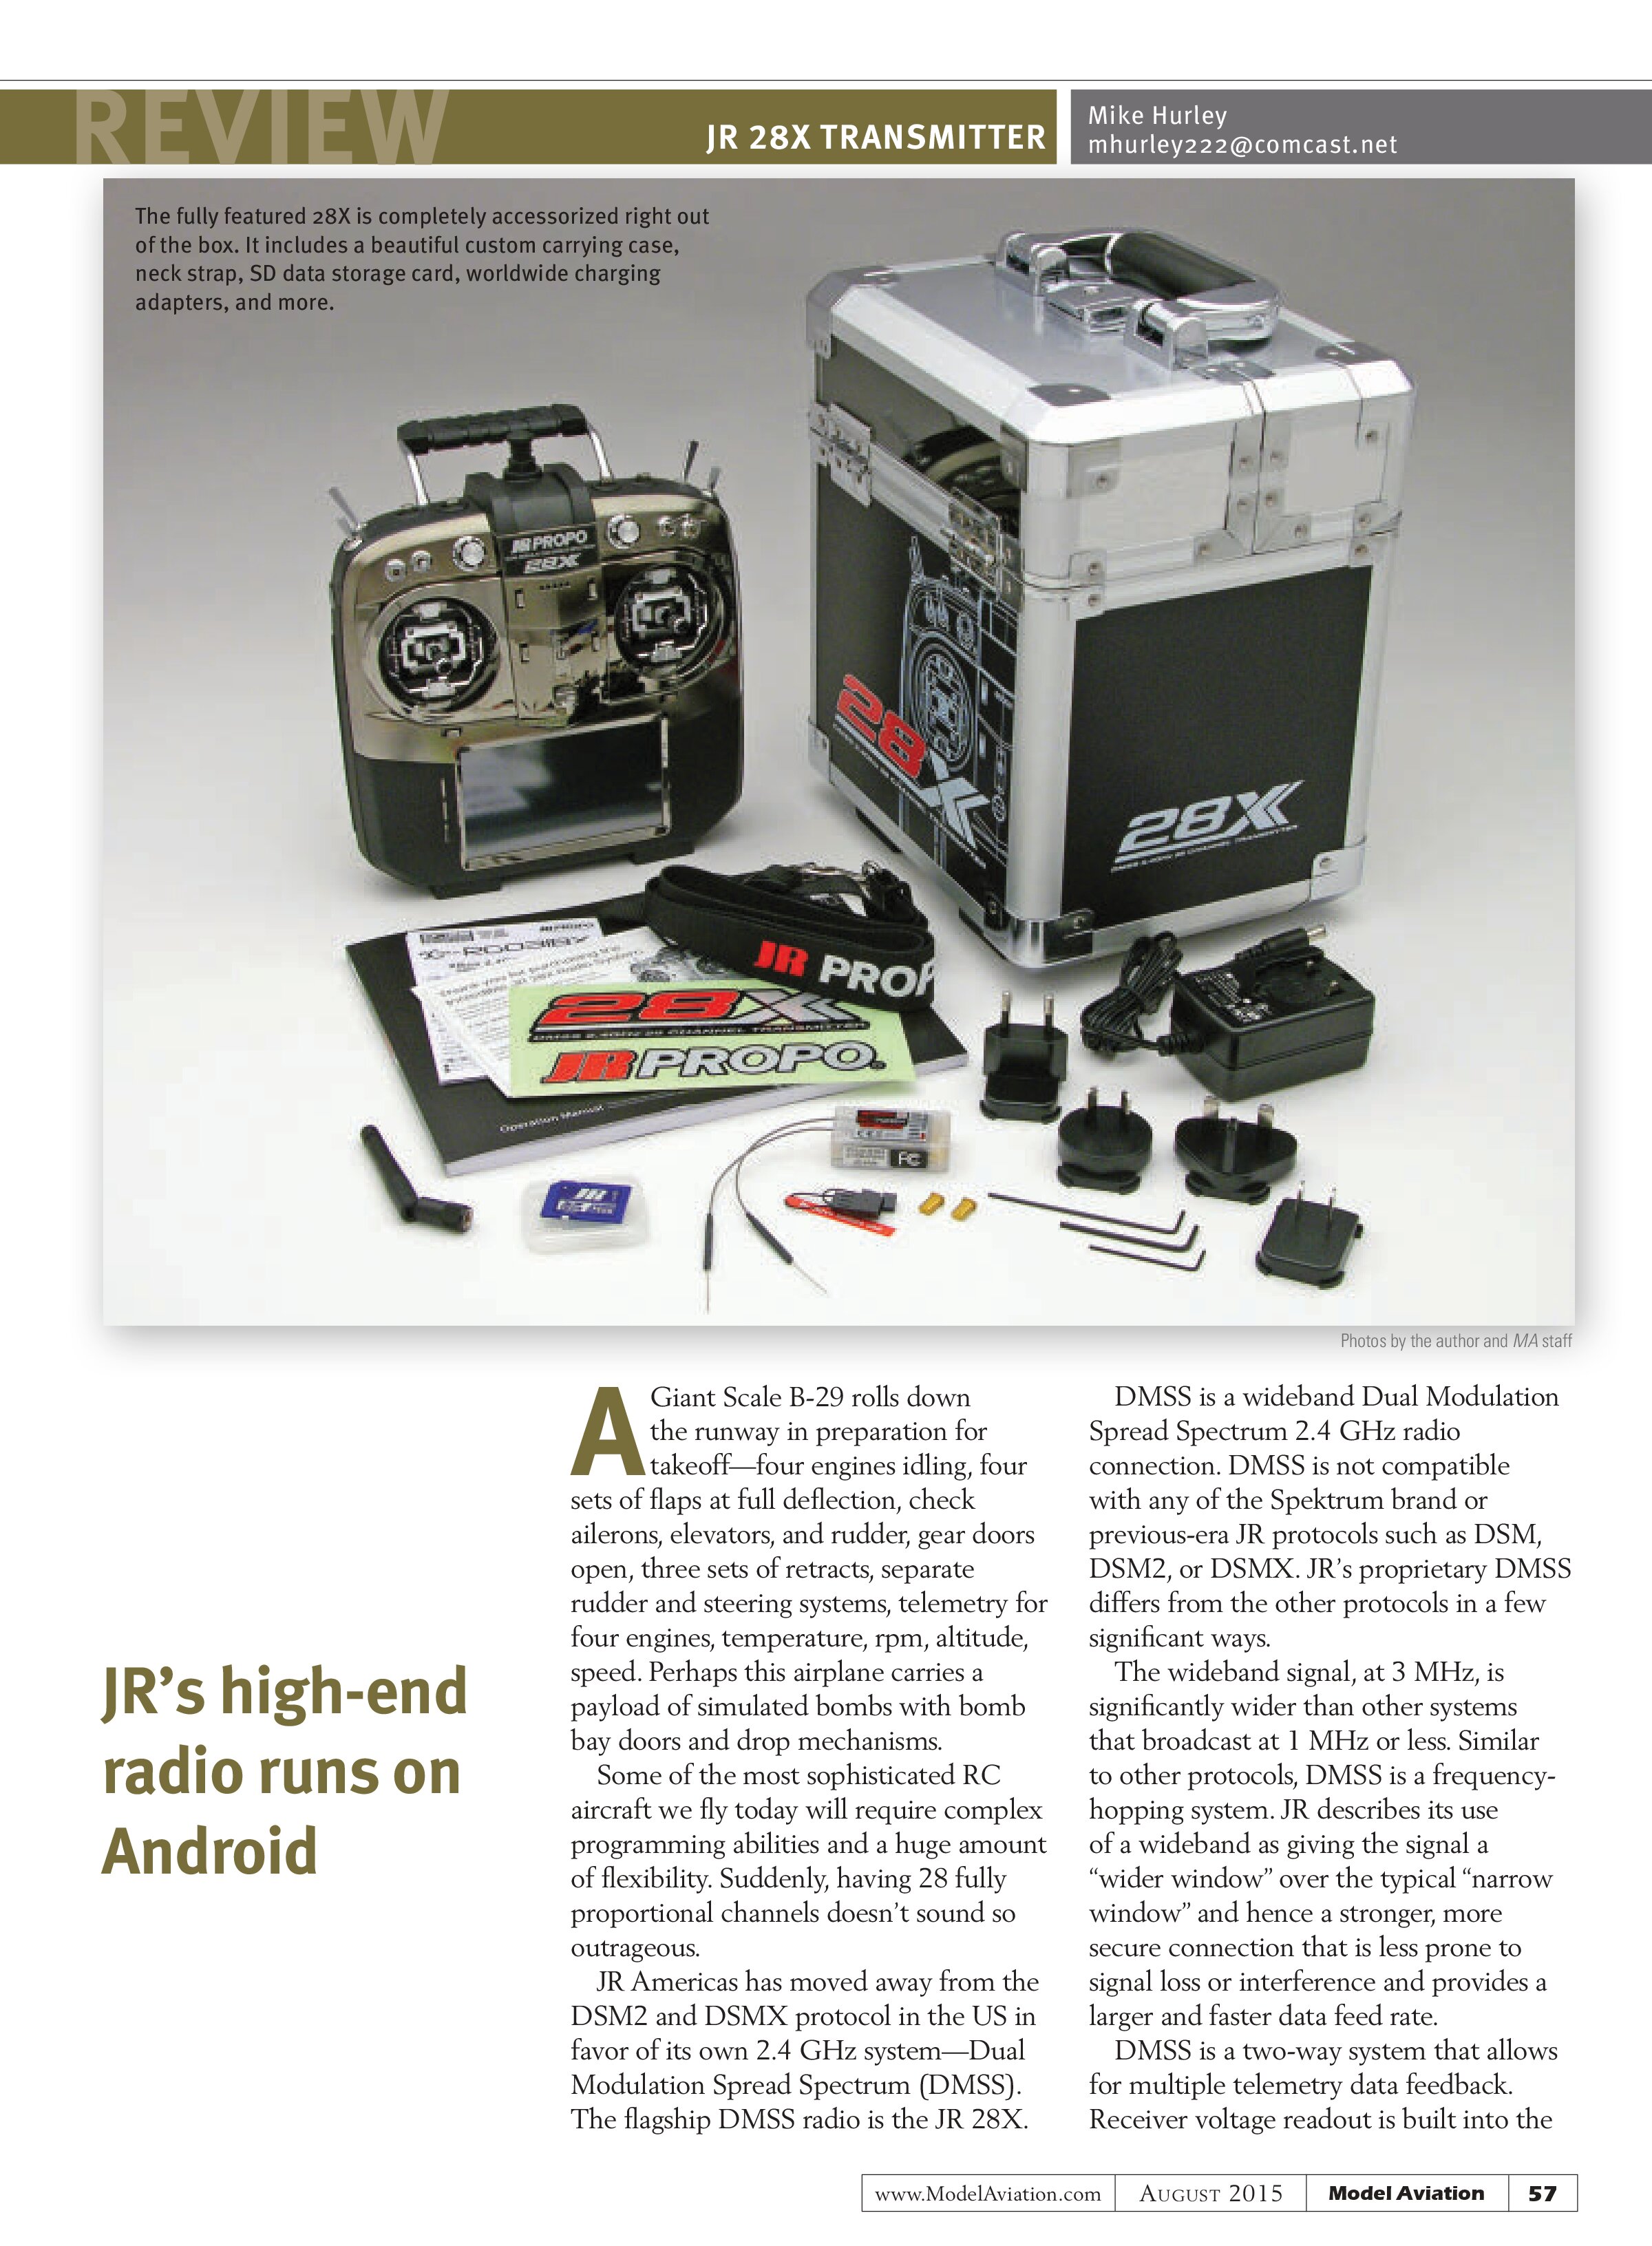
The fully featured 28X is completely accessorized right out of the box. It includes a beautiful custom carrying case, neck strap, SD data storage card, worldwide charging adapters, and more.

JR’s high-end radio runs on Android
Giant Scale B-29 rolls down the runway in preparation for takeoff—four engines idling, four sets of flaps at full deflection, check ailerons, elevators, and rudder, gear doors open, three sets of retracts, separate rudder and steering systems, telemetry for four engines, temperature, rpm, altitude, speed. Perhaps this airplane carries a payload of simulated bombs with bomb bay doors and drop mechanisms.
Some of the most sophisticated RC aircraft we fly today will require complex programming abilities and a huge amount of flexibility. Suddenly, having 28 fully proportional channels doesn’t sound so outrageous.
JR Americas has moved away from the DSM2 and DSMX protocol in the US in favor of its own 2.4 GHz system—Dual Modulation Spread Spectrum (DMSS). The flagship DMSS radio is the JR 28X.
DMSS is a wideband Dual Modulation Spread Spectrum 2.4 GHz radio connection. DMSS is not compatible with any of the Spektrum brand or previous-era JR protocols such as DSM, DSM2, or DSMX. JR’s proprietary DMSS differs from the other protocols in a few significant ways.
The wideband signal, at 3 MHz, is significantly wider than other systems that broadcast at 1 MHz or less. Similar to other protocols, DMSS is a frequency-hopping system. JR describes its use of a wideband as giving the signal a “wider window” over the typical “narrow window” and hence a stronger, more secure connection that is less prone to signal loss or interference and provides a larger and faster data feed rate.
DMSS is a two-way system that allows for multiple telemetry data feedback. Receiver voltage readout is built into the
AT A GLANCE ...
FEATURES
- 480 x 273-pixel, 4.3-inch WQVGA-TFT full-color touch screen
- Android OS
- Dual processors: One manages the operating system, while the other manages the radio
- CNC-machined aluminum gimbals are ball-bearing supported and fully adjustable to suit any pilot
- 65,536 step stick resolution
- 4 GB internal memory, with 512 MB RAM
- Removable, customizable shoulder switch plates can be configured to virtually any combination of switches
- Heavy-duty, cast-aluminum chassis
- 28 channels: Up to 16 non-shared; up to 28 fully proportional
- Integrated USB host controller and USB device port
- External SD card slot for unlimited model, picture, sound, and telemetry data storage
- Customizable audio and vibration notifications
TRANSMITTER SPECIFICATIONS
Frequency: 2.4 GHz
Protocol: DMSS Dual Modulation Spread Spectrum
Input power: Single 7.2-volt lithium battery with second battery capability
Display: 4.3-inch full color TFT touch-screen display
Number of channels: 28 and expandable with XBus system
Frame rate: 16 channels at 14 ms; 12 channels at 28 ms
Resolution: Stick resolution is 65,536 steps
Price: $ 2,699.99
RG712BX RECEIVER SPECIFICATIONS
Channels: Seven plus XBus
Weight: 7 grams
Size: 1.87 inches long; width: 1 inch; height: 0.57 inches
Antenna length: 150mm
IN THE BOX
- Transmitter with battery
- Carrying case
- RG712BX receiver
- Charger with international adapters
- JR-formatted 4 GB SD card
- Neck strap
- Bind plugs
- Allen wrenches for adjustments
- Decal sheet
- Manual
PLUSES
- High-quality materials and construction with aluminum chassis.
- Smooth operation CNC-machined aluminum gimbals supported with ball bearings.
- Extremely precise stick resolution.
- Cutting-edge user interface and operating system, completely customizable to user preference.
- Ease of use and programming.
- Expanded programming capabilities.
MINUSES
- Limited voice output.
- No signal-strength telemetry.
- Gimbal adjustments require additional parts not included with the radio.
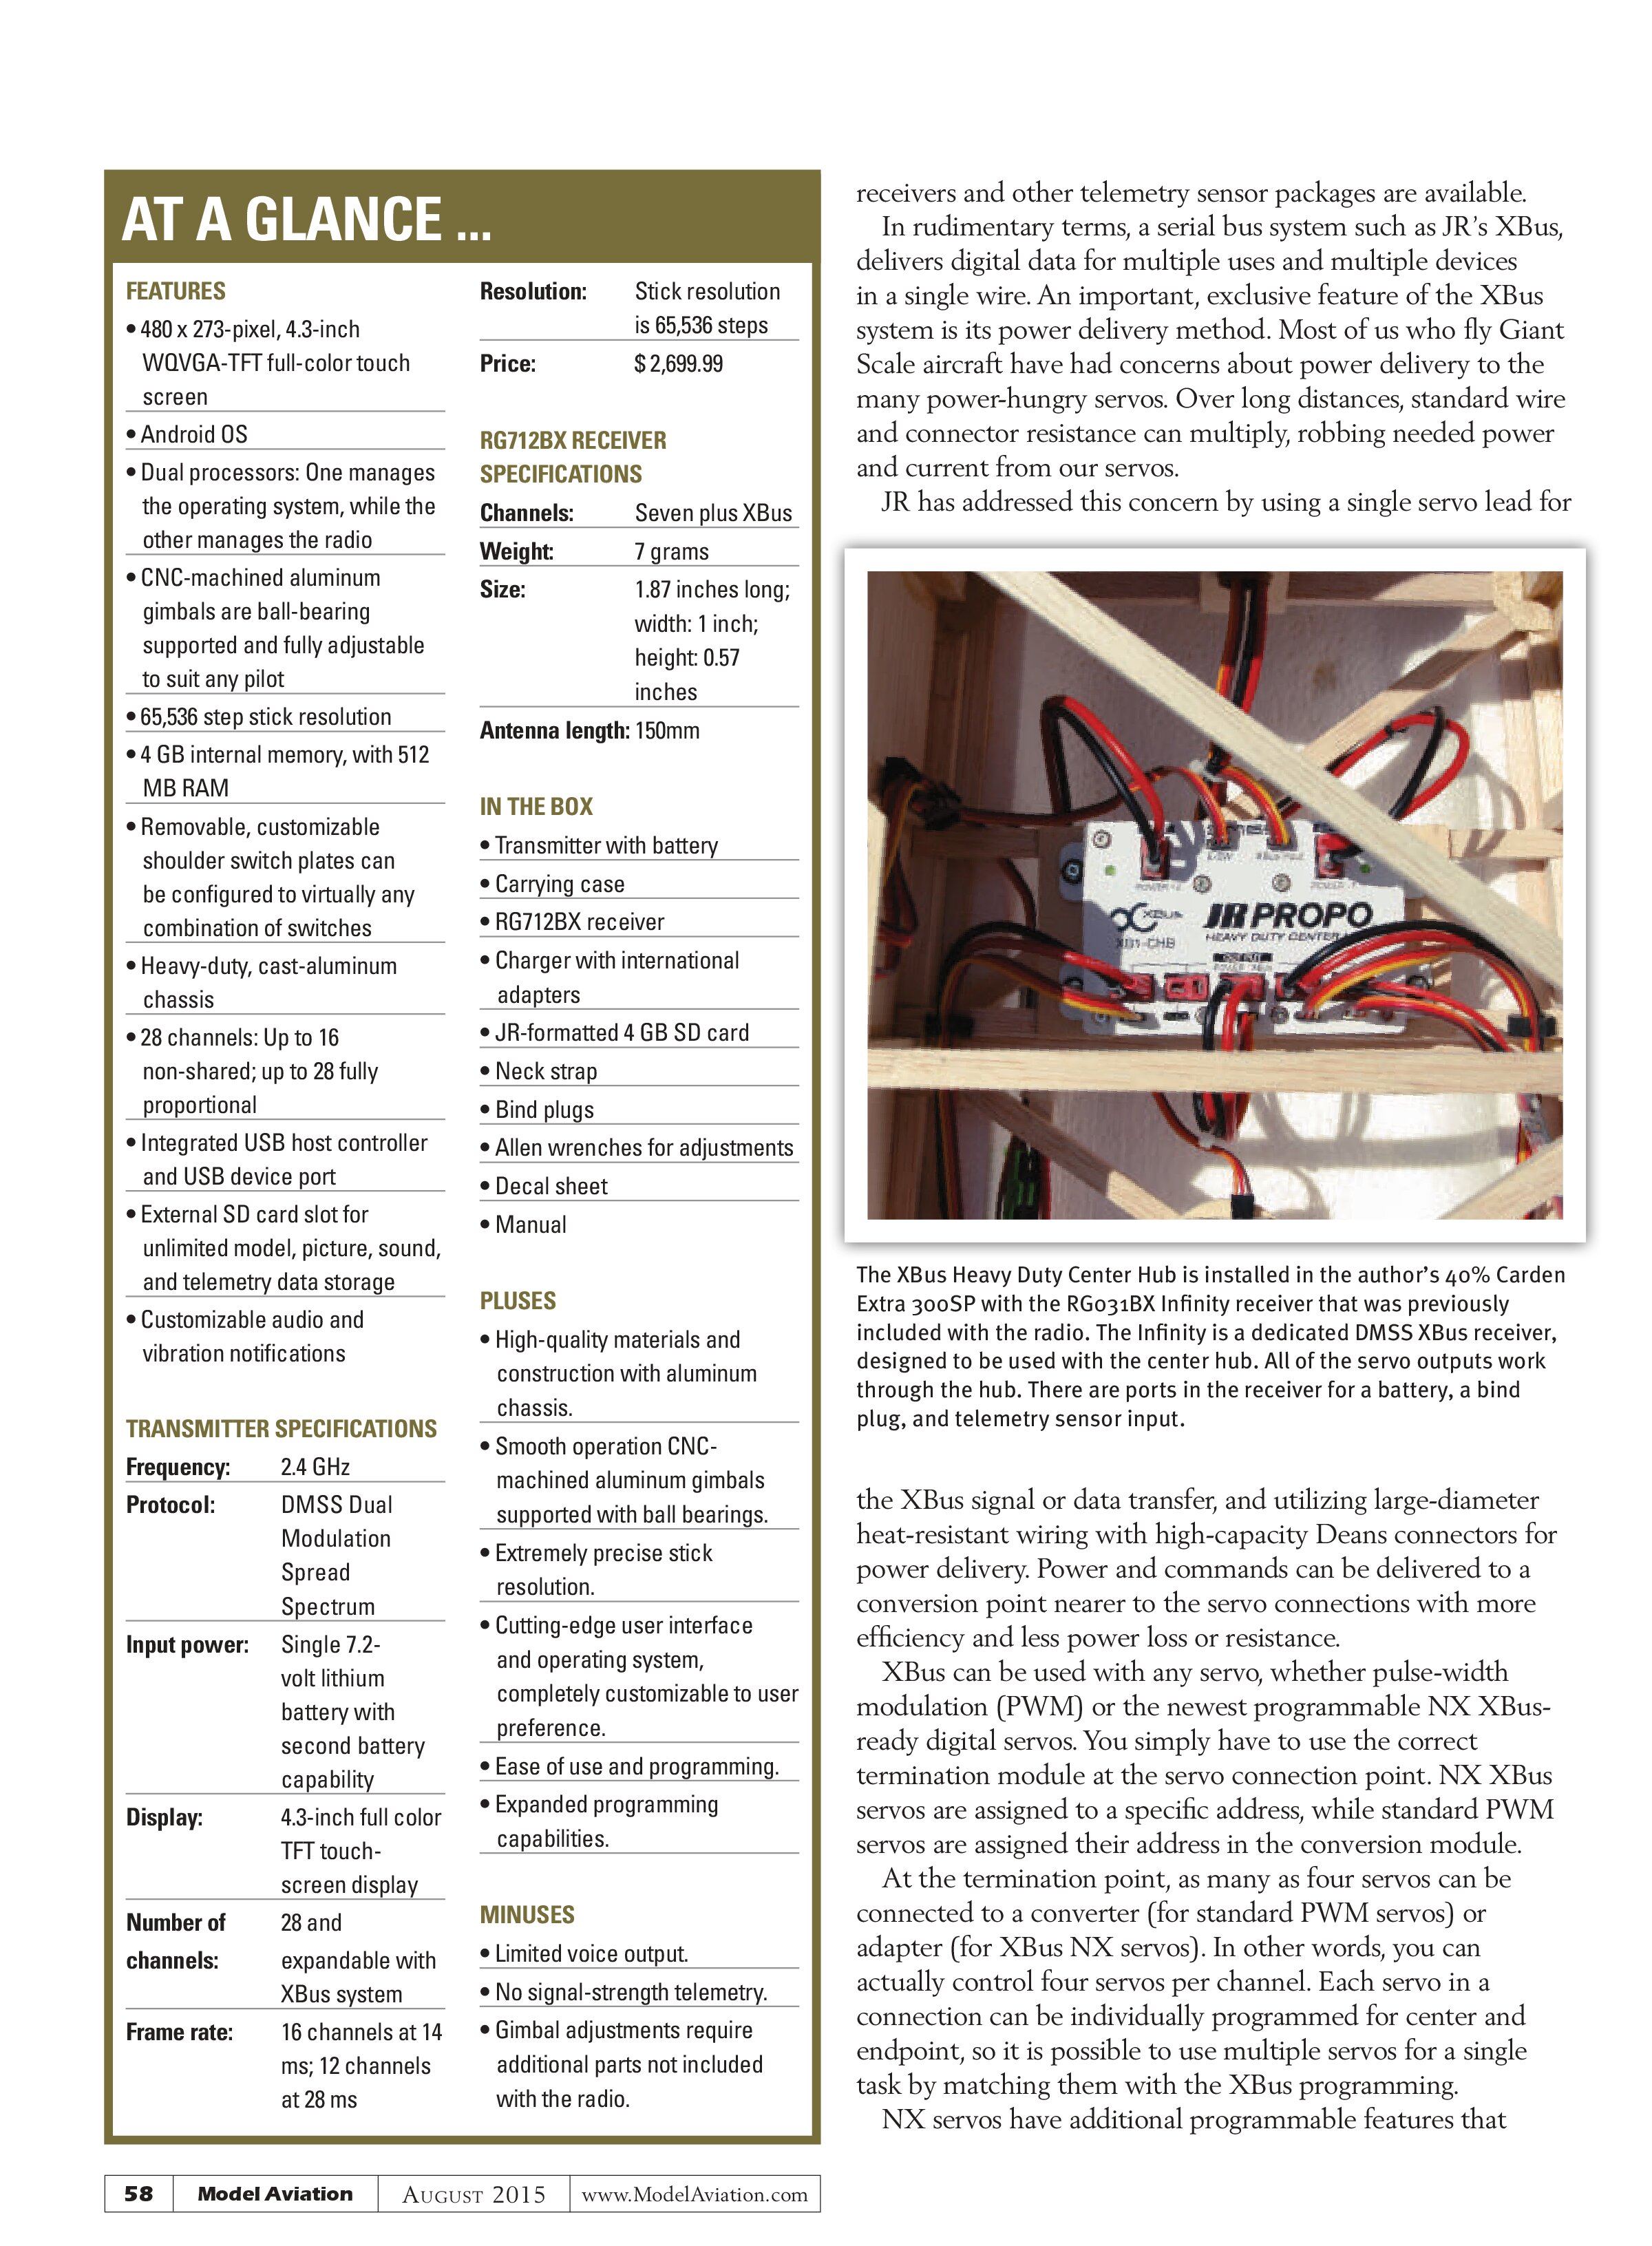
receivers and other telemetry sensor packages are available.
In rudimentary terms, a serial bus system such as JR’s XBus, delivers digital data for multiple uses and multiple devices in a single wire. An important, exclusive feature of the XBus system is its power delivery method. Most of us who fly Giant Scale aircraft have had concerns about power delivery to the many power-hungry servos. Over long distances, standard wire and connector resistance can multiply, robbing needed power and current from our servos.
JR has addressed this concern by using a single servo lead for the XBus signal or data transfer, and utilizing large-diameter heat-resistant wiring with high-capacity Deans connectors for power delivery. Power and commands can be delivered to a conversion point nearer to the servo connections with more efficiency and less power loss or resistance.
XBus can be used with any servo, whether pulse-width modulation (PWM) or the newest programmable NX XBus-ready digital servos. You simply have to use the correct termination module at the servo connection point. NX XBus servos are assigned to a specific address, while standard PWM servos are assigned their address in the conversion module.
At the termination point, as many as four servos can be connected to a converter (for standard PWM servos) or adapter (for XBus NX servos). In other words, you can actually control four servos per channel. Each servo in a connection can be individually programmed for center and endpoint, so it is possible to use multiple servos for a single task by matching them with the XBus programming. NX servos have additional programmable features that are compatible with any PWM system.

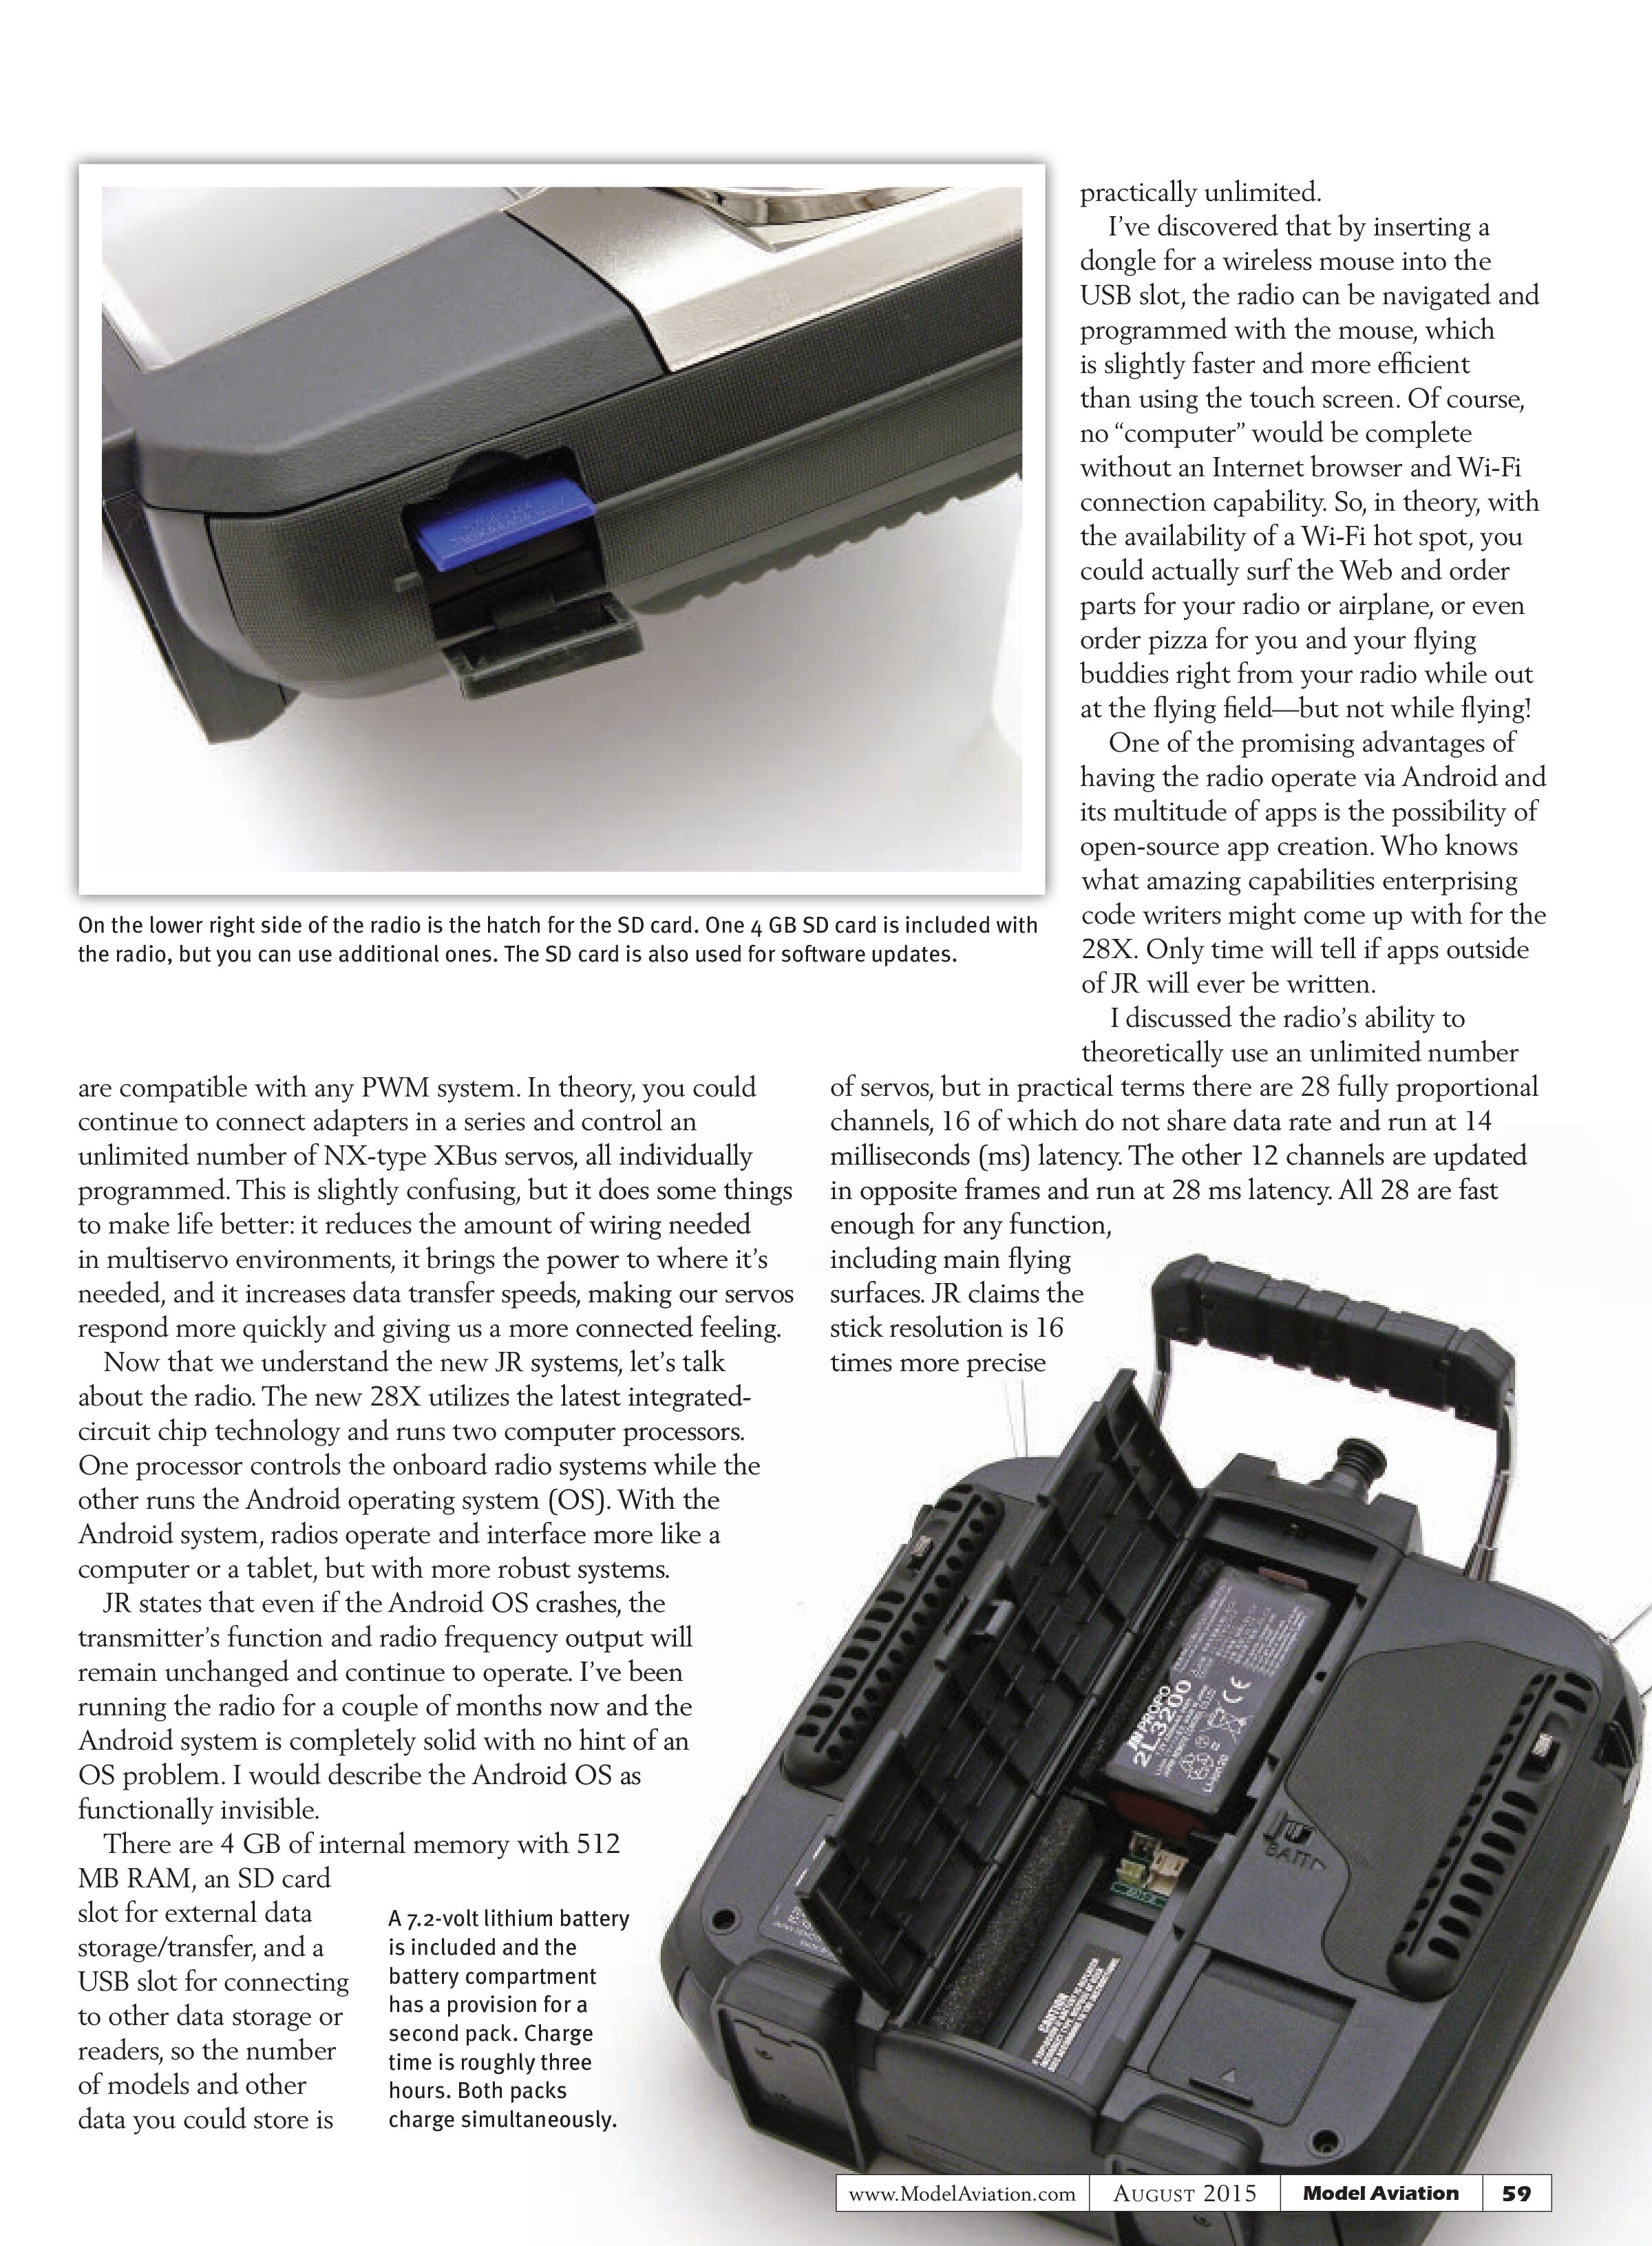
On the lower right side of the radio is the hatch for the SD card. One 4 GB SD card is included with the radio, but you can use additional ones. The SD card is also used for software updates.
practically unlimited.
I’ve discovered that by inserting a dongle for a wireless mouse into the USB slot, the radio can be navigated and programmed with the mouse, which is slightly faster and more efficient than using the touch screen. Of course, no “computer” would be complete without an Internet browser and Wi-Fi connection capability. So, in theory, with the availability of a Wi-Fi hot spot, you could actually surf the Web and order parts for your radio or airplane, or even order pizza for you and your flying buddies right from your radio while out at the flying field—but not while flying!
One of the promising advantages of having the radio operate via Android and its multitude of apps is the possibility of open-source app creation. Who knows what amazing capabilities enterprising code writers might come up with for the 28X. Only time will tell if apps outside of JR will ever be written.
I discussed the radio’s ability to theoretically use an unlimited number of servos, but in practical terms there are 28 fully proportional channels, 16 of which do not share data rate and run at 14 milliseconds (ms) latency. The other 12 channels are updated in opposite frames and run at 28 ms latency. All 28 are fast enough for any function, including main flying surfaces. JR claims the stick resolution is 16 times more precise
are compatible with any PWM system. In theory, you could continue to connect adapters in a series and control an unlimited number of NX-type XBus servos, all individually programmed. This is slightly confusing, but it does some things to make life better: it reduces the amount of wiring needed in multiser vo environments, it brings the power to where it’s needed, and it increases data transfer speeds, making our servos respond more quickly and giving us a more connected feeling.
Now that we understand the new JR systems, let’s talk about the radio. The new 28X utilizes the latest integrated-circuit chip technology and runs two computer processors. One processor controls the onboard radio systems while the other runs the Android operating system (OS). With the Android system, radios operate and interface more like a computer or a tablet, but with more robust systems.
JR states that even if the Android OS crashes, the transmitter’s function and radio frequency output will remain unchanged and continue to operate. I’ve been running the radio for a couple of months now and the Android system is completely solid with no hint of an OS problem. I would describe the Android OS as functionally invisible.
There are 4 GB of internal memory with 512 MB RAM, an SD card slot for external data storage/transfer, and a USB slot for connecting to other data storage or readers, so the number of models and other data you could store is
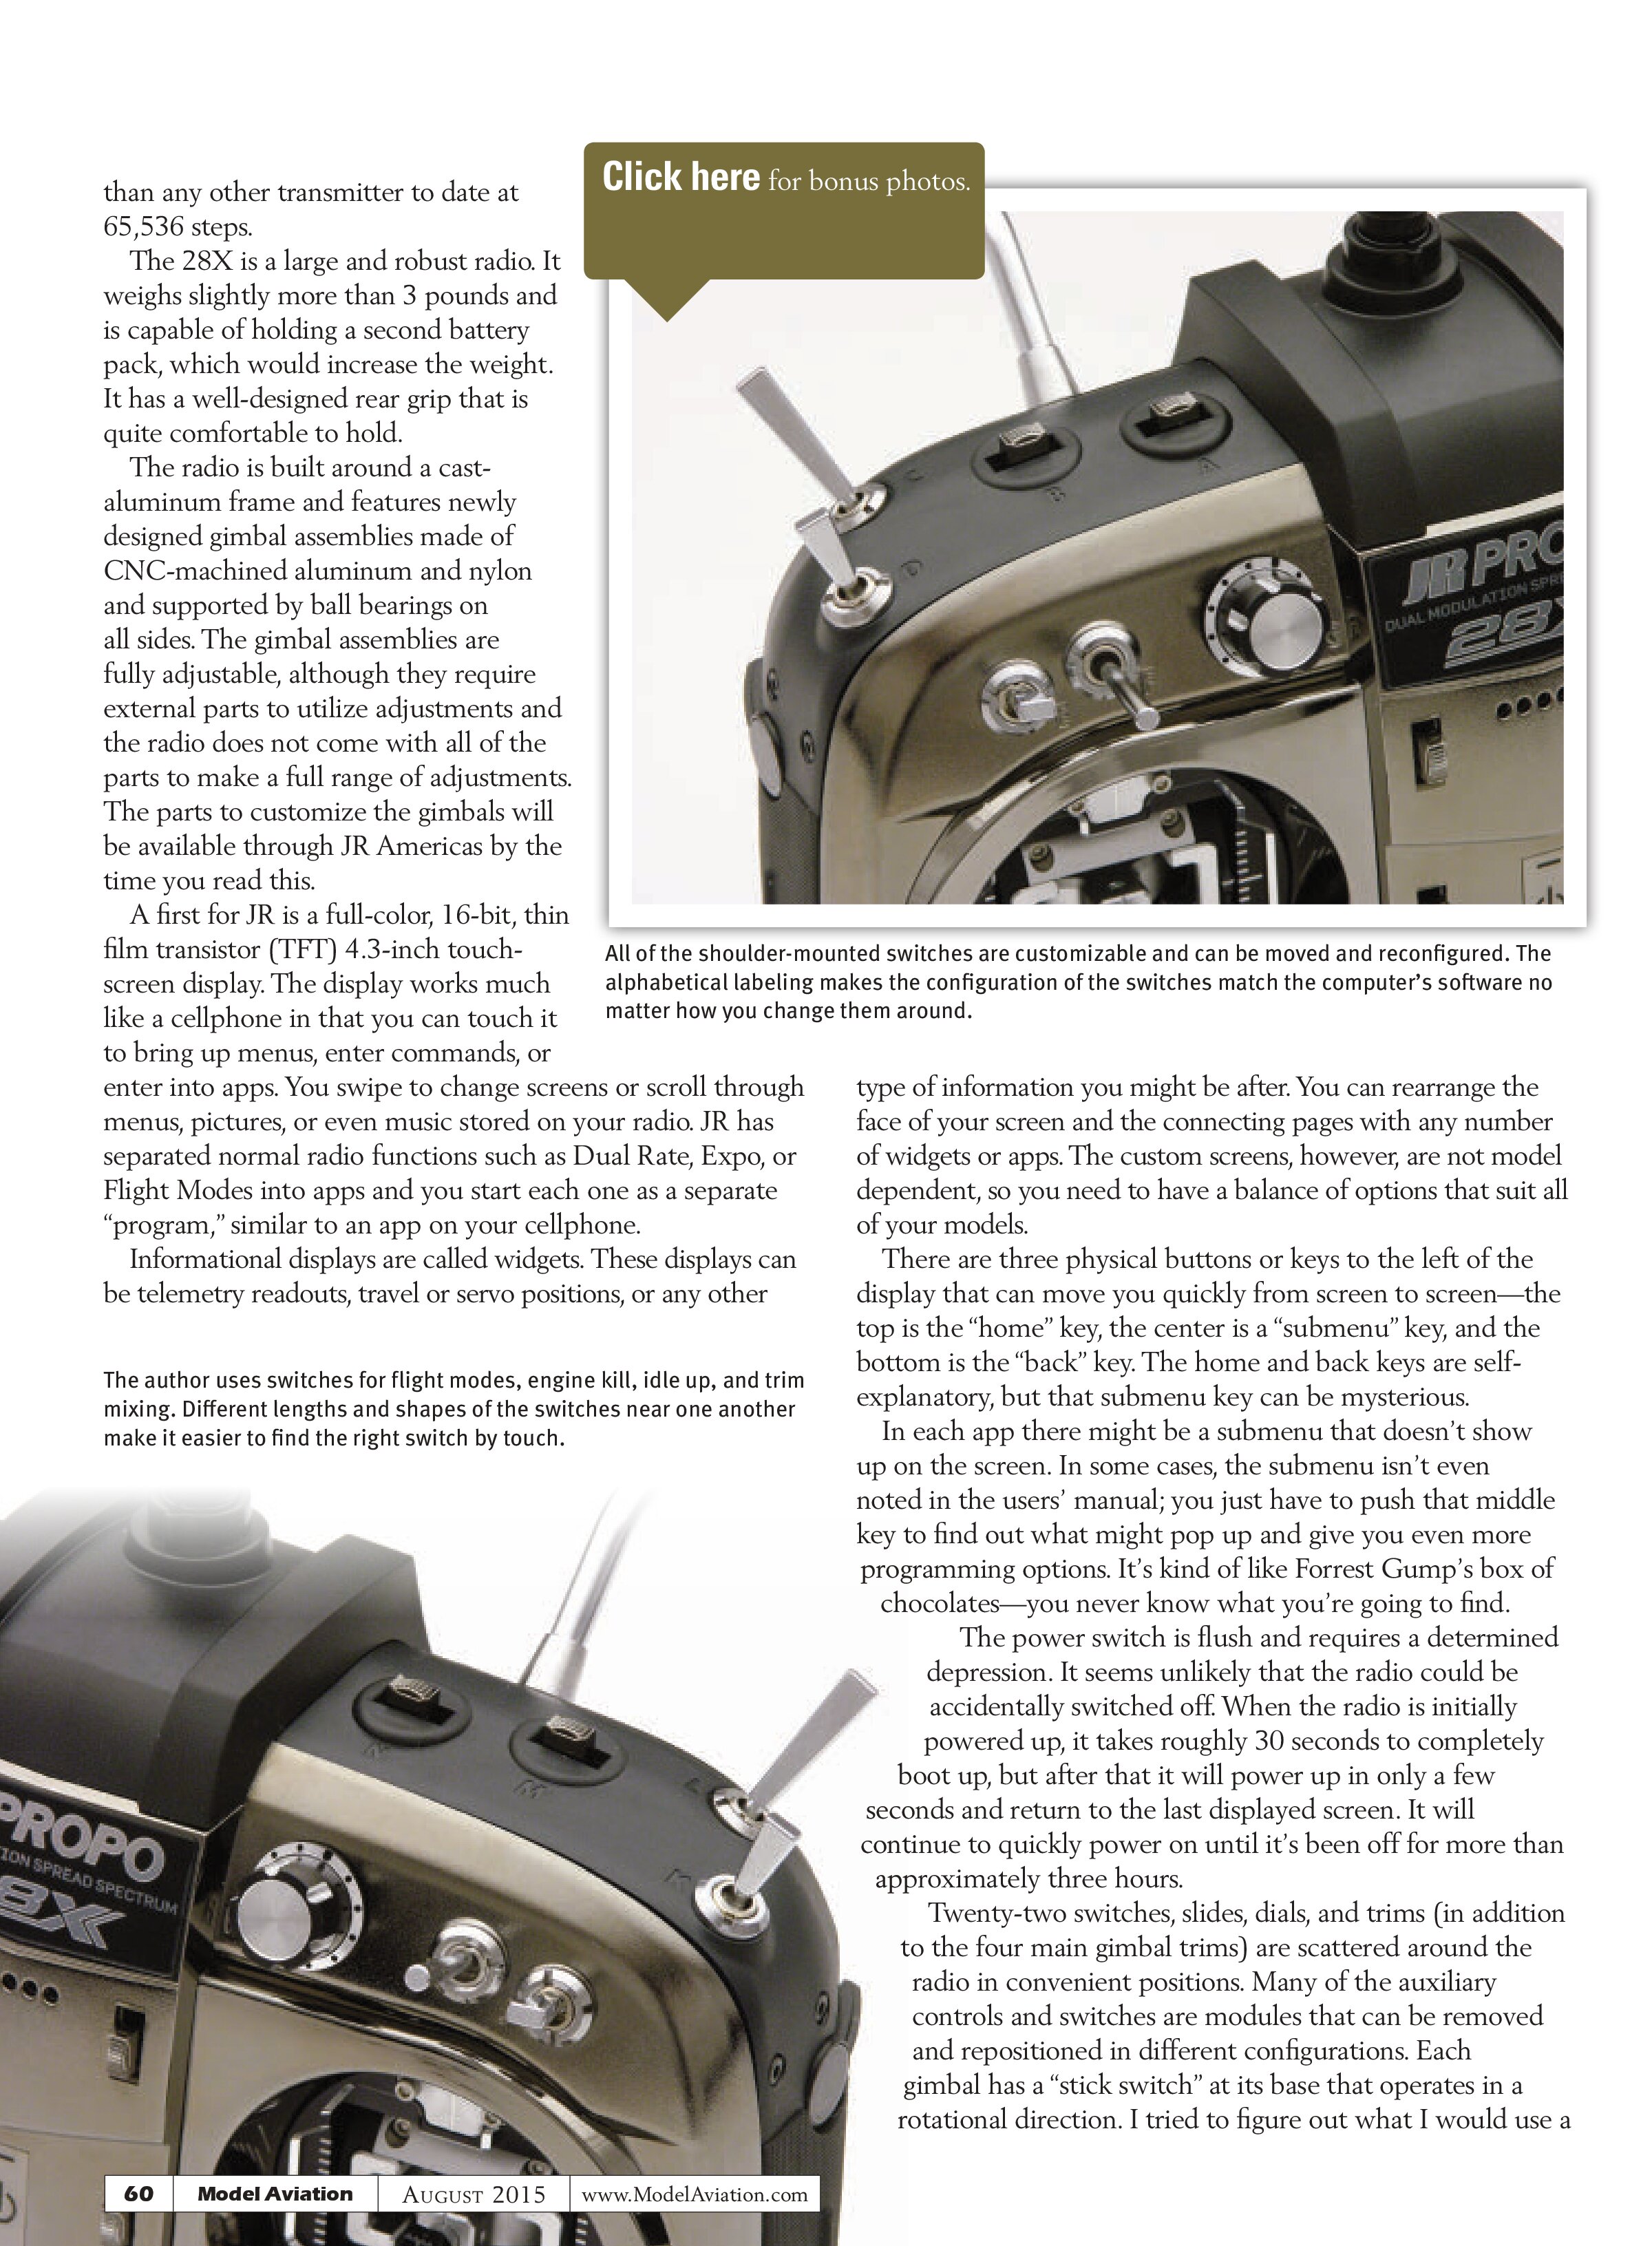
A 7.2-volt lithium battery is included and the battery compartment has a provision for a second pack. Charge time is roughly three hours. Both packs charge simultaneously.

than any other transmitter to date at 65,536 steps.
The 28X is a large and robust radio. It weighs slightly more than 3 pounds and is capable of holding a second battery pack, which would increase the weight. It has a well-designed rear grip that is quite comfortable to hold.
The radio is built around a cast-aluminum frame and features newly designed gimbal assemblies made of CNC-machined aluminum and nylon and supported by ball bearings on all sides. The gimbal assemblies are fully adjustable, although they require external parts to utilize adjustments and the radio does not come with all of the parts to make a full range of adjustments. The parts to customize the gimbals will be available through JR Americas by the time you read this.
A first for JR is a full-color, 16-bit, thin film transistor (TFT) 4.3-inch touch-screen display. The display works much like a cellphone in that you can touch it to bring up menus, enter commands, or enter into apps. You swipe to change screens or scroll through menus, pictures, or even music stored on your radio. JR has separated normal radio functions such as Dual Rate, Expo, or Flight Modes into apps and you start each one as a separate “program,” similar to an app on your cellphone.
Informational displays are called widgets. These displays can be telemetry readouts, travel or servo positions, or any other
The author uses switches for flight modes, engine kill, idle up, and trim mixing. Different lengths and shapes of the switches near one another make it easier to find the right switch by touch.

All of the shoulder-mounted switches are customizable and can be moved and reconfigured. The alphabetical labeling makes the configuration of the switches match the computer’s software no matter how you change them around.
type of information you might be after. You can rearrange the face of your screen and the connecting pages with any number of widgets or apps. The custom screens, however, are not model dependent, so you need to have a balance of options that suit all of your models.
There are three physical buttons or keys to the left of the display that can move you quickly from screen to screen—the top is the “home” key, the center is a “submenu” key, and the bottom is the “back” key. The home and back keys are self-explanatory, but that submenu key can be mysterious.
In each app there might be a submenu that doesn’t show up on the screen. In some cases, the submenu isn’t even noted in the users’ manual; you just have to push that middle key to find out what might pop up and give you even more programming options. It’s kind of like Forrest Gump’s box of chocolates—you never know what you’re going to find.
The power switch is flush and requires a determined depression. It seems unlikely that the radio could be accidentally switched off. When the radio is initially powered up, it takes roughly 30 seconds to completely boot up, but after that it will power up in only a few seconds and return to the last displayed screen. It will continue to quickly power on until it’s been off for more than approximately three hours.
Twenty-two switches, slides, dials, and trims (in addition to the four main gimbal trims) are scattered around the radio in convenient positions. Many of the auxiliary controls and switches are modules that can be removed and repositioned in different configurations. Each gimbal has a “stick switch” at its base that operates in a rotational direction. I tried to figure out what I would use a proportional gimbal switch for, but so far I can’t come up with anything.
The action on these gimbal switches is smooth and firm, but lacks any detent positions so the chances of it staying in any one place are pretty low. I like the fact that each of the switches located adjacent to one another are of varied length and shape, making them easier to distinguish from each other while flying.
The 28X doesn’t come with a spring-loaded momentary switch or snap-roll button. I would normally use it as a kill switch. The spring-loaded nature keeps it from being in the “off” position when I don’t want it to be.
The two dials left and right of the center at the top of the radio are operated with a fine detent action and look and feel better than any I’ve ever experienced. I’ll be using these to trim my mixes while in flight, but other RC disciplines may love them for various tasks such as flaps, hatches, or canopy movement.
The sides, back, and lower front of the radio have a high-quality feel in the rubber material that covers these areas. Your hands naturally touch these places and the material provides a solid grip. The material looks and feels as though it will withstand use and stay looking new. Spring tension for the gimbals, detent adjustment for the throttle, and physical mode changes for the sticks can be accessed through the back of the radio under a pair of rubber pads without disassembling or removing the back of the case.
The radio is configurable for modes 1 through 4. A panel in the back offers access to a standard and mini USB port, the trainer port, headphone jack, and the charging port. The SD card slot is accessed through a panel on the right side of the radio.
How does this high-end, exclusive radio feel in your hands and how does it feel to fly with it? That is a subjective question. I’m a hybrid thumb and pinch flier. I use my thumb on my left hand and pinch with my right hand and I don’t use a strap or a tray so I hold my radio oddly.
The gimbal’s feel is unmatched in smoothness and control. The springs feel completely linear with no difference in
proportional gimbal switch for, but so far I can’t come up with anything.

finite level and multiple servo adjustments.
The XBus screens on the 28X make the XBus system more intuitive by supporting the naming of the servo function in the menu. It also supports the new XBus-based servos, which allow you to program centering, speed, power, initial movement power, stopping power, and dead band.
The next level up is surface setup. For this example, we have two right aileron servos and two left aileron servos. Using the traditional PWM setup, you can gang the servos together as before and the adjustments are handled through the output curve function. This differs slightly from the balance function we had before, because you can use it for almost any servo to adjust how it moves not only for ganged functions.
The XBus setup could also be used to manage the servos on a surface. On the right aileron, you would have IDs 3.1 and 3.2. This will free up main channel IDs in the radio so you may only have to use two channels to manage the left and right aileron surfaces instead of four PWM. The surface setup then supports how the surface moves as a whole, not the servos independently.
Then we get into the new ideas for JR on the transmitter side where you have the function input and device/switch/stick input. This is important because any mixing, position switches, and some other programming can be activated differently than before.
Using the typical 40% IMAC airplane setup, let’s start with the downline mix. This program mix adds a small amount of down-elevator when the throttle stick is in its lowest position, which will keep the airplane from pulling out on a vertical downline.
In the past you could only do this by input mixing throttle function to elevator. The percentage of elevator mix is based on the percentage of movement of the throttle function. Now you can actually use a device level input from the transmitter to mix.
By device, this is the actual stick movement or switch/slider/dial movement. This is important when you have complex setups on a single function. Using the downline mix example, instead of mixing the throttle function to the elevator function, you can use the actual throttle stick device S3 and the elevator function. This makes setting up the mixing much easier and independent from other mixes.
In the downline mix example, in the past if you added a lot of throttle trim, this could also add additional down-elevator mix because you were mixing functions to functions. Now, with the device level inputs, the mix is only conditional on the movement of the throttle stick, so it is not influenced by any big changes in trim.
I set up all of my models in flight modes. The 28X has 15 in the airplane configuration. I have a landing and takeoff mode, which on my IMAC aircraft has a very low idle, full rudder, high elevator, and less exponential on the ailerons. This mode allows me to steer the airplane on the ground, set the idle low for landing, and with the higher elevator and less exponential on the ailerons, makes the airplane responsive at low airspeeds.
The widgets make it easy to navigate and set up multiple throttle curves tied to the flight modes. When I take off and am climbing out, I switch to my normal or sequence mode, which then goes to a higher idle and sets the rates for the aileron/elevator/rudder. I never touch the throttle trim in flight. I adjust the idle on the ground, which will actual adjust all of my throttle curve settings.
For the extremely complex jet setups, the 28X is incredible. In my 2.5m Tomahawk Futura, I am running 16 channels. It is all XBus-based and has two elevators, two ailerons, two flaps, one rudder, one steering system, landing gear, brakes, throttle, smoke, and four channels for the axis gyro. Using running flight modes, I eliminated the gear switch by having the gear down in my landing and takeoff mode.
Using the axis assistant gyro setup software in the 28X, I can change the gyro settings by flight mode between heading hold and dampen. In flight, I can adjust all three axes’ gains by flight mode. I also use the normal trims (elevator, aileron, elevator) to act as the gain switches when the gyro is on. This lessens the pilot’s workload and it’s easy to adjust because the switches are naturally in the right position.
Smoke pumps on jets can be challenging to dial in. The throttle stick position and the speed of the turbine don’t match because of turbine lag. The turbine lag from idle to half throttle can be seconds, and from half to full throttle is pretty quick.
The Powerbox smoke pump in my jet is variable speed, pumping less at lower throttle settings and more at higher throttle. Because the throttle trim has to be all the way up for most turbines to go into run mode, the pump programming and curve can be difficult to set up because the trim may take 10% to 20% of the total throw.
The 28X has two things that make this a breeze to set up. First is to utilize the stick device in the mix versus the throttle function. Now the pump is only affected by the stick position and not the trim.
The second feature is the servo speed widget. This allows you to change the output speed of the stick position into four areas: idle to 25%, 25% to 50%, 50% to 75%, and 75% to 100%. You can change the speed separately in each direction. So, for the pump output channel, I slowed down the speed on the idle to half throttle, 1 second, and from half throttle .5 seconds up and down. Now the smoke pump is much more in sync with the turbine.