HORIZON HOBBY BLADE 350 QX3 AP COMBO WITH SAFE TECHNOLOGY
Greg Gimlick
maelectrics@gimlick.com

Aerial photography evolved
I have a little history with Horizon Hobby’s Blade 350 lineup. I bought the first version and upgraded it to version two with a firmware update and equipment relocation. I eventually upgraded it to version three with the new body and GPS changes. My upgraded quadcopter is a nice unit, but I knew I wanted the new control board and the camera that was included with the AP Combo, so with high expectations, I ordered one.
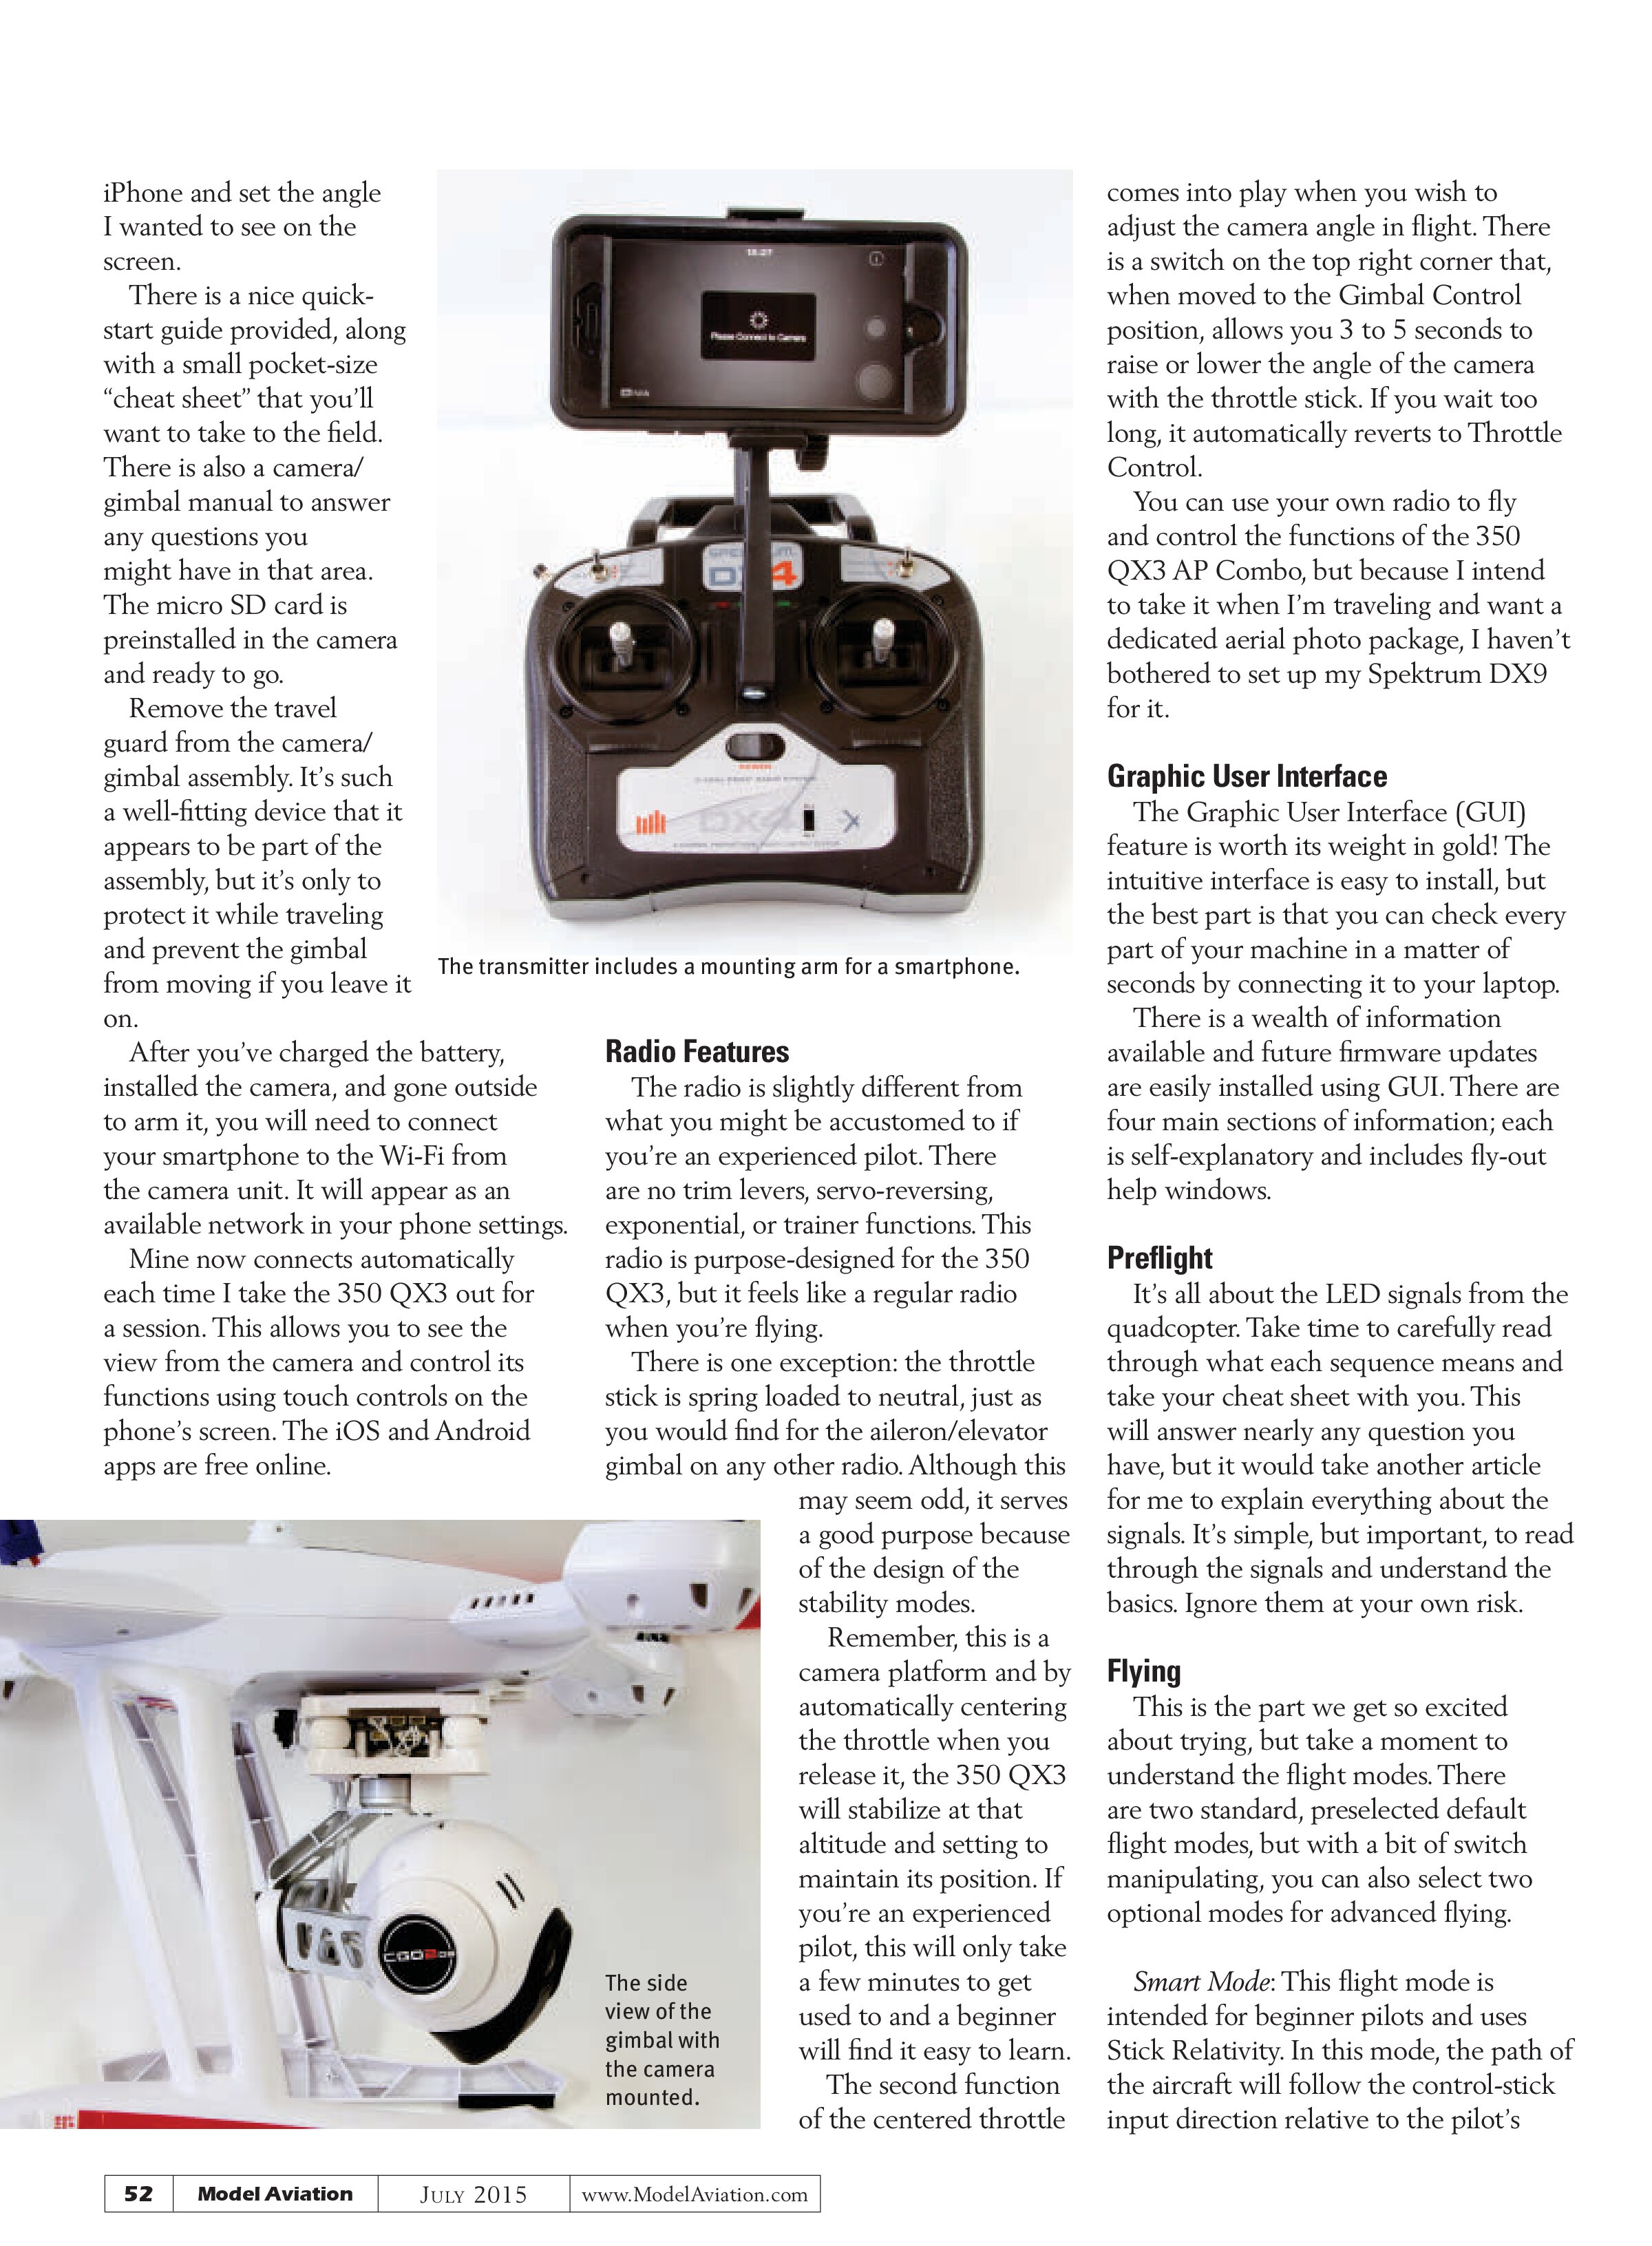
When the box arrived—actually, two boxes because I also got the aluminum travel case—I couldn’t wait to open it. That was on a Friday night, and I was at the field by 8 a.m. the next morning for some test-flying. I was impressed!
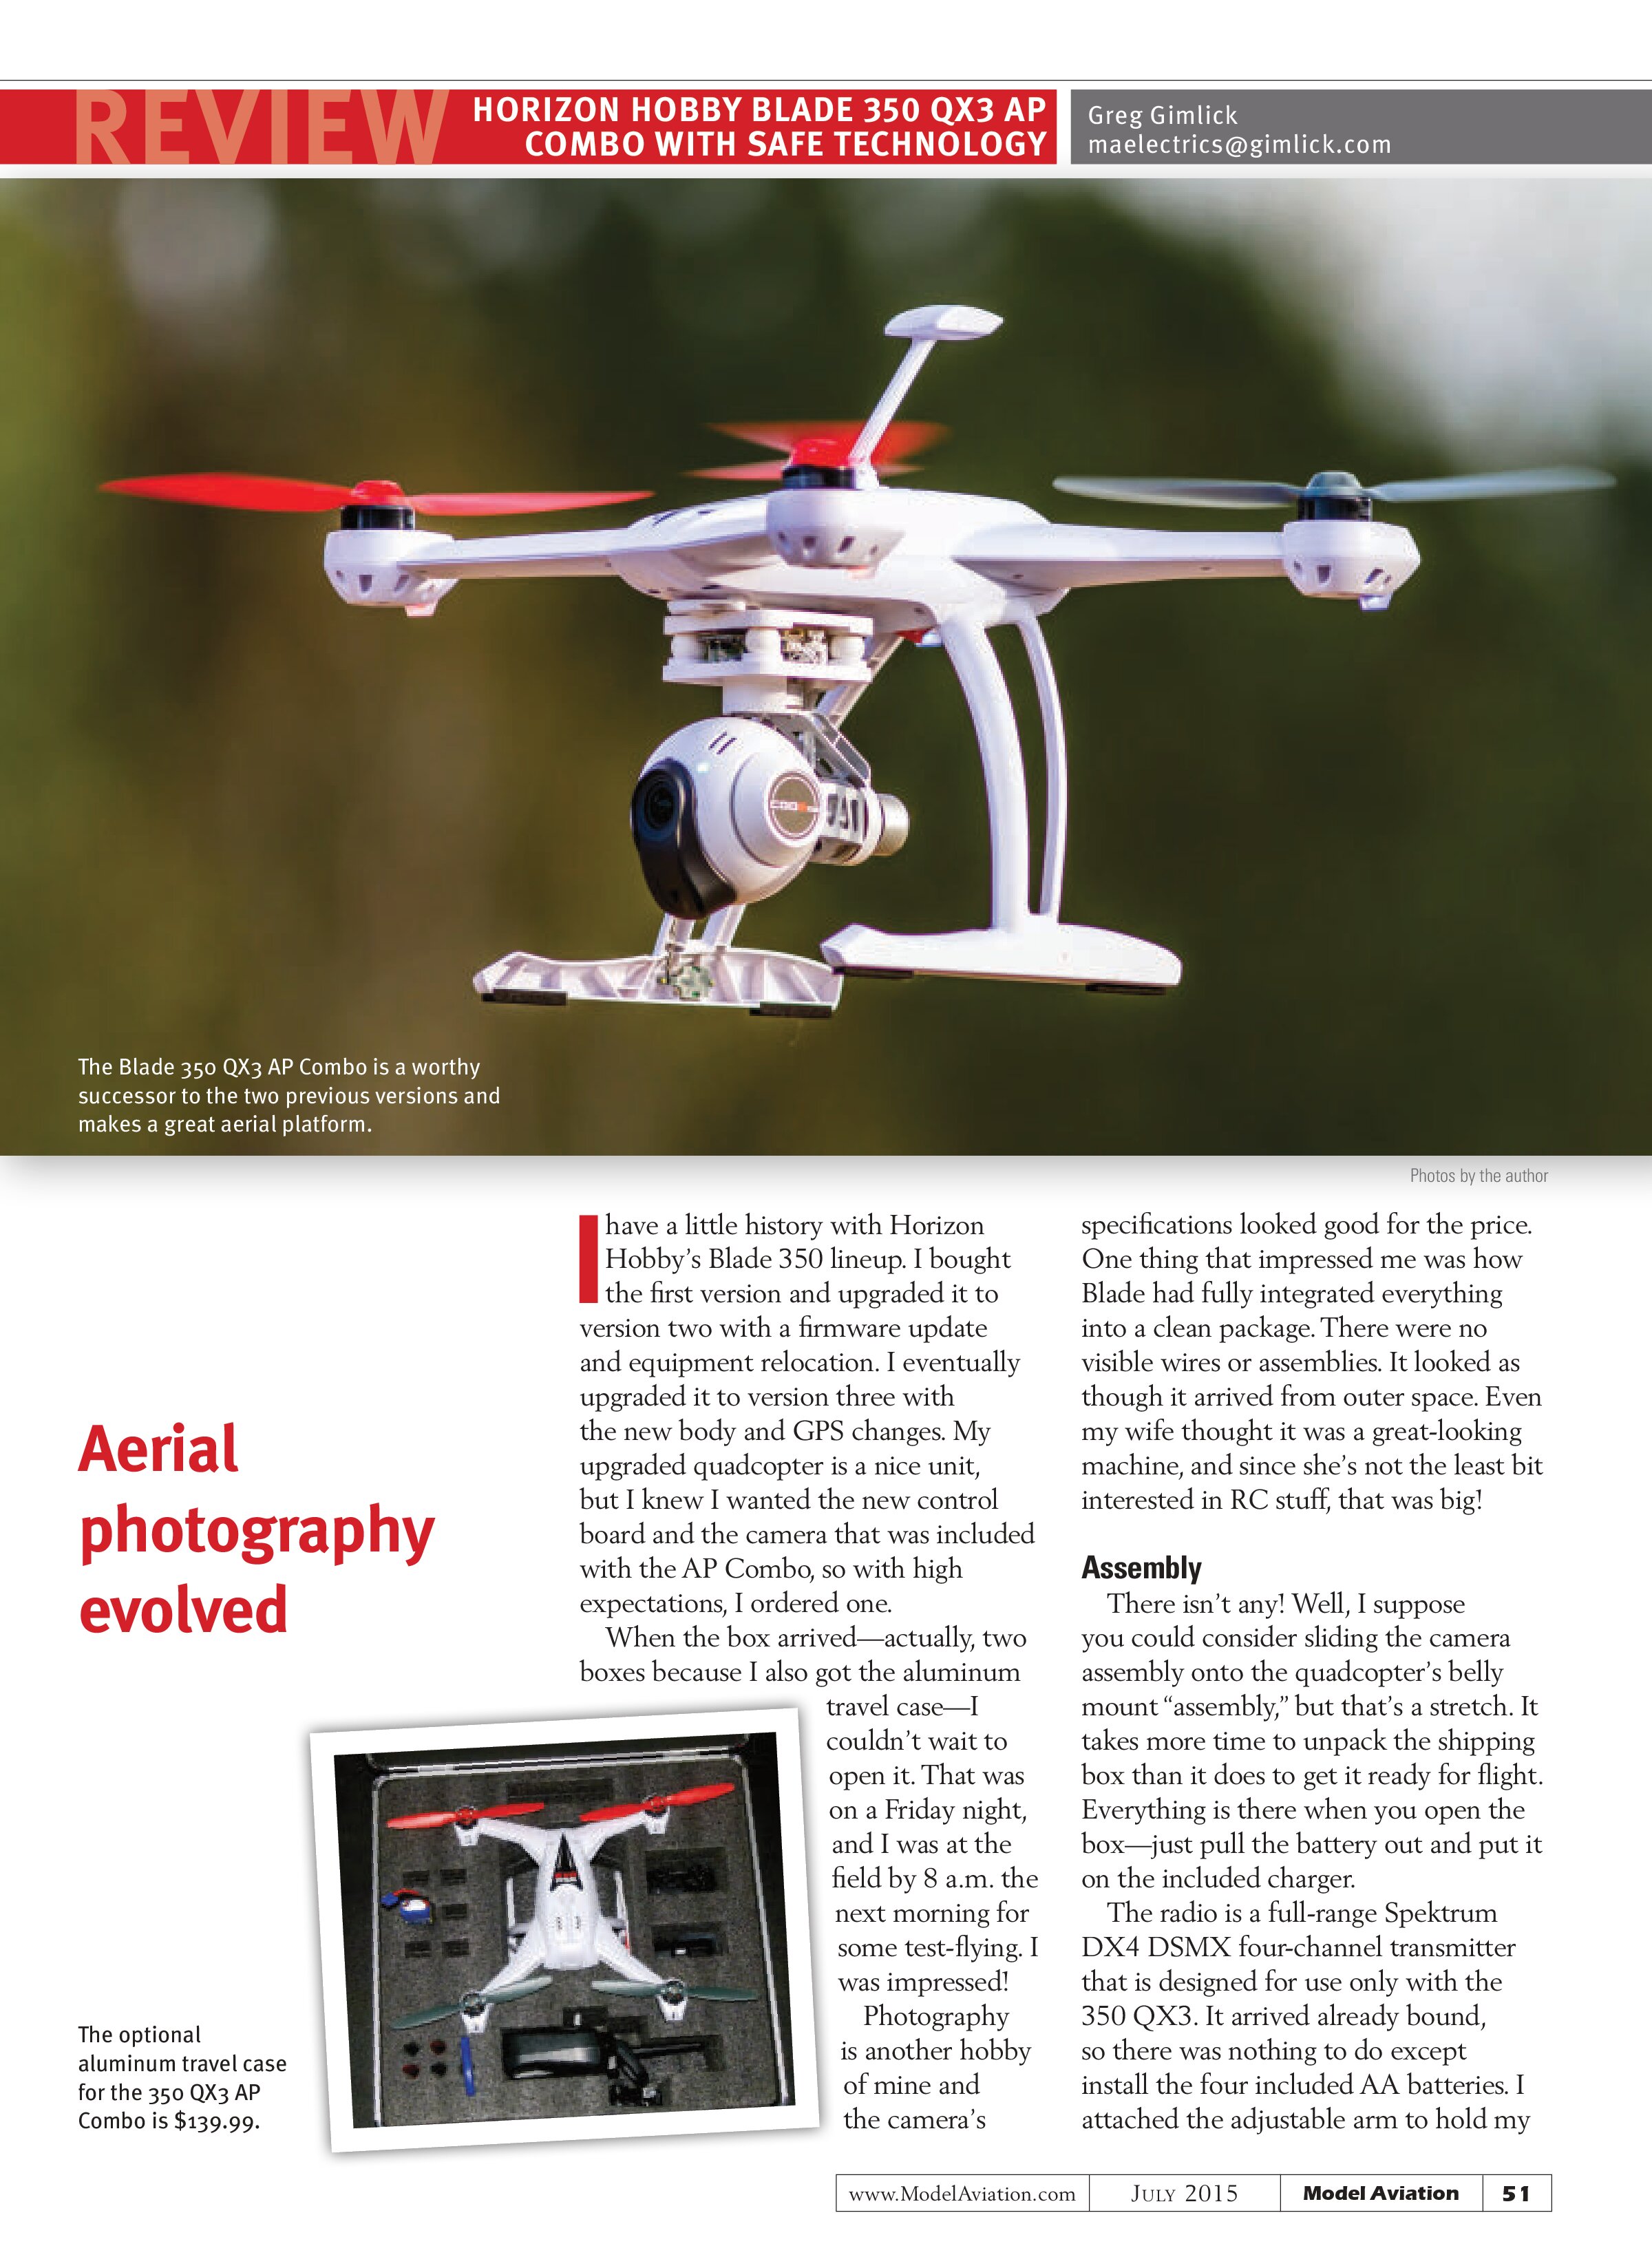
Photography is another hobby of mine and the camera’s specifications looked good for the price. One thing that impressed me was how Blade had fully integrated everything into a clean package. There were no visible wires or assemblies. It looked as though it arrived from outer space. Even my wife thought it was a great-looking machine, and since she’s not the least bit interested in RC stuff, that was big!
Assembly
There isn’t any! Well, I suppose you could consider sliding the camera assembly onto the quadcopter’s belly mount “assembly,” but that’s a stretch. It takes more time to unpack the shipping box than it does to get it ready for flight. Everything is there when you open the box—just pull the battery out and put it on the included charger.
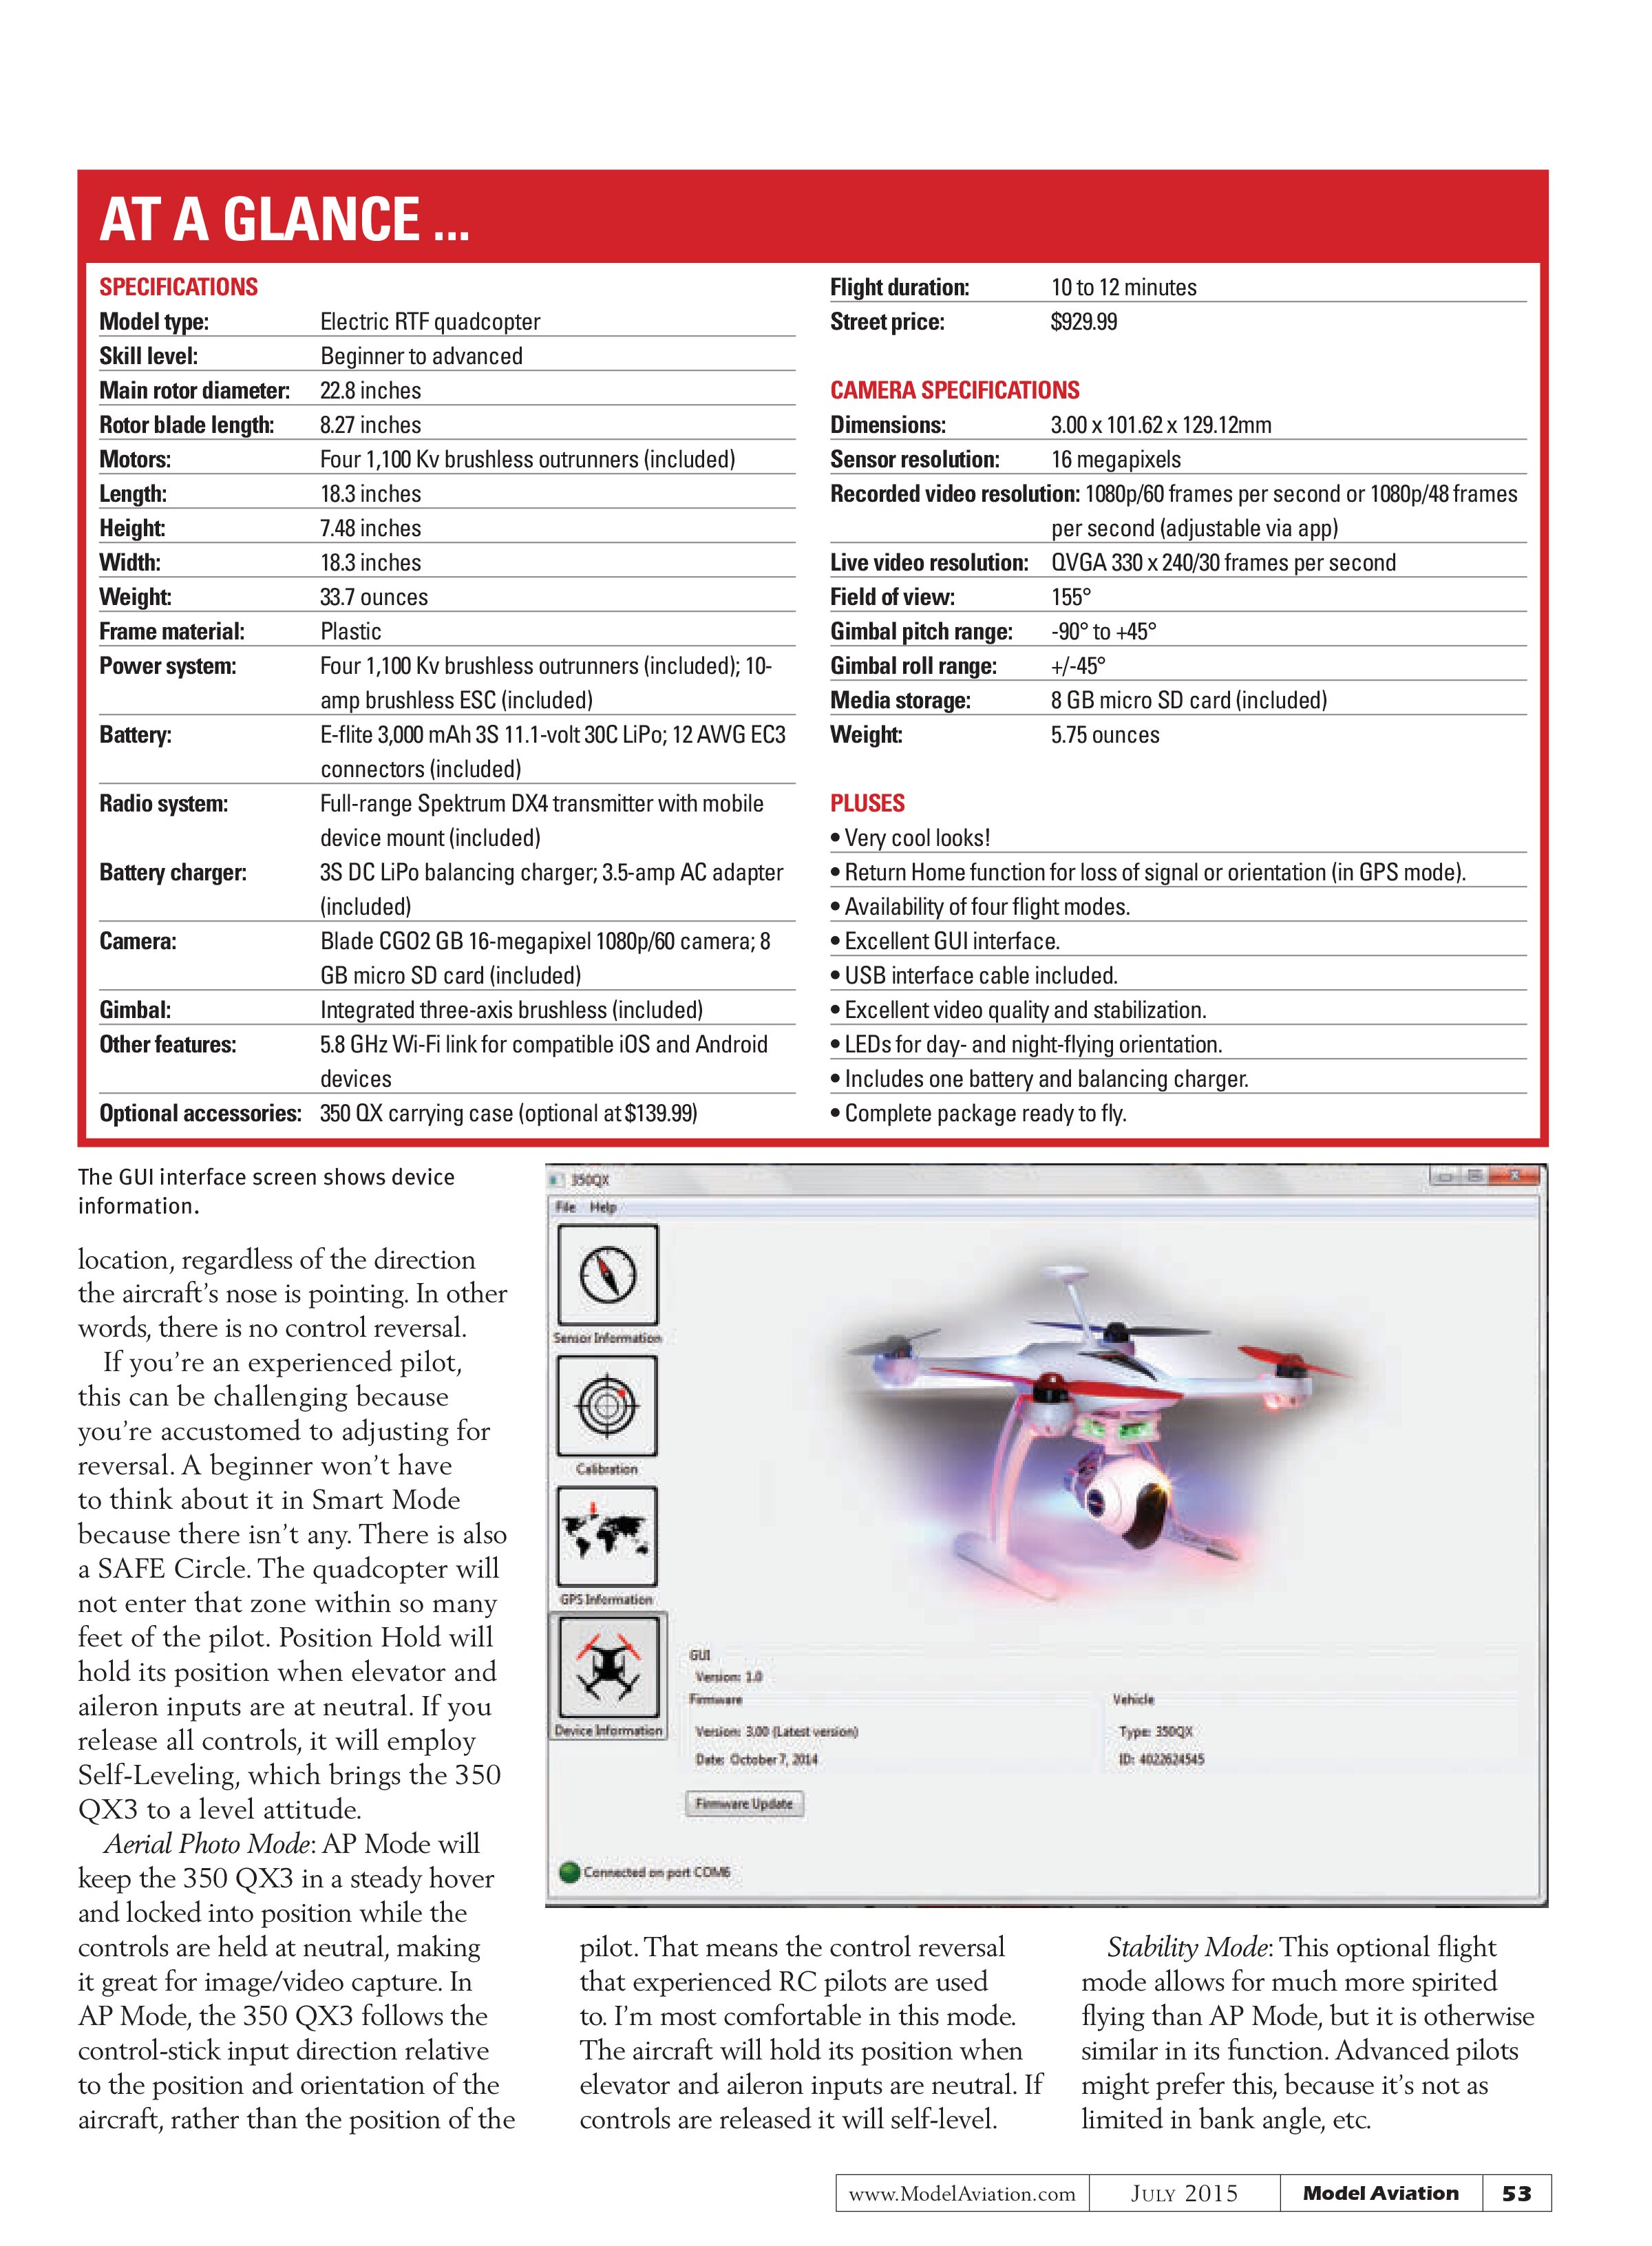
The radio is a full-range Spektrum DX4 DSMX four-channel transmitter that is designed for use only with the 350 QX3. It arrived already bound, so there was nothing to do except install the four included AA batteries. I attached the adjustable arm to hold my

iPhone and set the angle I wanted to see on the screen.
There is a nice quick-start guide provided, along with a small pocket-size “cheat sheet” that you’ll want to take to the field. There is also a camera/gimbal manual to answer any questions you might have in that area. The micro SD card is preinstalled in the camera and ready to go.
Remove the travel guard from the camera/gimbal assembly. It’s such a well-fitting device that it appears to be part of the assembly, but it’s only to protect it while traveling and prevent the gimbal from moving if you leave it on.
After you’ve charged the battery, installed the camera, and gone outside to arm it, you will need to connect your smartphone to the Wi-Fi from the camera unit. It will appear as an available network in your phone settings.
Mine now connects automatically each time I take the 350 QX3 out for a session. This allows you to see the view from the camera and control its functions using touch controls on the phone’s screen. The iOS and Android apps are free online.

Radio Features
The radio is slightly different from what you might be accustomed to if you’re an experienced pilot. There are no trim levers, servo-reversing, exponential, or trainer functions. This radio is purpose-designed for the 350 QX3, but it feels like a regular radio when you’re flying.
There is one exception: the throttle stick is spring loaded to neutral, just as you would find for the aileron/elevator gimbal on any other radio. Although this may seem odd, it serves a good purpose because of the design of the stability modes.
Remember, this is a camera platform and by automatically centering the throttle when you release it, the 350 QX3 will stabilize at that altitude and setting to maintain its position. If you’re an experienced pilot, this will only take a few minutes to get used to and a beginner will find it easy to learn.
The second function of the centered throttle comes into play when you wish to adjust the camera angle in flight. There is a switch on the top right corner that, when moved to the Gimbal Control position, allows you 3 to 5 seconds to raise or lower the angle of the camera with the throttle stick. If you wait too long, it automatically reverts to Throttle Control.
You can use your own radio to fly and control the functions of the 350 QX3 AP Combo, but because I intend to take it when I’m traveling and want a dedicated aerial photo package, I haven’t bothered to set up my Spektrum DX9 for it.
Graphic User Interface
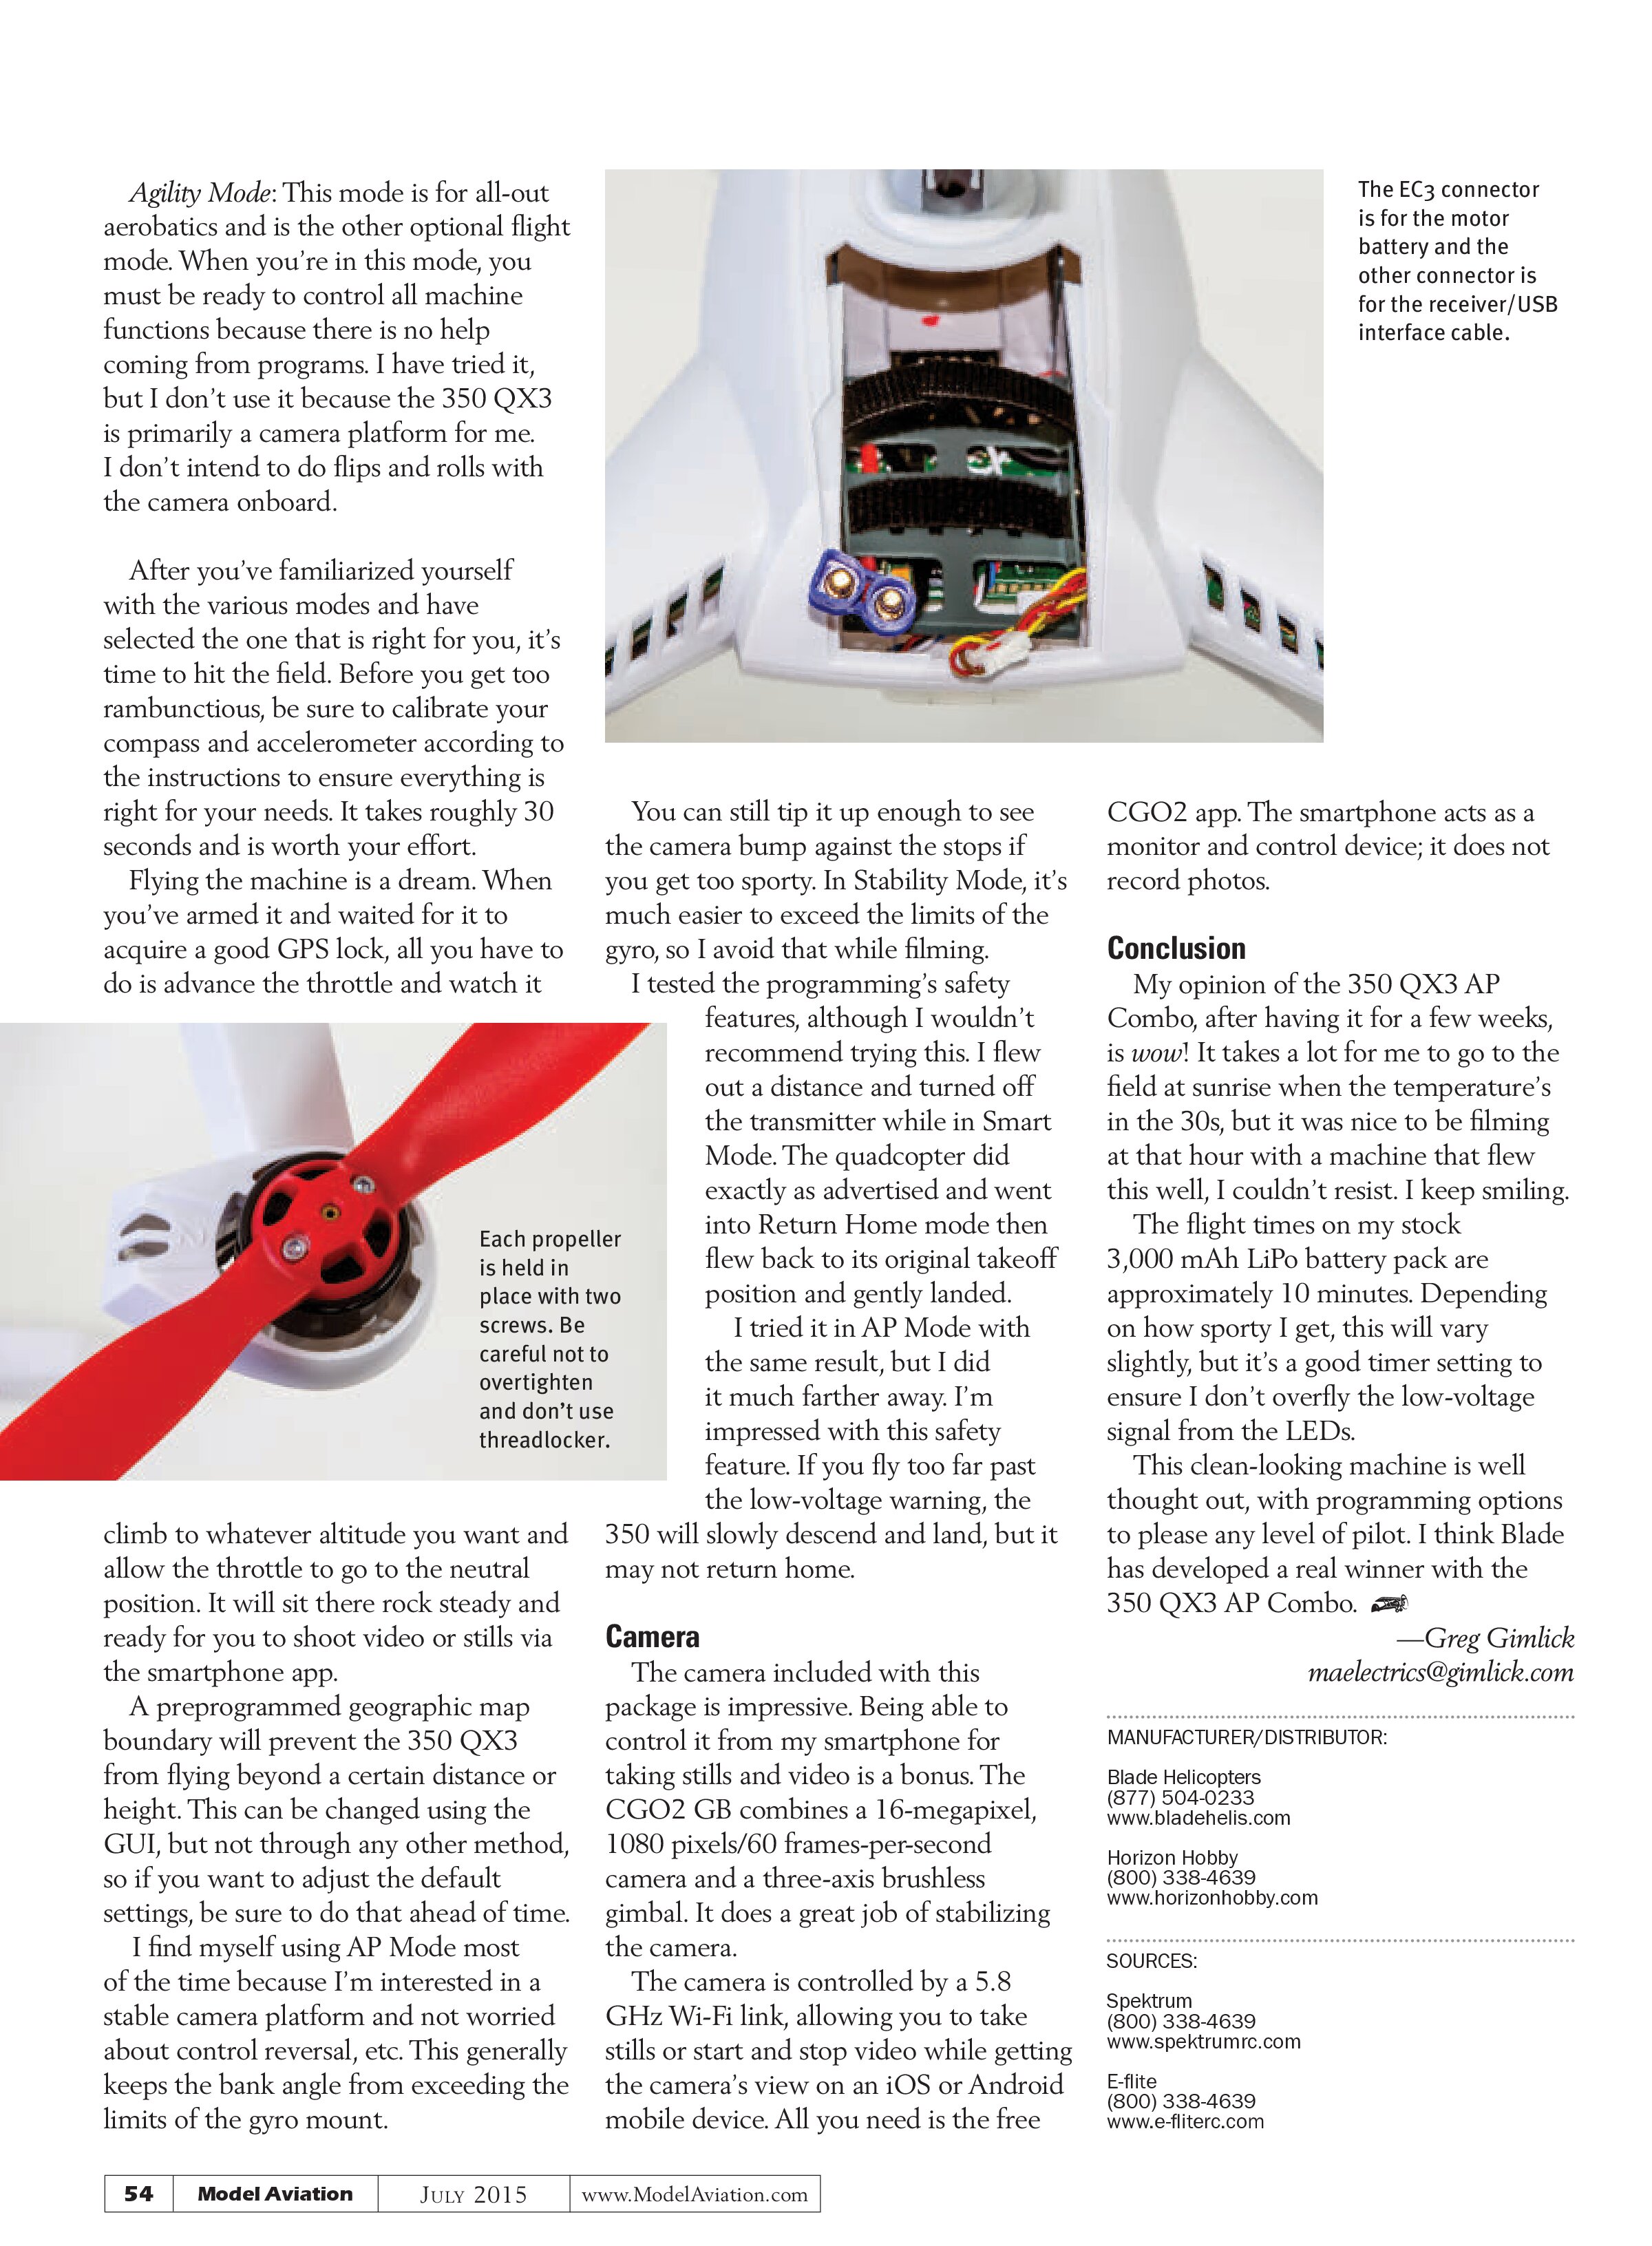
The Graphic User Interface (GUI) feature is worth its weight in gold! The intuitive interface is easy to install, but the best part is that you can check every part of your machine in a matter of seconds by connecting it to your laptop.
There is a wealth of information available and future firmware updates are easily installed using GUI. There are four main sections of information; each is self-explanatory and includes fly-out help windows.
Preflight
It’s all about the LED signals from the quadcopter. Take time to carefully read through what each sequence means and take your cheat sheet with you. This will answer nearly any question you have, but it would take another article for me to explain everything about the signals. It’s simple, but important, to read through the signals and understand the basics. Ignore them at your own risk.
Flying
This is the part we get so excited about trying, but take a moment to understand the flight modes. There are two standard, preselected default flight modes, but with a bit of switch manipulating, you can also select two optional modes for advanced flying.
Smart Mode: This flight mode is intended for beginner pilots and uses Stick Relativity. In this mode, the path of the aircraft will follow the control-stick input direction relative to the pilot’s location, regardless of the direction the aircraft’s nose is pointing. In other words, there is no control reversal.
If you’re an experienced pilot, this can be challenging because you’re accustomed to adjusting for reversal. A beginner won’t have to think about it in Smart Mode because there isn’t any. There is also a SAFE Circle. The quadcopter will not enter that zone within so many feet of the pilot. Position Hold will hold its position when elevator and aileron inputs are at neutral. If you release all controls, it will employ Self-Leveling, which brings the 350 QX3 to a level attitude.
Aerial Photo Mode: AP Mode will keep the 350 QX3 in a steady hover and locked into position while the controls are held at neutral, making it great for image/video capture. In AP Mode, the 350 QX3 follows the control-stick input direction relative to the position and orientation of the aircraft, rather than the position of the pilot. That means the control reversal that experienced RC pilots are used to. I’m most comfortable in this mode. The aircraft will hold its position when elevator and aileron inputs are neutral. If controls are released it will self-level.
Stability Mode: This optional flight mode allows for much more spirited flying than AP Mode, but it is otherwise similar in its function. Advanced pilots might prefer this, because it’s not as limited in bank angle, etc.
At a Glance …
SPECIFICATIONS
Model type: Electric RTF quadcopter
Skill level: Beginner to advanced
Main rotor diameter: 22.8 inches
Rotor blade length: 8.27 inches
Motors: Four 1,100 Kv brushless outrunners (included)
Length: 18.3 inches
Height: 7.48 inches
Width: 18.3 inches
Weight: 33.7 ounces
Frame material: Plastic
Power system: Four 1,100 Kv brushless outrunners (included); 10-amp brushless ESC (included)
Battery: E-flite 3,000 mAh 3S 11.1-volt 30C LiPo; 12 AWG EC3 connectors (included)
Radio system: Full-range Spektrum DX4 transmitter with mobile device mount (included)
Battery charger: 3S DC LiPo balancing charger; 3.5-amp AC adapter (included)
Camera: Blade CGO2 GB 16-megapixel 1080p/60 camera; 8 GB micro SD card (included)
Gimbal: Integrated three-axis brushless (included)
Other features: 5.8 GHz Wi-Fi link for compatible iOS and Android devices
Optional accessories: 350 QX carrying case (optional at $139.99)
Flight duration: 10 to 12 minutes
Street price: $929.99
CAMERA SPECIFICATIONS
Dimensions: 3.00 x 101.62 x 129.12mm
Sensor resolution: 16 megapixels
Recorded video resolution: 1080p/60 frames per second or 1080p/48 frames per second (adjustable via app)
Live video resolution: QVGA 330 x 240/30 frames per second
Field of view: 155°
Gimbal pitch range: -90° to +45°
Gimbal roll range: +/-45°
Media storage: 8 GB micro SD card (included)
Weight: 5.75 ounces
PUSES
• Very cool looks!
• Return Home function for loss of signal or orientation (in GPS mode).
• Availability of four flight modes.
• Excellent GUI interface.
• USB interface cable included.
• Excellent video quality and stabilization.
• LEDs for day- and night-flying orientation.
• Includes one battery and balancing charger.
• Complete package ready to fly.

The GUI interface screen shows device information.

Agility Mode: This mode is for all-out aerobatics and is the other optional flight mode. When you’re in this mode, you must be ready to control all machine functions because there is no help coming from programs. I have tried it, but I don’t use it because the 350 QX3 is primarily a camera platform for me. I don’t intend to do flips and rolls with the camera onboard.
After you’ve familiarized yourself with the various modes and have selected the one that is right for you, it’s time to hit the field. Before you get too rambunctious, be sure to calibrate your compass and accelerometer according to the instructions to ensure everything is right for your needs. It takes roughly 30 seconds and is worth your effort.
Flying the machine is a dream. When you’ve armed it and waited for it to acquire a good GPS lock, all you have to do is advance the throttle and watch it

climb to whatever altitude you want and allow the throttle to go to the neutral position. It will sit there rock steady and ready for you to shoot video or stills via the smartphone app.
A preprogrammed geographic map boundary will prevent the 350 QX3 from flying beyond a certain distance or height. This can be changed using the GUI, but not through any other method, so if you want to adjust the default settings, be sure to do that ahead of time.
I find myself using AP Mode most of the time because I’m interested in a stable camera platform and not worried about control reversal, etc. This generally keeps the bank angle from exceeding the limits of the gyro mount.

You can still tip it up enough to see the camera bump against the stops if you get too sporty. In Stability Mode, it’s much easier to exceed the limits of the gyro, so I avoid that while filming.
I tested the programming’s safety features, although I wouldn’t recommend trying this. I flew out a distance and turned off the transmitter while in Smart Mode. The quadcopter did exactly as advertised and went into Return Home mode then flew back to its original takeoff position and gently landed.
I tried it in AP Mode with the same result, but I did it much farther away. I’m impressed with this safety feature. If you fly too far past the low-voltage warning, the 350 will slowly descend and land, but it may not return home.
Camera
The camera included with this package is impressive. Being able to control it from my smartphone for taking stills and video is a bonus. The CGO2 GB combines a 16-megapixel, 1080 pixels/60 frames-per-second camera and a three-axis brushless gimbal. It does a great job of stabilizing the camera.
The camera is controlled by a 5.8 GHz Wi-Fi link, allowing you to take stills or start and stop video while getting the camera’s view on an iOS or Android mobile device. All you need is the free CGO2 app. The smartphone acts as a monitor and control device; it does not record photos.
Conclusion
My opinion of the 350 QX3 AP Combo, after having it for a few weeks, is wow! It takes a lot for me to go to the field at sunrise when the temperature’s in the 30s, but it was nice to be filming at that hour with a machine that flew this well, I couldn’t resist. I keep smiling.
The flight times on my stock 3,000 mAh LiPo battery pack are approximately 10 minutes. Depending on how sporty I get, this will vary slightly, but it’s a good timer setting to ensure I don’t overfly the low-voltage signal from the LEDs.
This clean-looking machine is well thought out, with programming options to please any level of pilot. I think Blade has developed a real winner with the 350 QX3 AP Combo.
—Greg Gimlick
maelectrics@gimlick.com
MANUFACTURER/DISTRIBUTOR:
Blade Helicopters
(877) 504-0233
www.bladehelis.com
Horizon Hobby
(800) 338-4639
www.horizonhobby.com
SOURCES:
Spektrum
(800) 338-4639
www.spektrumrc.com
E-flite
(800) 338-4639
www.e-fliterc.com