Graupner Gr-18 3Xg+3A+Vario Hott Gyro Receiver
Chris Mulcahy

A solid-performing
all-in-one solution
for Graupner radio
users
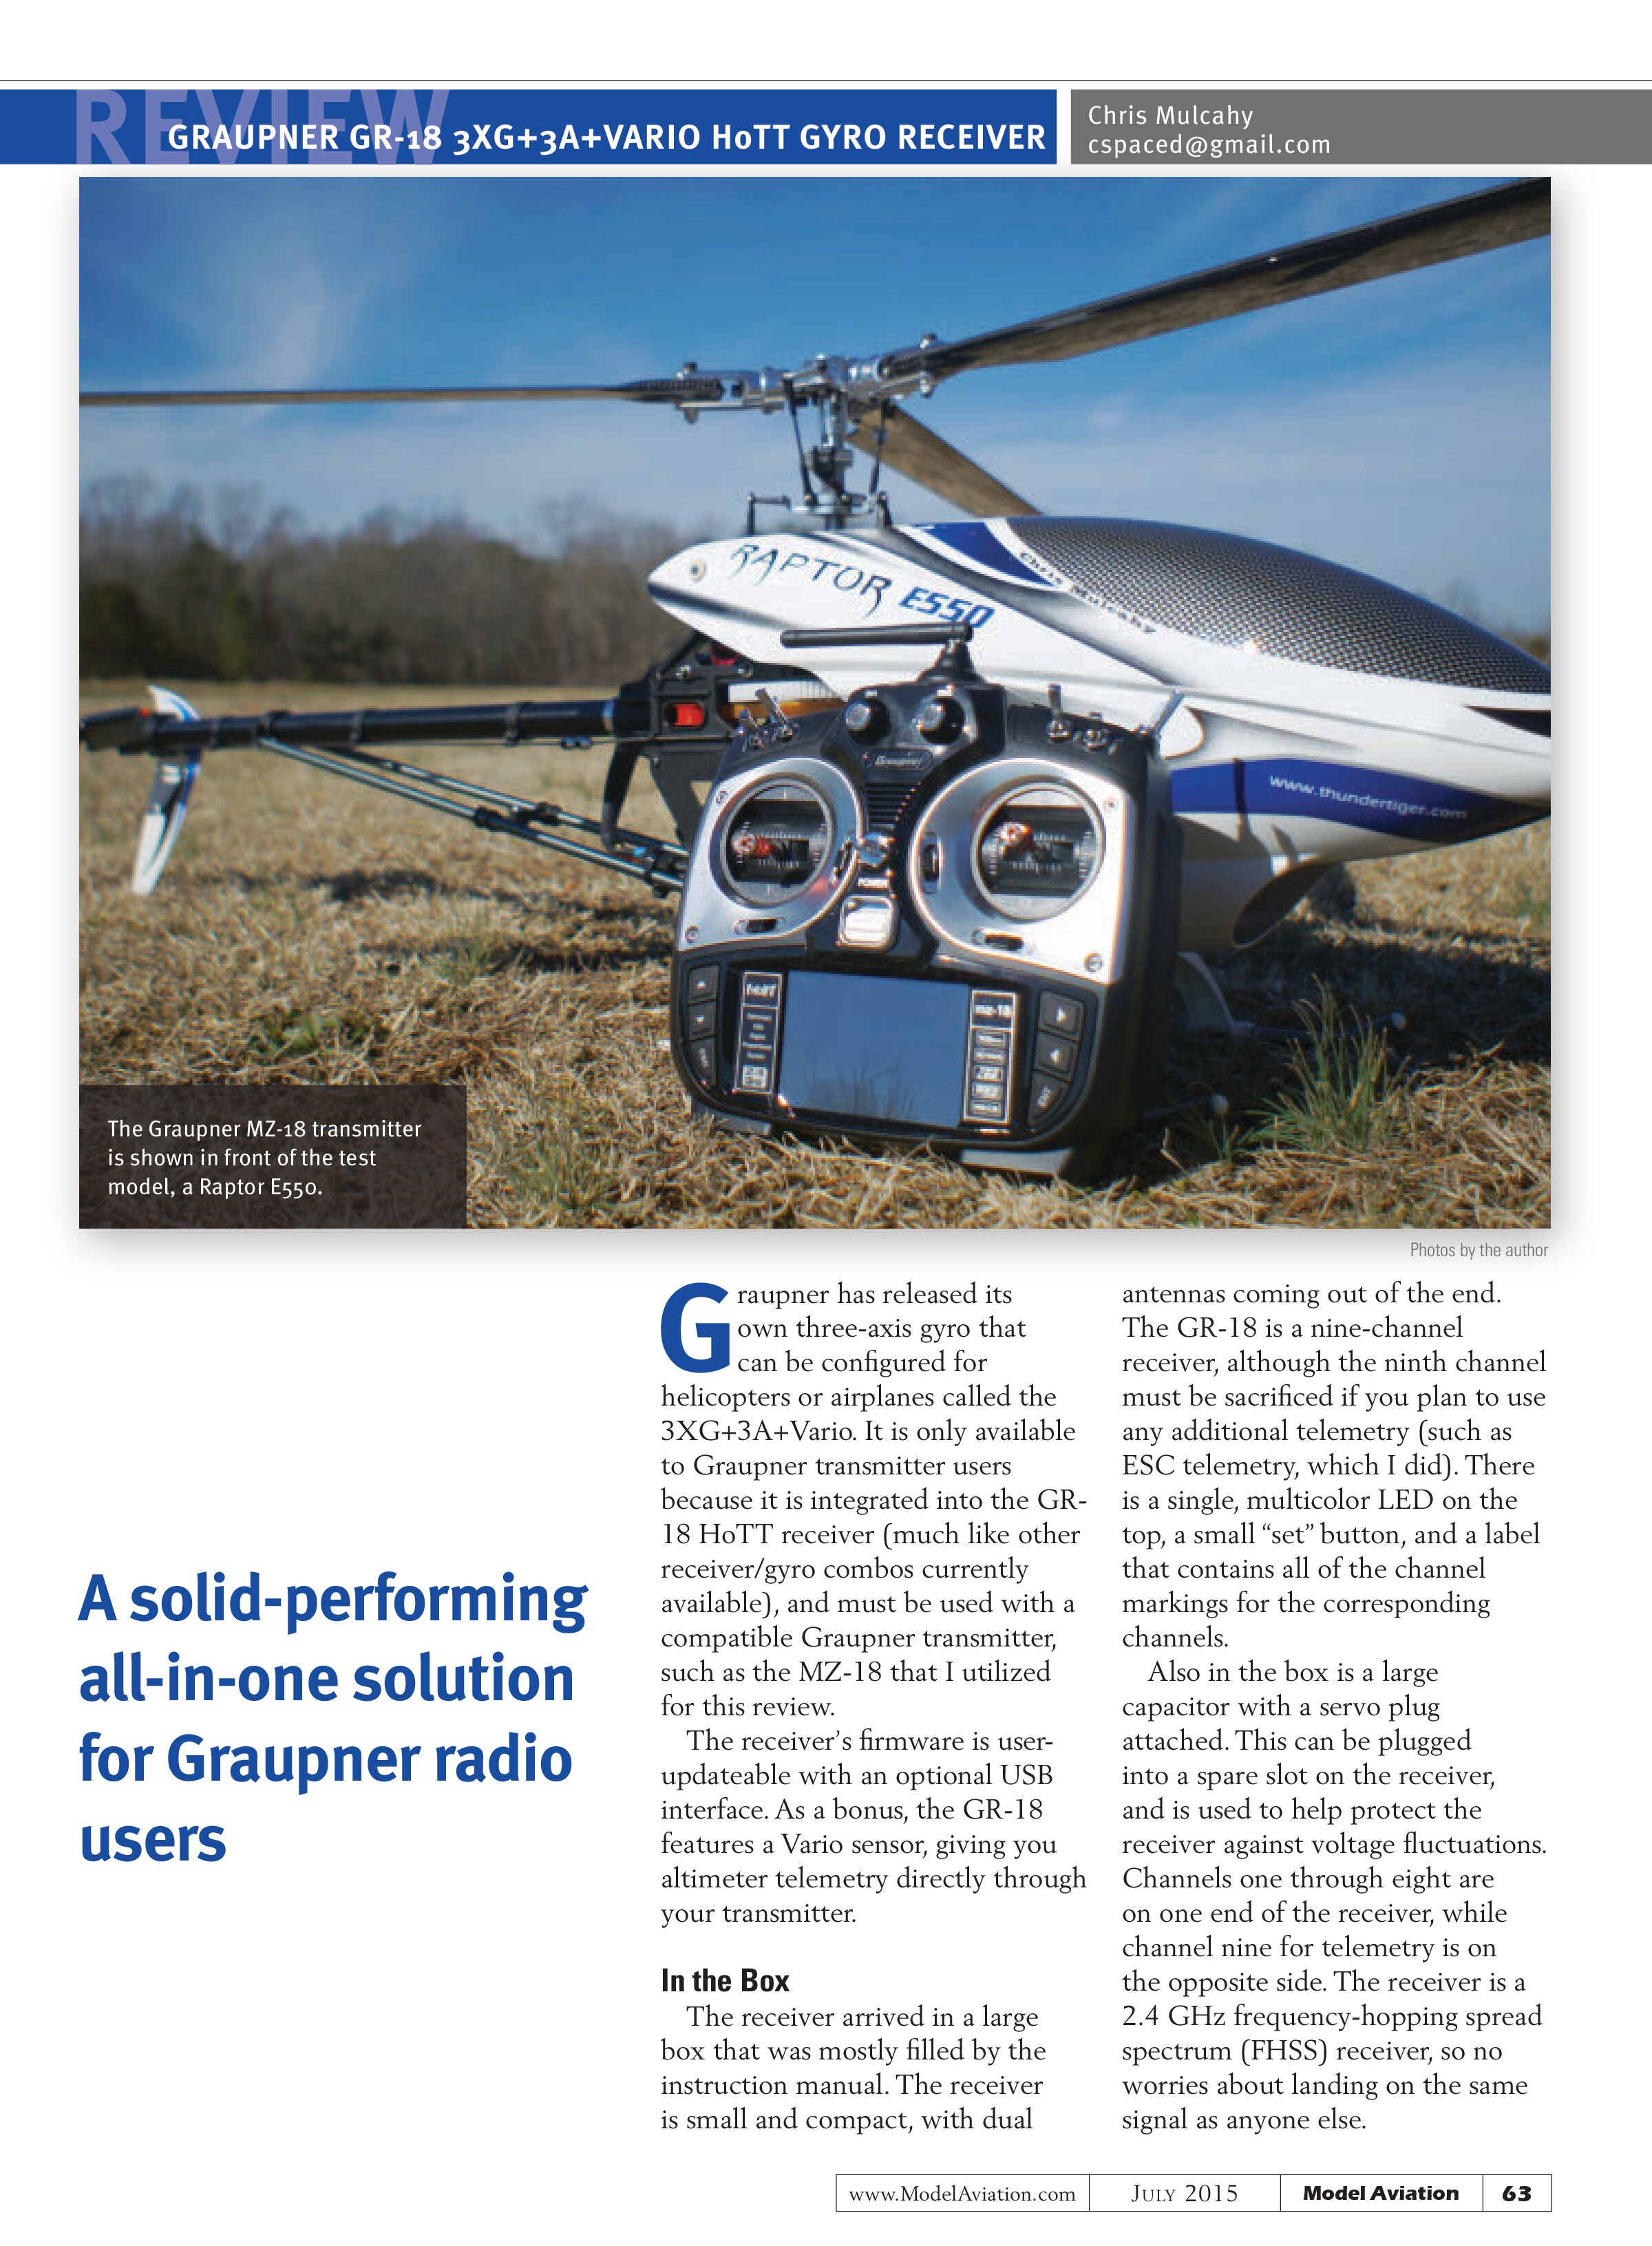
Graupner has released its own three-axis gyro that can be configured for helicopters or airplanes called the 3XG+3A+Vario. It is only available to Graupner transmitter users because it is integrated into the GR-18 HoTT receiver (much like other receiver/gyro combos currently available), and must be used with a compatible Graupner transmitter, such as the MZ-18 that I utilized for this review.
The receiver’s firmware is user-updateable with an optional USB interface. As a bonus, the GR-18 features a Vario sensor, giving you altimeter telemetry directly through your transmitter.
In the Box
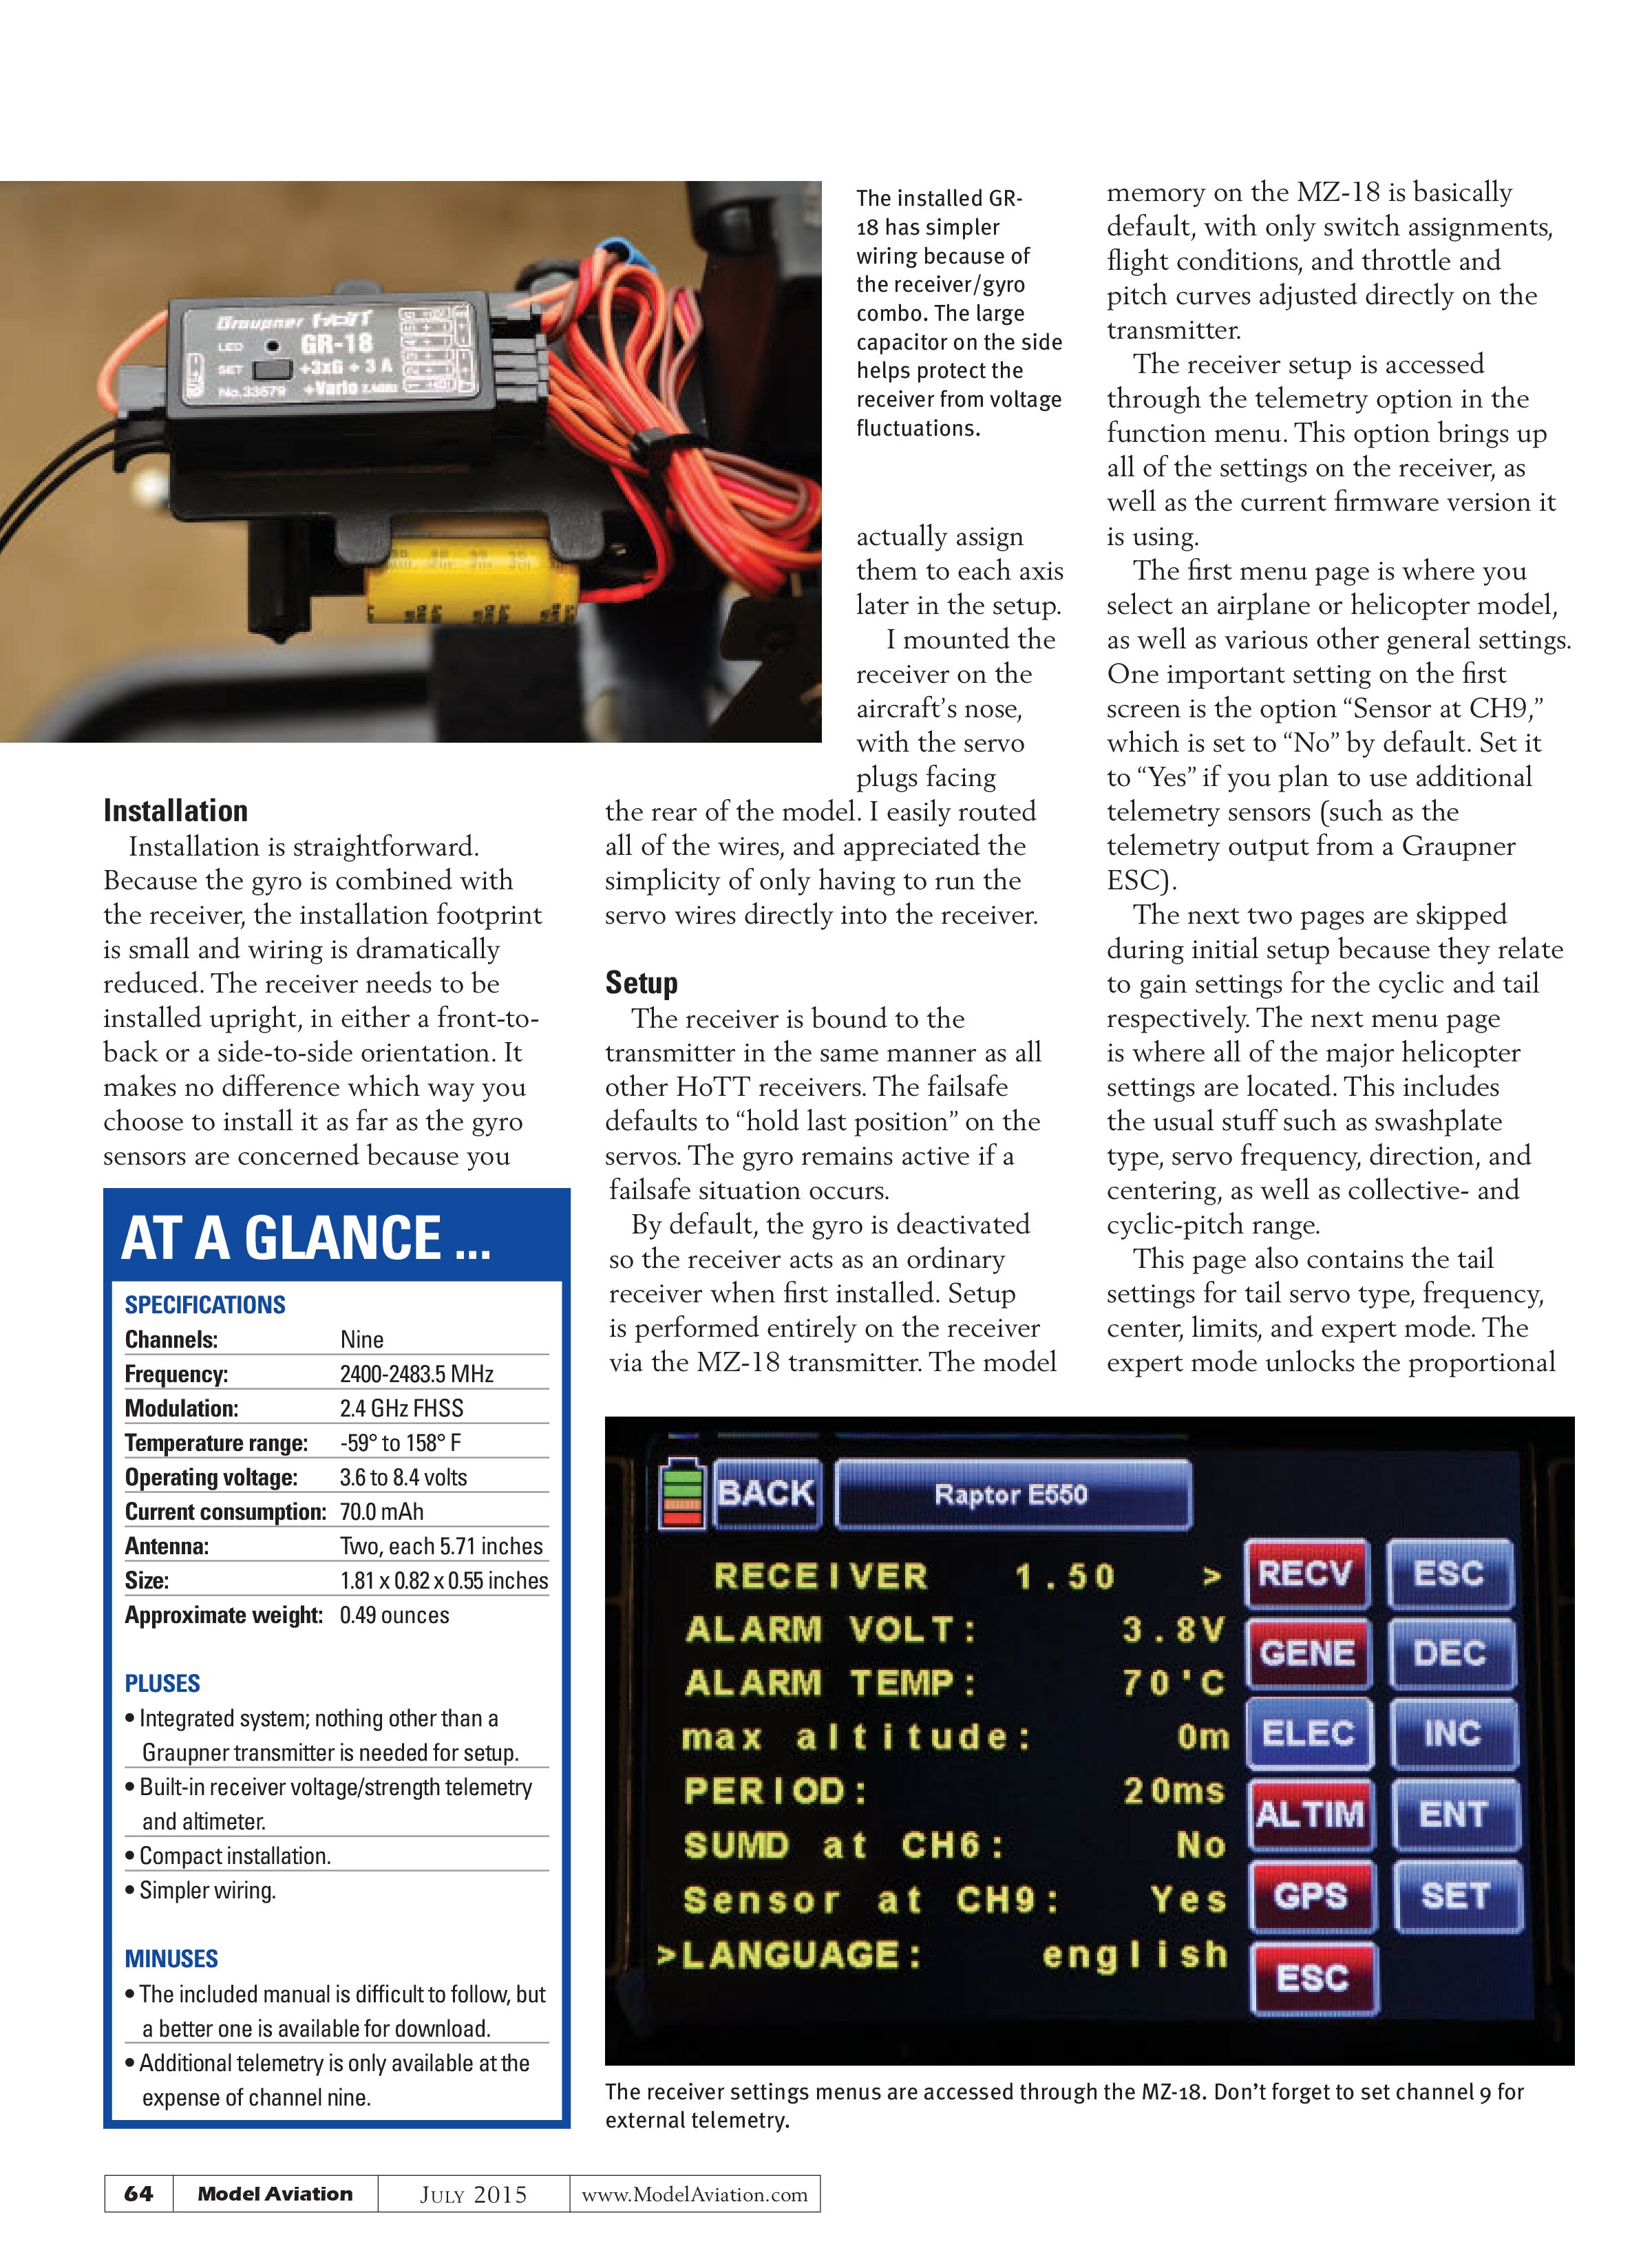
The receiver arrived in a large box that was mostly filled by the instruction manual. The receiver is small and compact, with dual antennas coming out of the end. The GR-18 is a nine-channel receiver, although the ninth channel must be sacrificed if you plan to use any additional telemetry (such as ESC telemetry, which I did). There is a single, multicolor LED on the top, a small “set” button, and a label that contains all of the channel markings for the corresponding channels.
Also in the box is a large capacitor with a servo plug attached. This can be plugged into a spare slot on the receiver, and is used to help protect the receiver against voltage fluctuations. Channels one through eight are on one end of the receiver, while channel nine for telemetry is on the opposite side. The receiver is a 2.4 GHz frequency-hopping spread spectrum (FHSS) receiver, so no worries about landing on the same signal as anyone else.

Installation
Installation is straightforward. Because the gyro is combined with the receiver, the installation footprint is small and wiring is dramatically reduced. The receiver needs to be installed upright, in either a front-to-back or a side-to-side orientation. It makes no difference which way you choose to install it as far as the gyro sensors are concerned because you actually assign them to each axis later in the setup. I mounted the receiver on the aircraft’s nose, with the servo plugs facing the rear of the model. I easily routed all of the wires, and appreciated the simplicity of only having to run the servo wires directly into the receiver.
At a Glance ...
Specifications
Channels: Nine
Frequency: 2400-2483.5 MHz
Modulation: 2.4 GHz FHSS
Temperature range: -59° to 158° F
Operating voltage: 3.6 to 8.4 volts
Current consumption: 70.0 mAh
Antenna: Two, each 5.71 inches
Size: 1.81 x 0.82 x 0.55 inches
Approximate weight: 0.49 ounces
Pluses
- Integrated system; nothing other than a Graupner transmitter is needed for setup.
- Built-in receiver voltage/strength telemetry and altimeter.
- Compact installation.
- Simpler wiring.
Minuses
- The included manual is difficult to follow, but a better one is available for download.
- Additional telemetry is only available at the expense of channel nine.
Setup
The receiver is bound to the transmitter in the same manner as all other HoTT receivers. The failsafe defaults to “hold last position” on the servos. The gyro remains active if a failsafe situation occurs.
By default, the gyro is deactivated so the receiver acts as an ordinary receiver when first installed. Setup is performed entirely on the receiver via the MZ-18 transmitter. The model memory on the MZ-18 is basically default, with only switch assignments, flight conditions, and throttle and pitch curves adjusted directly on the transmitter.
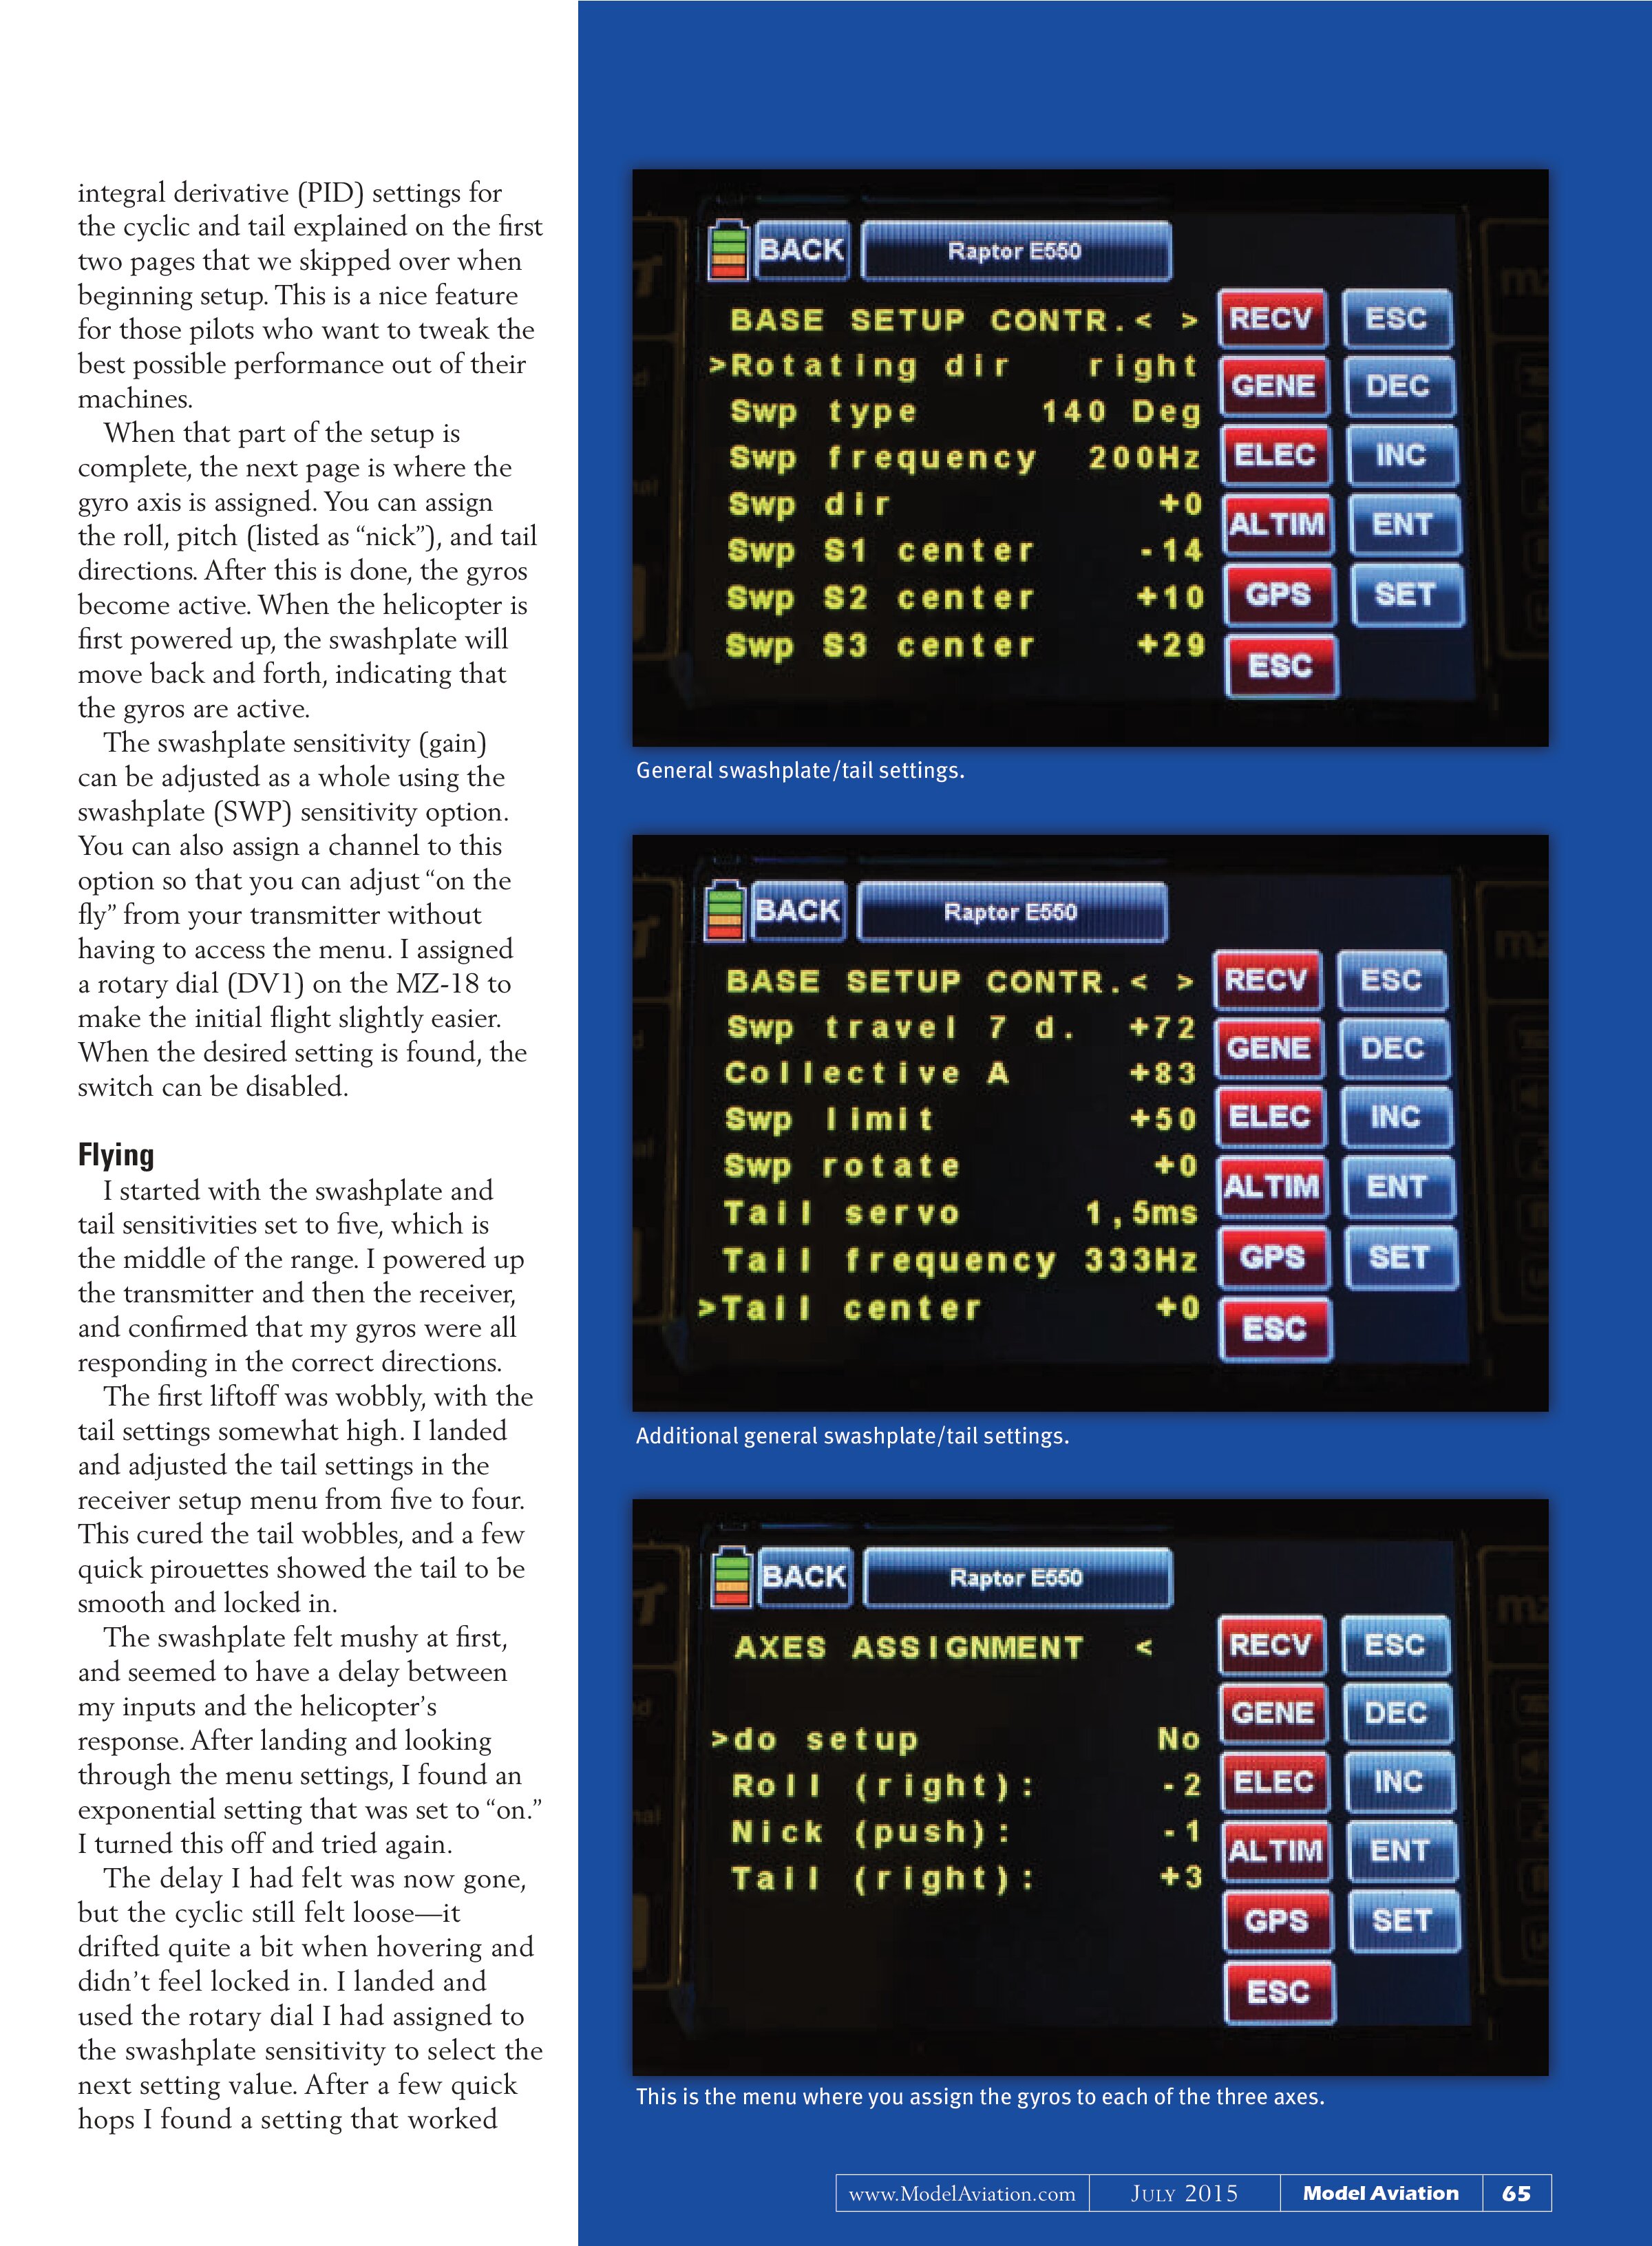
The receiver setup is accessed through the telemetry option in the function menu. This option brings up all of the settings on the receiver, as well as the current firmware version it is using.
The first menu page is where you select an airplane or helicopter model, as well as various other general settings. One important setting on the first screen is the option “Sensor at CH9,” which is set to “No” by default. Set it to “Yes” if you plan to use additional telemetry sensors (such as the telemetry output from a Graupner ESC).
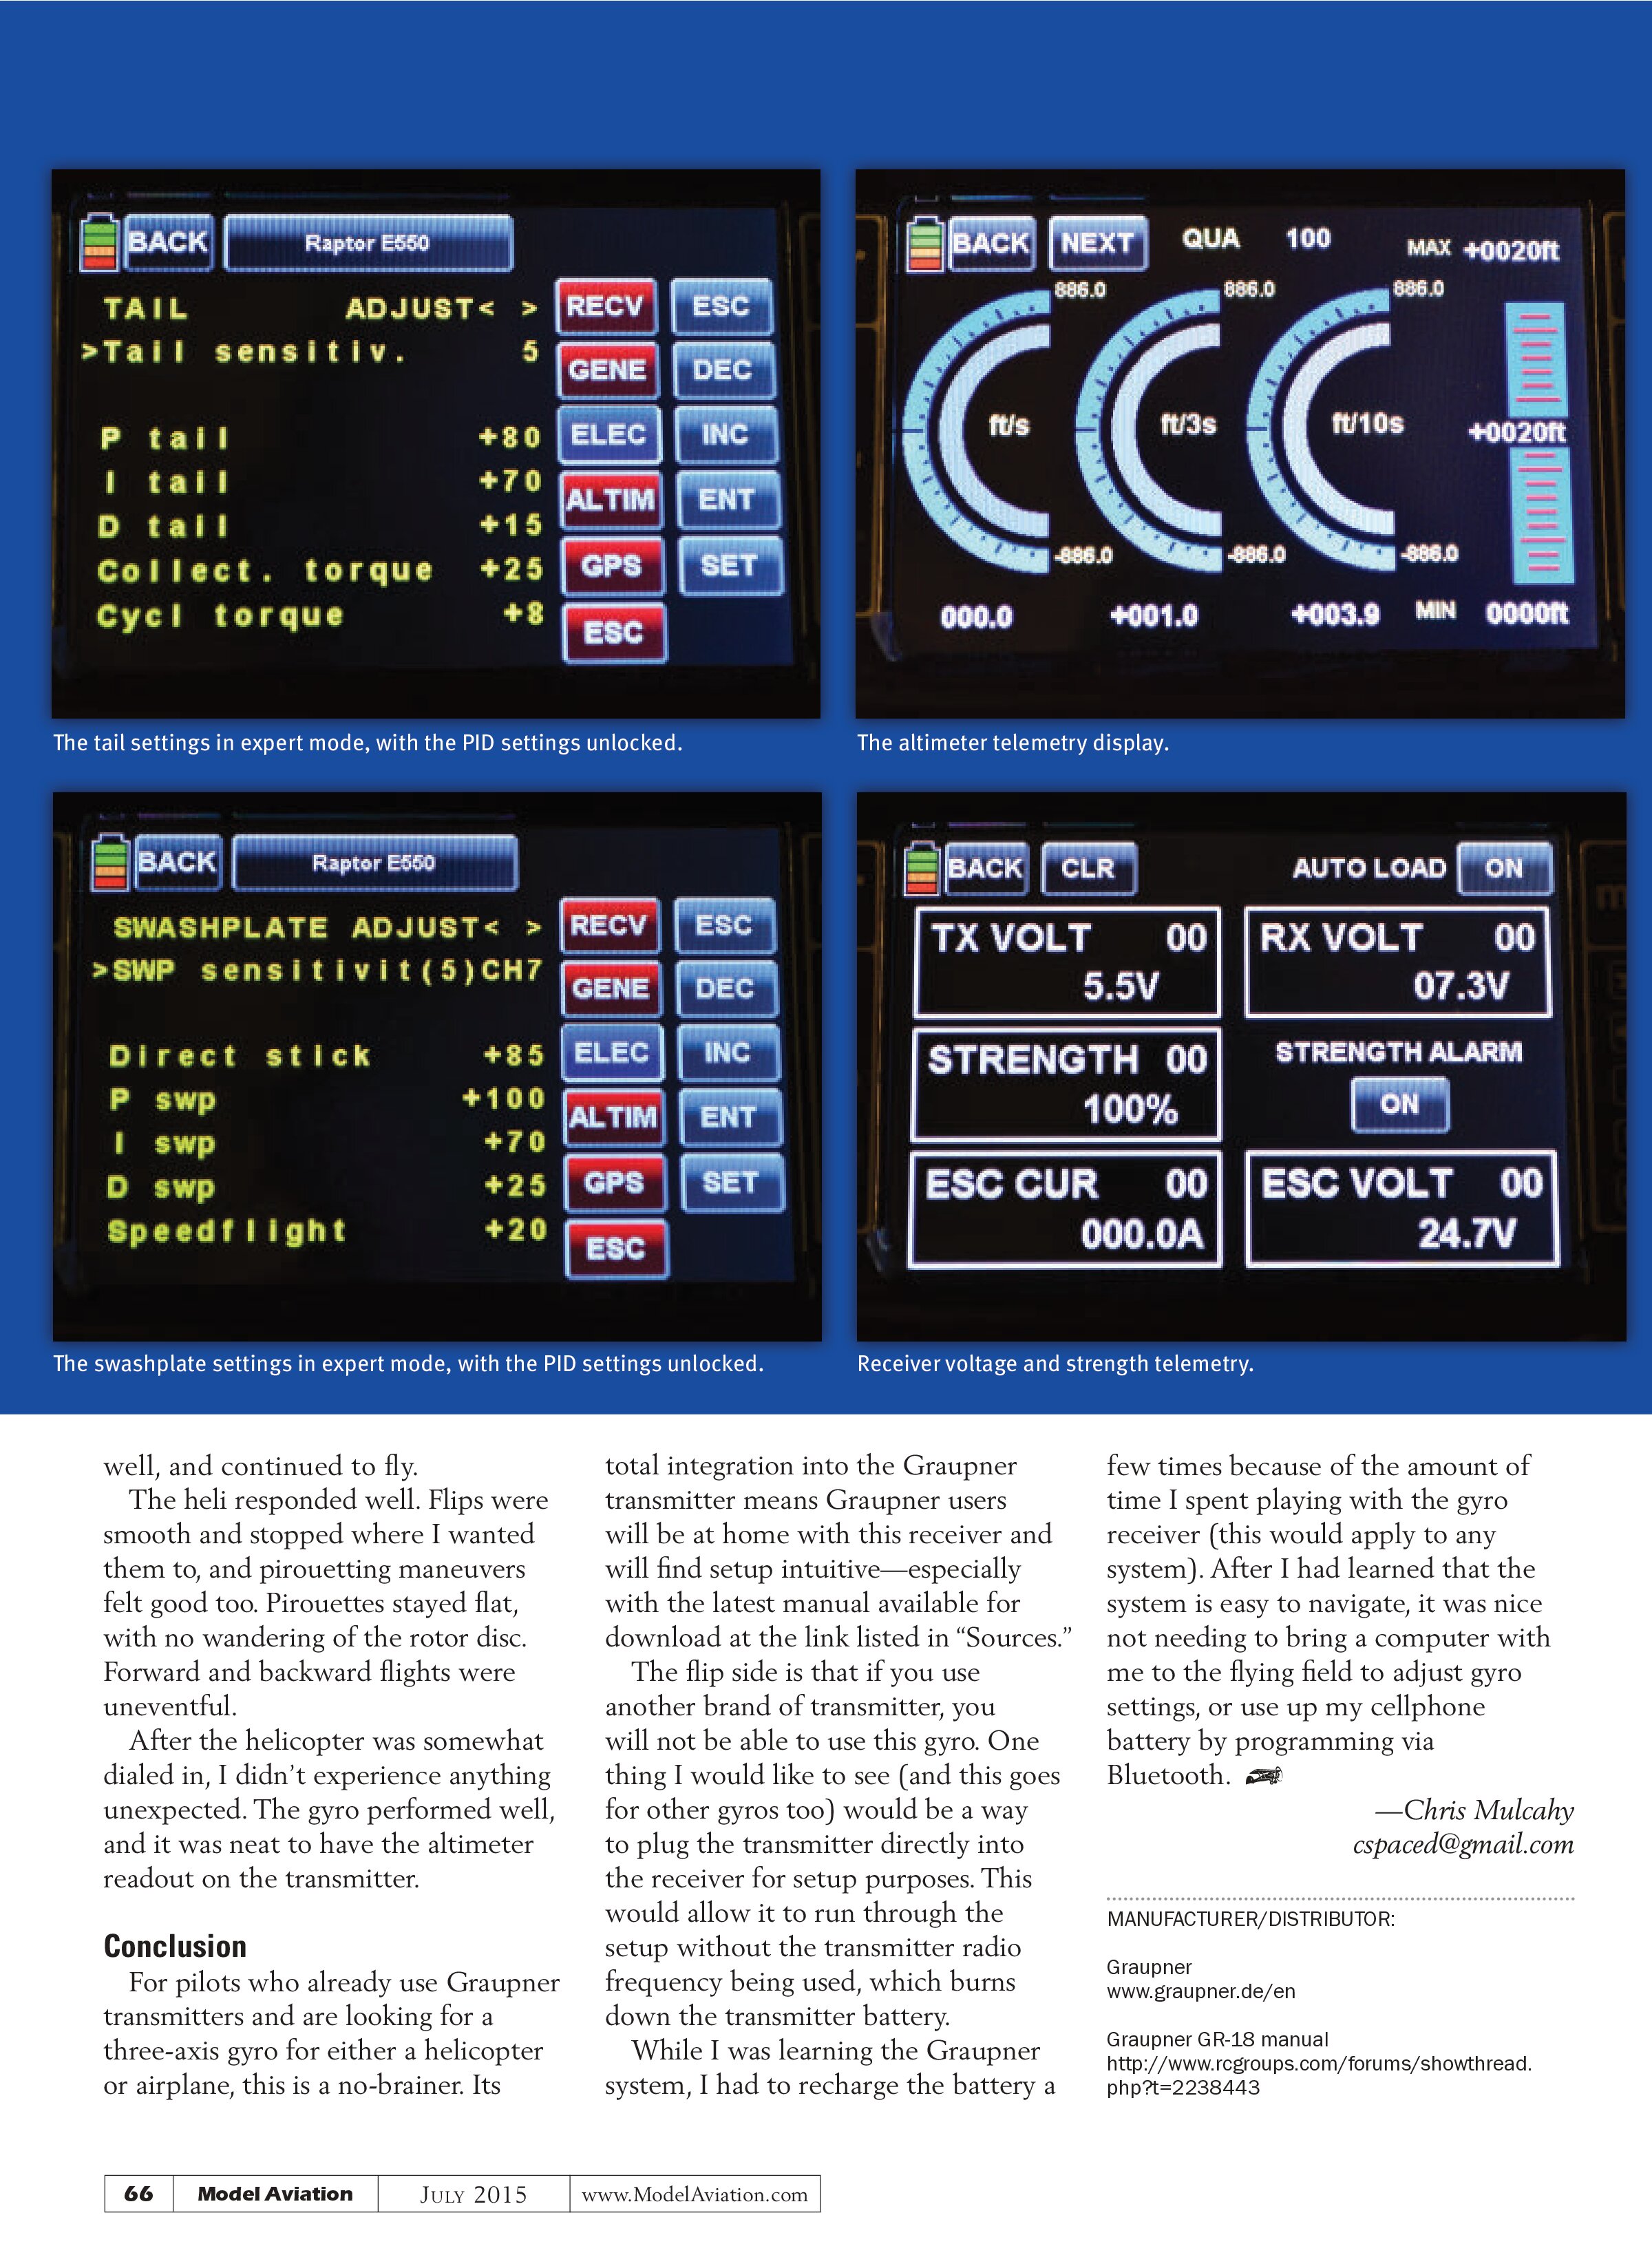
The next two pages are skipped during initial setup because they relate to gain settings for the cyclic and tail respectively. The next menu page is where all of the major helicopter settings are located. This includes the usual stuff such as swashplate type, servo frequency, direction, and centering, as well as collective- and cyclic-pitch range.
This page also contains the tail settings for tail servo type, frequency, center, limits, and expert mode. The expert mode unlocks the proportional integral derivative (PID) settings for the cyclic and tail explained on the first two pages that we skipped over when beginning setup. This is a nice feature for those pilots who want to tweak the best possible performance out of their machines.
When that part of the setup is complete, the next page is where the gyro axis is assigned. You can assign the roll, pitch (listed as “nick”), and tail directions. After this is done, the gyros become active. When the helicopter is first powered up, the swashplate will move back and forth, indicating that the gyros are active.
The swashplate sensitivity (gain) can be adjusted as a whole using the swashplate (SWP) sensitivity option. You can also assign a channel to this option so that you can adjust “on the fly” from your transmitter without having to access the menu. I assigned a rotary dial (DV1) on the MZ-18 to make the initial flight slightly easier. When the desired setting is found, the switch can be disabled.
Flying
I started with the swashplate and tail sensitivities set to five, which is the middle of the range. I powered up the transmitter and then the receiver, and confirmed that my gyros were all responding in the correct directions.
The first liftoff was wobbly, with the tail settings somewhat high. I landed and adjusted the tail settings in the receiver setup menu from five to four. This cured the tail wobbles, and a few quick pirouettes showed the tail to be smooth and locked in.
The swashplate felt mushy at first, and seemed to have a delay between my inputs and the helicopter’s response. After landing and looking through the menu settings, I found an exponential setting that was set to “on.” I turned this off and tried again.
The delay I had felt was now gone, but the cyclic still felt loose—it drifted quite a bit when hovering and didn’t feel locked in. I landed and used the rotary dial I had assigned to the swashplate sensitivity to select the next setting value. After a few quick hops I found a setting that worked


well, and continued to fly. The heli responded well. Flips were smooth and stopped where I wanted them to, and pirouetting maneuvers felt good too. Pirouettes stayed flat, with no wandering of the rotor disc. Forward and backward flights were uneventful.
After the helicopter was somewhat dialed in, I didn’t experience anything unexpected. The gyro performed well, and it was neat to have the altimeter readout on the transmitter.
Conclusion
For pilots who already use Graupner transmitters and are looking for a three-axis gyro for either a helicopter or airplane, this is a no-brainer. Its total integration into the Graupner transmitter means Graupner users will be at home with this receiver and will find setup intuitive—especially with the latest manual available for download at the link listed in “Sources.”
The flip side is that if you use another brand of transmitter, you will not be able to use this gyro. One thing I would like to see (and this goes for other gyros too) would be a way to plug the transmitter directly into the receiver for setup purposes. This would allow it to run through the setup without the transmitter radio frequency being used, which burns down the transmitter battery.
While I was learning the Graupner system, I had to recharge the battery a few times because of the amount of time I spent playing with the gyro receiver (this would apply to any system). After I had learned that the system is easy to navigate, it was nice not needing to bring a computer with me to the flying field to adjust gyro settings, or use up my cellphone battery by programming via Bluetooth.
—Chris Mulcahy
cspaced@gmail.com
MANUFACTURER/DISTRIBUTOR:
Graupner
www.graupner.de/en
Graupner GR-18 manual
http://www.rcgroups.com/forums/showthread.php?t=2238443