Color Copier
Dennis Norman
The growing use of computers, scanners, and printers has given rise to interest in making prefinished coverings for models. The drawback is that modelers who want to do this on computers, etc. must first invest considerable time to learn how to use them and money if they want to own the necessary equipment. Few of us can justify spending $1,000 or more on a computer and other equipment to produce a few sheets of covering for a model airplane.
There is the option of going to a commercial copy center, but by the time you pay for a professional's time, you may find yourself spending more money than you are comfortable with.
In the July 1994 Model Aviation I presented a discussion about using artists' markers to decorate and finish rubber-powered models. The techniques described are still valid and produce handsome results. There are many ways to finish a model, but a discussion of them is beyond the scope of this article.
In January 2001 I began working on the next issue of Crosswinds—the quarterly newsletter of the Cleveland Free Flight Society. I decided to make an extended presentation on the Spad 13. In doing so, I presented the patterns needed to finish the model using markers. Subscribers were also given two pages of full-color insignia and markings for eight different Spad 13 subjects.
As a rule, when I draw a new plan I also build a model from it to double-check the accuracy of my drawing. After I sent the newsletter for publication, I found myself contemplating the boxes of my test model. I decided to finish it and was about to use markers for this purpose when I got a call from my good friend Gordon Roberts who said, "Why not print the tissue covering using the hobby shop copier?"
We have two computers in our home, along with scanners and printers. These were purchased for the use and benefit of our children, and I must confess that I am not computer literate. My kids are busy with school, sports, and friends, and I decided not to impose on them. For years I have enjoyed making colored copies of photographs and illustrations with color photocopiers for modeling presentations. The results are often impressive on the original pictures. Could I use a copier (or a computer printer) to print color on Japanese tissue?
I had already learned that I could tape Japanese tissue to heavier (e.g., 40- or 60-pound) copy paper and print it on my office copy machine by putting it through the bypass. (This is a way to produce line marking quickly without having to use the markers described in my earlier article.) If Japanese tissue could be passed through a color copier, the results would be revolutionary.
One drawback is that color copy machines are expensive. I am told that they cost approximately $75,000; because of this, they are usually located in copy centers who are "busy" about using them. I suspect that is unthinkable to ask most copy centers to try to pass Japanese tissue through one of their expensive machines.
The good news is that I have found a way that works, thanks to the local copy store owner's kindness and courage, and it produces stunning results!
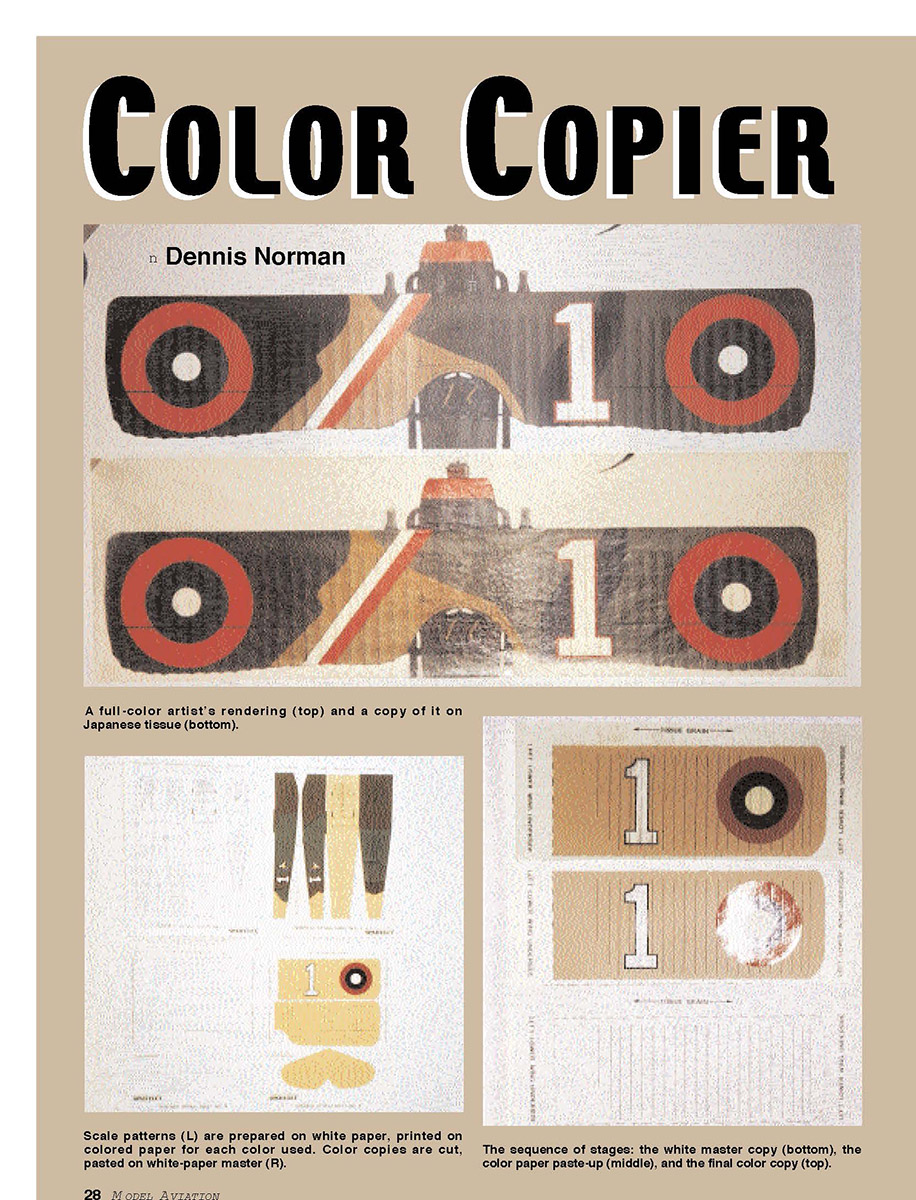
I have experimented and learned that I can take a highly detailed, full-color artist's rendering of an aircraft and copy it perfectly onto tissue. The problem is that artists generally do fully detailed renderings in which things such as struts, wires, etc. are shown. You do not want to print these on your covering.
For the artists in the group, you can solve this by making uncluttered drawings of the aircraft minus struts and other details for use as masters for making copies onto tissue paper. As an alternative to this, I have devised a simpler method for making the master artwork needed for printing Japanese tissue in color.
Making the Master Artwork
Enlarge a scale drawing to the size of the model you are making. Make several copies, then break down the drawing into its component parts, separating the wings, tail, and so forth.
Eliminate the outer lines (e.g., leading and trailing edges) of the portion of the drawing with which you are working. Also eliminate any details from the scale drawing that do not relate to the surface of the part with which you are working, such as rigging wires, struts, etc. It is best not to cut out these portions of the drawings; cover them with bits of paper, typewriter correction fluid, or other method.
After you have cleaned up the basic component drawing, make a fresh copy of it so you have a smooth surface with which to work.
Carefully draw in any panel lines, rivets, or other surface detail needed to complete the basic component drawing. If you are working with the wing or tail surfaces, you may want to extend any chordwise details so that they completely cover the surface when applied to the model.
When you have prepared the component surface details, arrange them on 8½ x 11-inch white paper so that all pieces are running the same direction you want the tissue grain to run when you make your print. Tissue is generally applied so that the grain runs spanwise on the wings and tail surfaces and lengthwise on the fuselage and nacelles.
Arrange the cut pieces with enough room around them to cover the model. I generally allow at least 1/8 inch beyond the size needed. It is also helpful to outline this margin with dotted lines to assure that the piece is large enough to cover the part intended.
When you have finished arranging the components of the scale drawing, select the color scheme you want to use on the model. You can use paints to simulate the color, but you may find it helpful to use a simpler approach on your first attempt at printing tissue using a copier.
Let's assume that you are going to make a model of a US Army trainer from the 1930s. One scheme could be yellow wings and tail with a blue fuselage. Construction paper and artist's drawing paper come in a variety of colors. Though usually heavier than bond paper, it is capable of passing through the bypass of a standard (black-and-white) copier.
Select colored paper that approximates the hues of your intended model, then cut pieces of the paper to 8½ x 11-inch size. Using a photocopy machine, copy your master sheet onto the colored sheets. Use white paper for your master copy. This will serve as a base for pasting up the color composition.
Carefully cut the shapes (wings, etc.) from the colored paper, and place them on your white master sheet using a glue stick or double-stick tape. You do not have to attach the colored pieces tightly to the base; just tack them in place so that they will not move.
Once you have laid out the basic colors for your model (such as the yellow wings and tail surfaces and blue fuselage), you are ready to add details such as insignia. If you have a decal sheet for a plastic model with the insignia and markings you want to use, take it to a copy shop and have them copy the insignia onto the master white paper. This will give you much sharper detail than trying to hand-draw these items.
When you have the master composed of the colored paper shapes and the copied insignia, make a final clean copy of it onto white bond paper. This step produces a smooth, clean original for the color copier operator to work from and also provides a backup in case anything happens to the master.
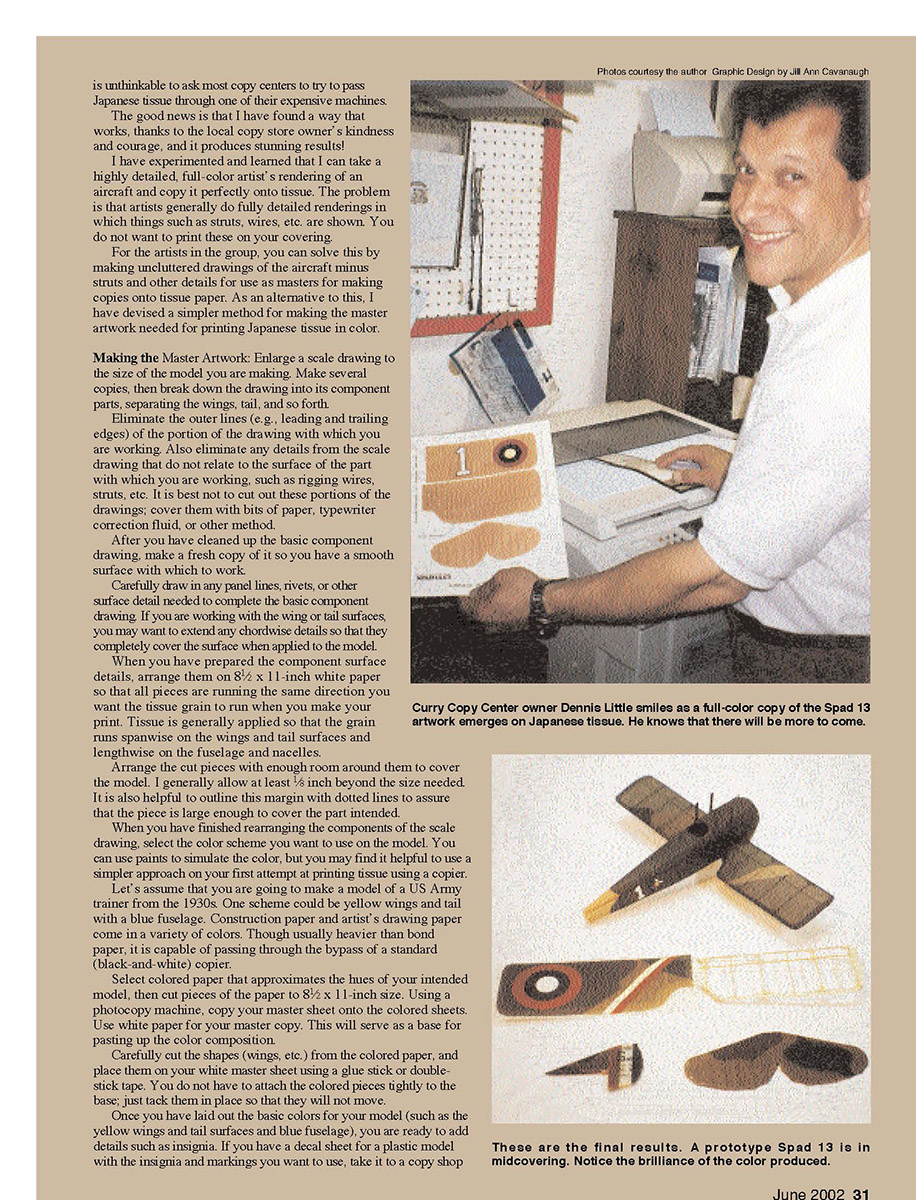
At the copy center, ask the operator to run a single, full-color copy of your master onto Japanese tissue using the bypass tray. The operator will usually test the tissue path first with scrap paper to ensure it will not jam. If the operator is willing to try the tissue, the result is a brilliant, full-color rendering on the delicate material.
After you have your color-printed tissue, carefully cut out the parts and apply them to your model in the usual manner. The color is surprisingly durable when applied and sealed with a light dope or clear coat suitable for tissue coverings.
I have found that local copy shops are often cooperative if you explain what you want and bring the master prepared as described. The results can be spectacular and save hours of hand painting while producing a very authentic appearance.
and have the decals enlarged to the size needed for your model's markings.
Cut out the markings, and carefully apply them to your paste-up using a glue stick or double-stick tape. If there are squadron insignia, placards, letterings, or other items you want to have on your finished model, apply these as well.
You are creating the master artwork from which the colored tissue will be printed. The artwork is similar to the patterns used in making paper-sculpture models. However, unlike the paper-sculpture models, your model will have a balsa framework to which the tissue "patterns" will be applied.
When you have finished detailing your master artwork, go to the local copy shop and make test copies (on regular copy paper) to check the accuracy of the colors. A blue-and-yellow scheme with interspersed star-and-dot insignia should be fairly straightforward to copy and easy to check visually.
If you are using a more complicated scheme (such as camouflage), you may want to run diagnostic tests to check the accuracy of your print. When running a diagnostic, the color copier repeats a small section of your original artwork with a number of variations, producing a series of samples which are slightly different in color, together with the settings that would be used to obtain each variation. This is especially helpful if the copier has trouble "reading" the colors used on your master (paste-up) copy.
Preparing Tissue for Printing
When you are satisfied with your master artwork, you are ready to prepare Japanese tissue for printing. I have done all my work to date with superfine tissue made by E. Saito of Japan that is marketed under the name Royal Products. A good supply of this is available from Micro-X Products Indoor Model Supplies at Box 1063, Lorain OH 44052, Tel: (440) 282-8354.
The process for making the tissue usable in a color copier is as follows.
Select one piece of tissue, and lay it flat on a smooth worktable. (If the tissue is smoother on one side, place that side down; it may make a better surface on which your copy is to be printed on.)
Carefully tack down the four corners of the tissue using four small pieces of Scotch® Magic Tape (stock number 810P2-DLT). Be sure to fold each piece of tape over roughly 1/8 inch to make a tab to ease removal of the tape later.
In similar fashion, place a small bit of tape halfway along each edge of the tissue. Stretch the tissue flat. You can do this by lifting the various securing bits of tape and pulling until you have a nice, smooth surface. If the tissue you are using is wrinkled, iron it or stretch it on a frame with water to remove the wrinkles. The tissue should be as smooth as possible to assure that it will pass through the color copier.
Select an 8-1/2 x 11-inch piece of 40-pound or so copy paper (standard copy paper is 20-pound stock, so you want something at least twice as heavy). I have used up to 67-pound stock successfully, but it is unnecessary to go that heavy.
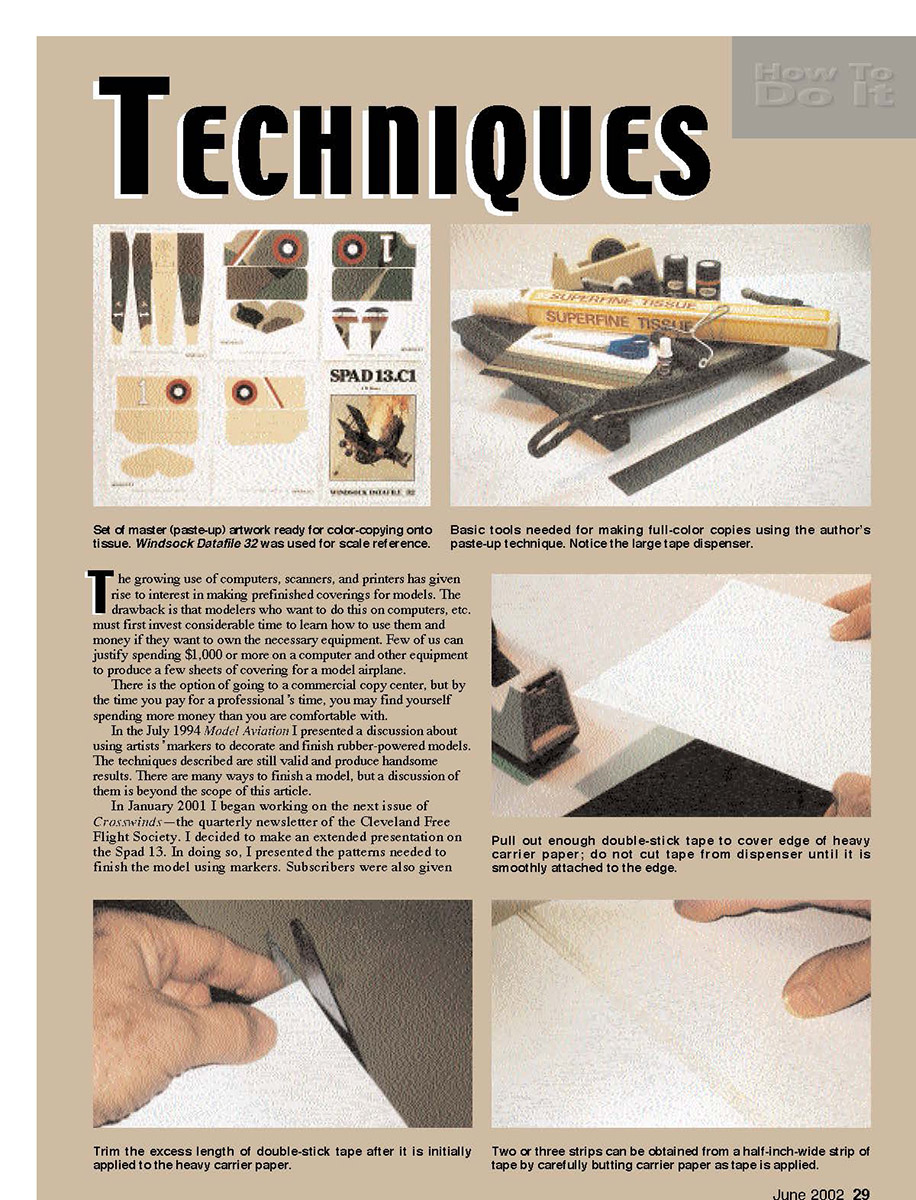
Using Scotch®-brand Double Coated Tape (stock number 665), "edge" all four sides of the copy paper, creating a "frame" of tape around the edges. The tape comes in 1/4-inch width, and it is difficult to work with since it is sticky on either side. I have had the best results using three-inch-diameter rolls, which give approximately 36 yards of tape with which to work. You can obtain these at local office-supply stores.
I found it most helpful to invest in a special tape dispenser for these large rolls. It is pricey, but it will assist greatly in handling the tape.
The technique I have developed for applying the tape to the paper is as follows.
- Pull from the dispenser a length of double-stick tape that is slightly longer than the edge of the copy paper you are intending to edge. See the sketch at the top for a diagram.
- With the tape pulled out, attach the end of it to the piece of copy paper with your thumb. As mentioned, the tape is a half-inch wide, but a width of 3/16 to 1/8 inch is sufficient to secure tissue paper for passing through the copier.
- With the end of the tape tucked to a 1/8- to 1/4-inch width of the paper's edge, and with the paper hanging below the tape, gradually roll the paper up to the tape with your other hand. Once you have a straight line attachment, run the tape lightly between your index finger and thumb and tack it better to the paper. Detach the tape from the dispenser.
This method sounds awkward at first, but with a little practice you will find that it works quite well.
I have tried other methods, such as stretching a piece of detached tape and laying it on the paper. This method is tricky because the tape may not attach evenly; if it does not, the paper is wavy and unusable.
If you want to try another method, attach the tape, keeping one end above the paper while you carefully press it lightly with a finger every inch or so down the length of the paper to assure a smooth and even result.
The important thing is that the paper must remain flat when you are finished edging it; otherwise, it will not pass through the copier.
By using only 1/16 to 3/16 inch of the tape's width, you can economize by using the rest of the double-stick tape as follows.
- Trim the ends of the tape so that they are even with the ends of the paper to which the tape is attached.
- With a sheet of paper the same size you are using, place an edge of that paper so that it is parallel to but not touching the tape-edged piece.
- Arrange the new paper so that approximately one-third of the exposed tape (from the edge) overlaps it.
- Lightly tack the tape to the edge of the new paper.
- Using a knife and straightedge, or a guillotine-style paper cutter, cut one side of the tape as close as possible to the edge of the paper.
- In a similar fashion to that described in the preceding, place the remaining free edge of tape over the unedged side of the first piece of paper, or, if both corresponding sides of the first piece of paper are edged, place the exposed tape edge over a fresh paper which should be butted tightly against the edge of the tape-edge paper.
Separate these in the same manner described before. Once you have mastered this technique, you should be able to edge three pieces of paper with one piece of double-stick tape.
Once a piece of heavy paper is "edged," you are ready to attach it to a sheet of tissue.
Tissue has a grain. To determine the grain, carefully tear one edge of a sheet. The tear will follow the tissue's grain. You want to use the tissue grain correctly in making your copies. The grain should generally run spanwise on the flying surfaces and lengthwise on the fuselages and nacelles.
Once you have determined the way the grain should run, place your tape-edged copy sheet so that the tissue grain runs parallel with the way you want the grain to be on the printed sheets. If the grain runs lengthwise on the copy sheet, you can usually get four 8-1/2 x 11-inch pieces of paper from a single sheet of tissue.
If you need to have the grain run with the short dimension of the copy sheet, you will probably only be able to get two 8-1/2 x 11-inch pieces from a sheet of tissue; this will leave a considerable portion unused.
I have learned that it is possible to print on small pieces of tissue by taping them to sheets of heavy copy paper. You must be careful about the placement of the tissue on the copy paper. It will do no good if your printed piece runs off the tissue.
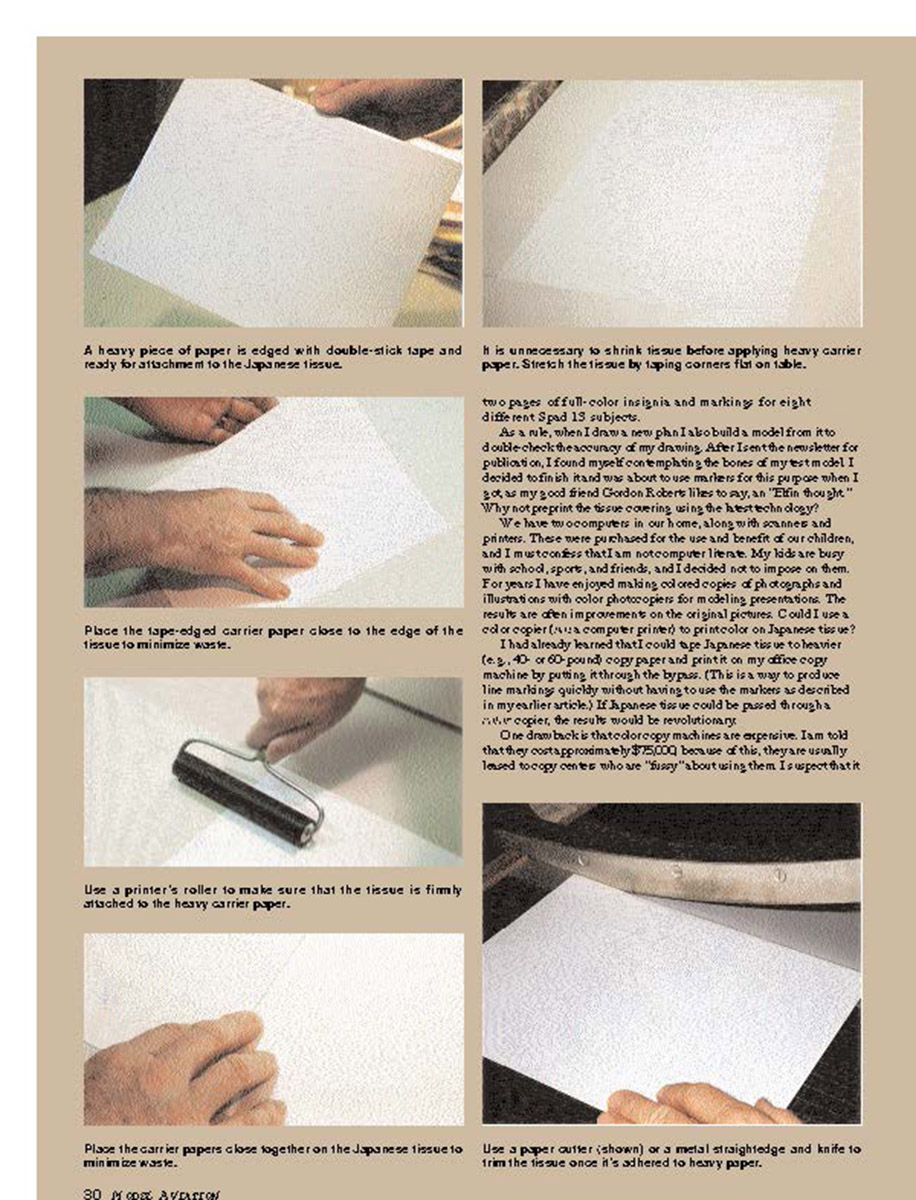
You should place the taped-edged pieces of heavy copy paper on the tissue as closely together as possible to minimize waste. Once you have placed as many pieces of tape-edged paper as you can on a sheet of tissue, cover the papers with a clean sheet of paper to protect them from getting dirty.
Using a printer's roller, carefully roll the edges of the tissue to make certain that they are firmly and smoothly attached to the heavy paper. When you are satisfied that the tissue is securely attached, carefully remove the small pieces of tape from the tissue's corners and edges.
At this point you are ready to cut the individual pieces from the tissue. You can use a sharp knife and a straightedge, but I have learned that a 20-inch, guillotine-style paper cutter works quite well.
Carefully cut each piece from the tissue with the paper still taped, then remove the scrap tissue and the remaining tape before running your copies.
As noted earlier, perhaps the most difficult part of this procedure is finding a copy center that will take the "risk" of passing your creation through its expensive machine.
Once you find someone with the courage to try it and once he or she sees that it works, you should have no problem. The copy center will probably come to regard you fondly as you find yourself returning to make a number of new color prints as you contemplate more subjects.
Although my initial efforts have been directed at Peanut Scale models, it is possible to make color prints as large as 11 x 17 inches. This should enable you to make larger models as you want.
What about weight? Color from a color copier is added weight to the tissue. The new tissue I use weighs 0.75 gram per 100 square inches. Applying color to it using a color copier increases the weight to roughly 1.24 grams per 100 square inches. This is well within reason for use on a rubber-powered model.
What about using dope? Do not use it to attach or to finish tissue colored with a color copier. Dope will attack the ink and ruin your finish.
If you feel the need to make your printed tissue flatter or glossier (this is a slight sheen to it when printed), use Testors Dull Coat (1250) Clear Flat Lacquer Over Coat for a flat finish or Testors Gloss Coat (1251) Clear Gloss Lacquer Over Coat for a glossy finish. This will increase the weight of the tissue approximately 1.0 gram per 100 square inches, so be sparing in your use of any spray-coating.
It is not necessary to use any coating on the tissue; the ink used in the printing process is fused to the tissue and seals it up nicely.
What about water-shrinking? You can over-cover and water-shrink tissue that is colored using a color copier. The result should be as smooth and wrinkle-free as conventionally applied tissue.
What about color permanence? Using marking pens to color tissue results in some fading and color changes in time. Because I have just learned this way of coloring tissue, it is too soon to know if the color will be more permanent. I have noticed that the color is somewhat brittle and will tend to flake if the tissue is overhandled when applying it.
What about white? Color copiers do not print white. Even if your copy is printed on white tissue, you may see that details such as white stars, etc., appear gray when the printed image is applied to the model.
I have solved this problem by carefully painting white on the cut ends (the unprinted side) of the tissue in the areas where white is required. White typewriter-correction fluid worked well, but I am sure there are other possibilities. Taking this step will dramatically "pop" your white markings, making them 1–2× as attractive as the rest of your beautifully colored tissue.
Transcribed from original scans by AI. Minor OCR errors may remain.